Tips and tricks for tools and techniques

Please register or login

Welcome to ScubaBoard, the world's largest scuba diving community. Registration is not required to read the forums, but we encourage you to join. Joining has its benefits and enables you to participate in the discussions.

Benefits of registering include

  • Ability to post and comment on topics and discussions.
  • A Free photo gallery to share your dive photos with the world.
  • You can make this box go away

Joining is quick and easy. Log in or Register now!

If you have large snap ring pliers with right-angle tips, they can be used to remove a seat retainer as well.

Henrik

I just have this to say: you guys have to deal with a lot less corrrosion than I do. If I used snap ring pliers on a seat retainer, I would just be kissing the snap ring pliers good-bye.


A further tip (and I would love to hear what others use for it). Anytime I get a white cardboard box, I turn it into a drying tray/project box for the disassembled gear. (Most of my gear overhauls are when I am doing five of the same regs at once or twenty valves at once, so maybe I just do things different overall though.)
 
I just have this to say: you guys have to deal with a lot less corrrosion than I do. If I used snap ring pliers on a seat retainer, I would just be kissing the snap ring pliers good-bye.

Granted - I have no clue as to the wear and tear on gear in your location. However, with a pair of large, replaceable tip pliers - like the large pair here:

Craftsman Professional 3-Pc. Internal/External Convertible Retaining Ring Pliers - Model 47394 at Sears.com

it is possible to put a "decent" amount of torque on the retainer without risk of the pliers slipping or bending. But I can see face pin spanners having the potential for more torque without bending the pins.

That said, would a good soaking in Salt-X or similar help loosen up a corroded cap?

Henrik
 
Bent nose pliers will also work on the seat retainer but may be a little tougher on the chrome. (Only matters to some of us though.)

I prefer to soak my way through stubborn disassemblies. Days or even weeks with hot/cold treatments thrown in to help loosen things up.
 
Henrik,

I do have a pair of heavy duty snap ring pliers and usually they work. But I did buy one MK10 that made an interesting piece of art work out of my pliers. Then, I used a pair of 90 deg needle nose pliers al la awap....I wonder if he would like to trade seat retainers with me?

I now have the Scuba Tools all purpose wrench, but the watch case opener is a great tool too. Now if I can figure out what is keeping my watch case frozen up...

c
 
That said, would a good soaking in Salt-X or similar help loosen up a corroded cap?

Henrik

I only recently discovered Salt-X so I cannot say for sure, but that stuff is wonderful.

Most (almost all) of the overhauls I did were on the rental units, or on other instructor units. (other than the Air2 overhauls which were pretty common) With both, they had to be in service the next morning, so I did not have time to do much waiting. But also I was doing it at a shop so they had the proper pin spanners, and vises, and cheater bars etc.. I have torn the punch pins out of the ScubaPro multi-tool (that's why it comes with spares!), and broken the tips off proper pin spanners trying to get the seat carrier out of old MK10s.

We had a number of cheater bars, 1" pipe with the end ground to mate with whatever, that would open/unscrew anything, but often at the expense of the pins and whatnot.

I have found that cheater bars are generally much gentler on the gear itself because of the slow application of force.

Here's an idea of how bad corrosion can be: We used to have tanks corroded at the neck that had to be condemned, because the valve would split into before the threads would turn.
 
Various size straws can be used when installing o-rings over threads, stems, etc.


Couv

I don't know why I never thought of that. But that's why I like these tips. Learn a useful thing everyday.
 
For ScubaPro piston first stages.

I just discovered a new method for removing a stubborn seat from a seat retainer. I usually just hold the retainer up to a tank valve or flip the retainer over the place where it screws in and blow the seat out. While this works for the majority of seats, sometimes putting another seal-a fatter one like a -112 against the back of the retainer helps pop the seat out. Well, what if that doesn't work? Previously I used a cup hook screw to extract the obstinate s.o.b. but, popping the seat out is so much more fun so I came up with the following to up the ante.

Take the retainer and place it into an empty yoke in the same direction the yoke retainer faces. (One more reason to eschew DIN) Now chuck it up to a tank valve with an extra o-ring to help sealing. Take aim at the nearest pet and slowly crank open the valve. Voila!

Now, if I could find a way to track where that seat went......gee, the cat is walking very funny today.
 
Last edited:
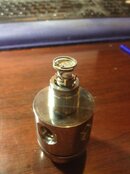
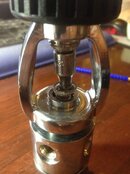
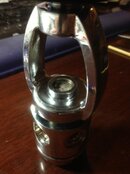
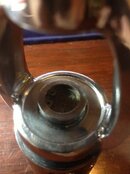
Aqualung Balanced Diaphragm First Stage Spring Block Spring Compressor

Ran across this thread a little while ago and since then, I’ve come up with one of my own. When I first pulled apart an Aqualung Titan first stage, I had a heck of a time getting the two springs and balancing chamber to stay in while putting the sintered filter, plastic ring, and snap ring. Eventually I managed but it was a real pain. I saw a special tool that allows you to set a cylinder over the top, put all the parts and use a rod to push them all in and even snaps the ring in place. Well, I wasn’t about to pay for one so last time I went through one of my Aqualung first stages, I came up with this. I put everything in place and then use the screw from the yoke and a 5/32” ¼ inch drive socket to press everything into place and hold it while I use the snap ring pliers to set the ring. As I screw it down, I hold the socket to keep it from spinning on the filter. I had to try a couple of different sockets because the first couple of larger ones didn’t leave enough room for the tabs on the inside of the snap ring to compress enough to slide into the bore.
IMG_2450.jpgIMG_2453.jpgIMG_2454.jpgIMG_2455.jpg

Hope this helps somebody.

Bruce
 

Back
Top Bottom