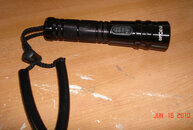
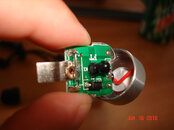
Ok, so I got a Intova Nova WA from a friend at work to modify after he saw the other lights that I've modified so far. This one seems to have some potential, there is an easy mod once you get it open to just swap the Q3 that they use in it with an XR-E R2, which I plan to do with the original driver/heatsink that the light has.
However I think it has more potential than that, being an aluminum case and all, the driver doesn't provide much current at 700mA so I'm going to try to change that... here is what I intend to do.
1) Drill out tube slightly so it fits a single 18650 Li-Ion cell
2) Fit a CREE XP-G R5 LED inside with a 4x AMC 7135 driver
So far I have a good plan, I'm not going to mess with the original heatsink/driver that the light comes with except for swapping the Q3 for an R2. I have an extra pill from a reflector that fits perfectly inside in place of the stock one. Additionally I have a ground down copper pill from a reflector that will work to extend the pill deeper inside and house a reed switch.
To make the driver work I'm thinking I'm going to heat up a 16mm board I have that I'm not using to get all the SMT components to drop off. Then I'm going to mount a reed switch inside of the pill that handles 1.5A constant current that I've already identified.
Should work like this...
1) Drill out top of the ground down copper pill to allow connection
2) Solder blank board to the bottom of the ground down pill
3) Drill a hole in the empty board and solder one end of the reed to the positive pad on the bottom of it with a spring on top of this
4) Properly position the reed inside the ground down copper pill so the magnetic switch activates it on and off
5) Solder the other end of the reed to the positive pad of the AMC 7135 driver that will be soldered into the other pill
6) Solder the two pills together end to end
7) Drill out the body to fit a single 18650
That should do it... I wish they would've made the body just slightly bigger inside, it already almost fits a single 18650 but is just maybe 1-2mm too small in I.D. to fit.
Probably be a while, but this is something I'll get to play with
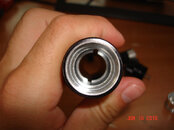
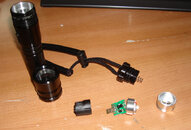
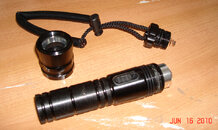
Some pics of the disassembled light are below, I got this one for free so no cost to me so far. It was fairly tough to get apart since it was glued together at the head, I had to put it in a vice and use a pipe wrench to get it apart.
However I think it has more potential than that, being an aluminum case and all, the driver doesn't provide much current at 700mA so I'm going to try to change that... here is what I intend to do.
1) Drill out tube slightly so it fits a single 18650 Li-Ion cell
2) Fit a CREE XP-G R5 LED inside with a 4x AMC 7135 driver
So far I have a good plan, I'm not going to mess with the original heatsink/driver that the light comes with except for swapping the Q3 for an R2. I have an extra pill from a reflector that fits perfectly inside in place of the stock one. Additionally I have a ground down copper pill from a reflector that will work to extend the pill deeper inside and house a reed switch.
To make the driver work I'm thinking I'm going to heat up a 16mm board I have that I'm not using to get all the SMT components to drop off. Then I'm going to mount a reed switch inside of the pill that handles 1.5A constant current that I've already identified.
Should work like this...
1) Drill out top of the ground down copper pill to allow connection
2) Solder blank board to the bottom of the ground down pill
3) Drill a hole in the empty board and solder one end of the reed to the positive pad on the bottom of it with a spring on top of this
4) Properly position the reed inside the ground down copper pill so the magnetic switch activates it on and off
5) Solder the other end of the reed to the positive pad of the AMC 7135 driver that will be soldered into the other pill
6) Solder the two pills together end to end
7) Drill out the body to fit a single 18650
That should do it... I wish they would've made the body just slightly bigger inside, it already almost fits a single 18650 but is just maybe 1-2mm too small in I.D. to fit.
Probably be a while, but this is something I'll get to play with
Some pics of the disassembled light are below, I got this one for free so no cost to me so far. It was fairly tough to get apart since it was glued together at the head, I had to put it in a vice and use a pipe wrench to get it apart.