DIY: Conversion of old UK SL4 dive light to LED

Please register or login

Welcome to ScubaBoard, the world's largest scuba diving community. Registration is not required to read the forums, but we encourage you to join. Joining has its benefits and enables you to participate in the discussions.

Benefits of registering include

  • Ability to post and comment on topics and discussions.
  • A Free photo gallery to share your dive photos with the world.
  • You can make this box go away

Joining is quick and easy. Log in or Register now!

@-JW

FYI, you can add up to 10 images/post so readers don't have open links. See:

 
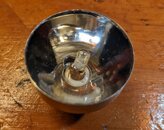
I removed too much of the reflector’s butt end. The led actually protrudes slightly into the reflector’s plane resulting in a white angle of light with no bright focused center. I will post a pic later of the light’s beam projection.
 
I removed too much of the reflector’s butt end. The led actually protrudes slightly into the reflector’s plane resulting in a white angle of light with no bright focused center. I will post a pic later of the light’s beam projection.
0691B9B0-AE80-4259-BA50-246522622A7B.jpeg

Still calling it a successful project
 
I took two slightly different approaches fixing my burnt bulb in my SL4
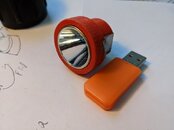
1st approach was to to convert my SL4 to LED with a currently available and economical LED
for $10.99
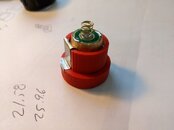
This assembly is the same length but smaller in diameter than the original reflector so I designed and printed an adapter ring from PLA. I've attached the stl file.

As PLA is non-conductive I used a thin strip of aluminum from a Monster soda can to connect the outer body of the LED assy to the ground contact point on the rim of the SL4 flashlight . I had to lightly sand the metal strip to remove the coating on the Al.

This assy is a direct fit for the old reflector except that it is keyed by the ground strip, so requires a little extra care in assembly.

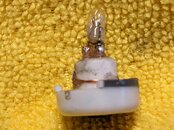
I also replaced the burnt out Zenon bulb with a 6V bulb from Amazon using the original reflector. It works but is not as bright as the LED solution and presumably won't last for more than a few hours, so I won't bother with writing instructions
 

Attachments

  • divelight_insert2-Body.stl
    divelight_insert2-Body.stl
    79.7 KB · Views: 127
  • PXL_20220514_191217026 - Copy.jpg
    PXL_20220514_191217026 - Copy.jpg
    40.3 KB · Views: 83
  • PXL_20220514_191324297 - Copy.jpg
    PXL_20220514_191324297 - Copy.jpg
    44.8 KB · Views: 84
  • PXL_20220519_052144066.MP.jpg
    PXL_20220519_052144066.MP.jpg
    111.3 KB · Views: 92
  • PXL_20220519_052008989.MP.jpg
    PXL_20220519_052008989.MP.jpg
    103.9 KB · Views: 86
I took two slightly different approaches fixing my burnt bulb in my SL4
1st approach was to to convert my SL4 to LED with a currently available and economical LED
for $10.99
This assembly is the same length but smaller in diameter than the original reflector so I designed and printed an adapter ring from PLA. I've attached the stl file.

As PLA is non-conductive I used a thin strip of aluminum from a Monster soda can to connect the outer body of the LED assy to the ground contact point on the rim of the SL4 flashlight . I had to lightly sand the metal strip to remove the coating on the Al.

This assy is a direct fit for the old reflector except that it is keyed by the ground strip, so requires a little extra care in assembly.
Thank you for the link to that LED assembly.
I don't have a 3D printer so I used three 7/8 x 1-3/8 x 18 machine bushings. Works perfectly. Though I might cut down the positive spring terminal of the LED assembly.
 
budgetlightforum.com
a treasure trove of knowledge on modifying flashlights, conversions, battery testing, etc...
There are also lots of reviews and teardown of many lights, both some diving and otherwise.
 

Back
Top Bottom