Complete ScubaPro MK2/R190/R380 Repair Steps/Parts List...

Please register or login

Welcome to ScubaBoard, the world's largest scuba diving community. Registration is not required to read the forums, but we encourage you to join. Joining has its benefits and enables you to participate in the discussions.

Benefits of registering include

  • Ability to post and comment on topics and discussions.
  • A Free photo gallery to share your dive photos with the world.
  • You can make this box go away

Joining is quick and easy. Log in or Register now!

Interesting.....So you guys think it's more of an antitrust issue. Meaning the witholding of parts is price fixing and they are using liability as an excuse. Honestly never looked at it that way. I still stinks what ever the cause is, I'm just explaining how I got around the problem.

With getting named as a defendant and getting served, a laundry list of names goes on these cases. It does not mean they will get a penny out of you, but still it is unwanted stress, time of work, money out of your pocket for a lawyer.

The parts warranty also does not hold much value of DIY guys. I found it interesting SP is launching a brand that does not come with a parts warranty to make them more competitive in price. Subgear - Featured Products

dive safe all
 
Just so everyone realizes, I'm posting this information because I enjoy working on my own regs and take pride in the fact that they all meet/exceed SP specs and breathe well underwater (I imagine that's one of the reasons a lot of us get into this). It's not just about saving money (which is a nice extra), or trusting your life to a stranger's repair skills. I will always purchase SP regs because they are absolutely bullet proof, so they're still getting my money.

Photos and the R190/R380 post are on their way...
 
The liability reason is pure BS, there is no precedence in any other product, some of which are much more dangerous to the general public than scuba could ever be. IMO, if anything, they are making themselves more liable buy insisting that parts be installed by a "Scubapro trained tech". I am not a lawyer but put me on the jury where a factory trained tech screwed up royally hurting someone and I am much more likely to find SP liable, after all they did certify that the tech was properly trained. At the same time, I would refuse the find them liable for a DIYer who improperly installed good (non-defective) parts and got hurt. To be fair, SP is not the only one, many of them do it. I questioned a manuf rep of another brand about selling parts and the excuse he gave me was the same BS. When ask for examples of suits, he basically blew me off and refused to answer any more questions . It was obvious he had no good answer. The best thing we can do is to not buy from the brands that continue to hide behind this line of BS. There are several good brands we can support, HOG and Zeagle for example and just as importantly, we need to let the dealers know why we are not buying SP or other brands that continue to attempt to blackmail us. Hurting their sales is a sure fire way to get their attention.
 
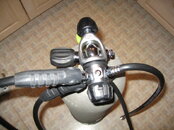
Image tn_0.jpg = MK2+R190+R380 mounted on cylinder
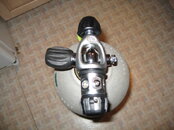
Image tn_1.jpg = MK2 with everything else removed
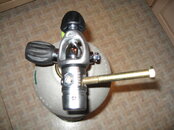
Image tn_2.jpg = 7/16"-20 bolt installed in MK2
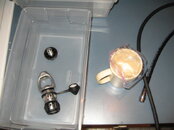
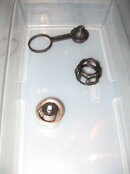
Image tn_3.jpg = bin and coffee cup for old parts
Image tn_4.jpg = partly disassembled
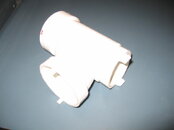
Image tn_8.jpg = faceplate removal tool

tn-0.jpg

tn-1.jpg

tn-2.jpg

tn-3.jpg

tn-4.jpg

tn-8.jpg
 
R190/R380 Disassembly

1. Remove the mouthpiece zip-tie or locking-clamp
2. Remove the mouthpiece
3. Remove the cover pin on the right-hand-side using your fingernail or a small flathead screwdriver
4. Unscrew the cover using your palm. Sometimes these are on really tight for various reasons. I modified a PVC reducer T...see tool #F
5. Remove the diaphragm retaining washer (toothed washer)
6. Remove the diaphragm
7. Remove the left-hand-side plug with a pair of needle nose pliers (rotate 90deg and pull) and remove the o-ring
8. Remove hose-entry bushing (if it exists)
9. Unscrew the external metal inlet
10. Unscrew the valve adjustment (plastic) part using a screwdriver or tool #c
11. Pull out the internal metal mechanism
12. With a finger on the low-pressure seat, use tool #B to remove the nylon-lock-nut from the poppet assembly. Careful with the alignment washer, metal washer, lever arm and spring
13. Use a pick to remove the LP seat from the poppet
14. OPTIONAL: Remove pin in exhaust port cover using a small screwdriver or pick. Remove cover and push exhaust port. I usually skip these steps...


R190/R380 Cleaning

1. Place all disassembled parts into a tub of 1 part simple green, 20 parts water.
2. Leave for 5-10 minutes depending on how much dirt/grime is on regulator.
3. Use an old tooth brush to scrub biological grime, rinse/repeat in the simple green.
4. Remove parts from solution, rinse thoroughly with water and dry.


R190/R380 Service/Rebuild
Repair Kit:
Item ScubaPro P/N Part McMaster P/N Description
1 01050132, O-Ring AS568A-02-010 Shore A 70, McMaster #9555K11, (For Orifice and LP hose)
2 01050160, O-Ring AS568A-02-016, Shore A 70, McMaster #9555K17, (For Valve body and dummy plug)
3 11108101, Poppet Seat,McMaster #8985K125, High-Strength Weather-Resistant EPDM Rubber 1/16" Thk, 2" W, 36" L, 80A Durometer
4 -----, Punch for poppet seats, McMaster #3424A22, Small-Diameter Hole Punch 9/32" Hole Diameter, Trade Size 11
5 01122101, Lock nut, McMaster #91831A006, 18-8 Stainless Steel Nylon-Insert Hex Locknut 5-40 Thread Size, 1/4" Width, 9/64" Height, packs of 100
6 01075131, Case Pin, -----, I typically reuse these. It's plastic. It's not damaged...
# Christo-Lube MCG-129 lubricant for o-rings.

1. Install lubed 2-016 o-ring (P/N 01050160) on the dummy plug
2. Install new LP seat (made with the punch) in the poppet
3. Install lubed 2-010 o-rings in both the white plastic orifice and the hose
4. Place the poppet seat down on a paper towel, put the spring over the post, and the body over the spring (carefull with the alignment washer outside the assembly)
5. This is tricky...place the lever arm over the post, then the washer over the post, and compress using one hand.
6. With the other hand, install the nylon lock nut using the nut driver.
7. Install the nut so approximately ONE thread of the post shows through (this will get us close to the desired cracking pressure)
8. Now install the assembly back into the reg body
9. Install the lubed 2-016 o-ring on the valve body and screw into the reg body from the outside. Tighten using a wrench.
10. Go ahead and replace the diaphram, retaining washer and cover (no set pin yet!)
11. Leave the dummy plug off and install onto hose with inline adjustment tool
12. Make sure all dummy plugs are in 1st stage, attach rebuilt reg to 1st stage and slowly open k-valve (with your palm over the dummy plug opening).
13. You most likely will hear 2nd stage free-flowing now. With the inline adjustment tool, slowly screw in the orifice (normal threads->right to tighten) until the free-flowing stops
14. Now continue to tighten orifice about 30 degrees (12:00 position to 1:00 position)
15. Now, test the breathing effort on a magnahelic or by feel. You may need to slightly adjust the nylon lock nut with the nut driver to assist dialing in a breathing resistance.
16. When you're satisfied, reinstall the dummy plug, and (turn off the air first) remove the inline adjustment tool and install reg to hose
17. Don't forget to reinstall the faceplate pin. I usually re-use these, or you can use an old one...not extremely necessary, but useful if your faceplate is loose...
 
I have never cared for the idea of a hard steel bolt threaded into a brass regulator body. I use old hose ends, preferably HP for the added strength (diameter). I like that cover tool. Do you have the dimensions?
 
Completely agree with you on the steel to brass...I typically use brass hardware when possible. Good idea with the old hose ends.

The cover tool is made from a PVC TEE 2.25" OD and 2.75"OD. Use band saw to cut out and leave two "teeth" that will fit into face slots on the R190 and R380. I believe it's a Home Depot: NIBCO 2 In. x 2 In. x 1 1/2 In. PVC DWV Sanitary Tee Reducing All Hub Model # C4811. Store SKU # 641165. I built it "to fit" instead of trying to match dimensions.
 
I have never cared for the idea of a hard steel bolt threaded into a brass regulator body. I use old hose ends, preferably HP for the added strength (diameter). I like that cover tool. Do you have the dimensions?

New "tool" added to my toolbox. Thanks!
 
What a spectacular effort. It is more likely to do damage using two soft metals. No coffee for you.
 

Back
Top Bottom