overhauled my first 2nd stage

Please register or login

Welcome to ScubaBoard, the world's largest scuba diving community. Registration is not required to read the forums, but we encourage you to join. Joining has its benefits and enables you to participate in the discussions.

Benefits of registering include

  • Ability to post and comment on topics and discussions.
  • A Free photo gallery to share your dive photos with the world.
  • You can make this box go away

Joining is quick and easy. Log in or Register now!

acteg

Contributor
Messages
411
Reaction score
136
Location
Central FL
# of dives
200 - 499
Finally got around to doing it. Got a rebuild kit for my Aeris A1 cheap on ebay, so this weekend I tackled the 2nd stage. With the help of Vance Harlow's book + a service manual for a similar reg (Oceanic Alpha 8), everything went pretty smoothly. I couldn't find the service manual for my specific regulator (Aeris A1).

I did not have an inline adjustment tool, what I did was insert the orifice into the inlet coupling and gently screwed it down. Hooked it up the tank and it was free flowing. So then I took it off the tank, and turned it down a quarter turn, and hooked it back up. Still free flowing. So I kept adjusting a quarter of a turn at a time, until it was just barely seated. No play in the demand lever, and it starts to flow in about an inch of water.

Next up is my SP4 first stage which has IP that is about 20 psi higher than it should be. The IP is adjusted with shims though (where do you get these shims)? I got a rebuild kit for this on ebay for cheap.

After that I've got an MR22 that I think has a bad HP seat (I've read the old seats had a tendency of falling apart before they came out with the new trimaterial seats). The IP is high and the adjustment doesn't seem to make a difference. I got the MR22 + abyss 2nd for $25 on ebay.
 
Well done; welcome to the Dark Side.
 
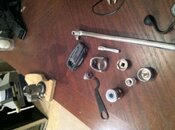
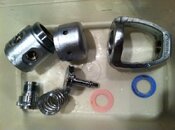
Thanks Couv. I did the first stage tonight. Made the yoke socket, then disassembled, ultrasonic cleaned in a vinegar/water mixture for about 15-20 minutes. Then rinsed well with water. Then soaked about 10 - 15 min in simple green. Then rinsed well with water. Will reassemble in the morning.

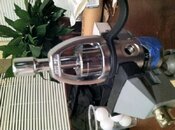
Here are some pics. Sorry I forgot to rotate them.

photo(11).jpgphoto(10).jpgphoto(9).jpg
 
Wow, that's a heavy duty breaker bar you have there.

If that's the reg that was 20 psi over specs, replace the hp seat, o-rings, and lube everything properly, then try removing the thickest (pink) shim first, then recheck the IP.

Thanks for the updates.

.............................

I just checked the manual. The preferred IP is 140-145 at 3000 psi supply
Acceptable is 137-148 at 3000 psi

With supply press of 500 psi the preferred IP is 130-136
127-139 is acceptable.

If you need a copy, PM me with an email address where you can receive PDF files.
 
If your IP is too high, you need to remove shims, not add them....I have seen them stuck up in the body of SP regs where you could not see them and have seen them "glued" the the piston face so tightly that unless you were really looking for them they were impossible to see, so it's possible they are there and you just missed them. As long at the IP is stable and not too high out of range I would not worry about it too much.

On the Mares, be careful when removing the diaphgram and the balance chamber oring. It's easy to scratch the mating surfaces on those parts. The easiest ways to remove the diaphgram is to make that your first thing to remove. Plug all the ports except 1 lp port and pressurize it with a rubber tipped airgun through the LP port you have open. It may take some coaxing to get out. If you have a replacement, the easiest (and some times only) way I know is to carefully cut an X in it with a razor blade, lift one of the X legs and pull it out with needle nose pliers. If you tear it into pieces it not a problem. You need to be careful but under the diaphgram is a wide brass button that if you knick it, you can easily polish it off and a scratch on it does not matter. With the exception of some of the orings, all the major parts can be substituted with ones from the MR-12 or USD/AL Conshelfs or Titans. Rebuild kits for those can be gotten at Vintage Double Hose.
 
Thanks for the comments guys. Very helpful. Both sides of the seat had rings on them, so I assume it had been previously flipped. I went ahead and replaced the seat (had a kit I got off ebay). Before completely tearing it down, I removed the pink shim first, put it back together and checked the IP. The IP went from 160 to 150. I want to see how everything plays out with a new HP seat first before I remove the pink shim for good. After tearing everything down and cleaning, I blew everything out with compressed air then let it sit overnight to completely dry out. I put everything back together this morning, but need to head to work so I'll check IP and remove shims if necessary to get to the factory setting of 140-145. I love breaker bars for removing things, totally unnecessary for this application but it does remove the elbow grease from the removal process . I have a few I picked up from harbor freight on one of their big sale days.

Herman, thanks for the tips on the mares. I've got a replacement diaphragm and a bunch of properly sized viton o-rings that I will use to build a "rebuild kit". I also have one of the $10 HP seats (northeast scuba or vintage double hose). The only thing I still need to get is the white split ring. They are $3 at vintage double hose for one or I could get a bag of 100 from mcmaster carr for a few bucks more. Guess that bag would last a life time.

I'll probably tackle the Mares sometime next week. I plan to spend the whole holiday break diving.

Couv, thanks for taking your personal time to look up the IP specs and for the offer to email a manual. I went to frogkick and downloaded a manual, and read it over thoroughly before attempting any of this. I read vance harlow's book as well, but that was nearly 8 months ago, and I think I've forgotten half of what I learned. I need to reread.

Thanks again for the help everyone.
 
Don't sweat the backup ring (it can be white or black ). It is there to support the primary oring and unless you mess it up there is no real reason to change it....or for that matter remove it as long as the balance chamber is in good shape. Some of them have a concave profile on one side, it it does, that goes out (against the primary oring).
 
Thanks Herman. Good to know.

I torqued down the yoke nut today to 16lbs and hooked up a 2nd staged + my IP gauge. With both shims in I was at 150 psi. I took out the pink shim and that brought me down to right around 141. Works for me.

I do have one question though. This maybe something I never noticed before, but I noticed when taking deep breaths out of my oceanic second stages (aeris a1/alpha 9 and Slimline 2), towards the end of my big breath they seem to crackle a little bit and there seems to be less air delivery. Additionally the sound of the air being delivered isn't as loud after the crackle and reduction in air occurs. Normal breathing there is no crackle or reduction in air/sound. Normal?

I hooked up my "nicer" 2nd stages (2 Abyss 2nds and a conshelf XIV) and did not notice any such drop off or reduction in sound towards the end of my deep breaths.
 
Maybe a combination of higher than "normal" IP drop and the way the diaphragm flexes at the end of the breath.

I'd suggest you hook up your IP gauge and do the test again to see where it goes. Also, you may want to make sure the diaphragm isn't dirty or something, and try rotate it by 90° or so.
 

Back
Top Bottom