HenrikBP
Contributor
OK, good news and bad news ...:
Good news: it turns out that a 3/4 spade drill bit is an almost perfect fit in the slots in the light body. It allowed me to use a 1/4 socket on a ratchet wrench and really put some torque on the body. To the point where the light head was slipping both in the vise and in a large strap wrench. Which in turn made me write Intova and ask what's going on ...
and here comes the bad news:
Quote - me:
"This may be an odd question, but I'm hoping you can help me out;
<snip>
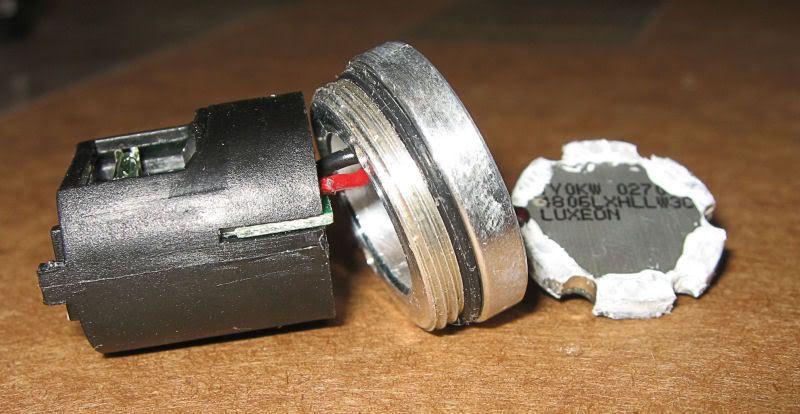
I know from other light tinkerers that the light head unscrews from the body just in front of the switch. However, I can't for the life of me get the light head unscrewed. So my question is; have you started using thread locking compound or similar on those threads rather than the 2 o-rings and rubber gasket of earlier versions of this light?"
Quote - Joe Ganahl from Intova was very kind to reply:
"Correct, it is glued.
We are also introducing a new 6 watt 130 lumen CREE LED wide angle
version for just a few dollars more.
Regards,
Joe Ganahl
Intova/Snap Sights
www.intova.net"
So I'm afraid that those of us who happened to buy the newer version is out of luck with regard to modding this light. Of course it's a very nice light in it's own right ... but I really wanted to tweak it")
Of course, if I feel brave enough I may either try heating the light more than I have before and see if I can break the glue, or even machine flats on the head so I can get a better grip. Won't happen right now though.
Henrik
Good news: it turns out that a 3/4 spade drill bit is an almost perfect fit in the slots in the light body. It allowed me to use a 1/4 socket on a ratchet wrench and really put some torque on the body. To the point where the light head was slipping both in the vise and in a large strap wrench. Which in turn made me write Intova and ask what's going on ...
and here comes the bad news:
Quote - me:
"This may be an odd question, but I'm hoping you can help me out;
<snip>
I know from other light tinkerers that the light head unscrews from the body just in front of the switch. However, I can't for the life of me get the light head unscrewed. So my question is; have you started using thread locking compound or similar on those threads rather than the 2 o-rings and rubber gasket of earlier versions of this light?"
Quote - Joe Ganahl from Intova was very kind to reply:
"Correct, it is glued.
We are also introducing a new 6 watt 130 lumen CREE LED wide angle
version for just a few dollars more.
Regards,
Joe Ganahl
Intova/Snap Sights
www.intova.net"
So I'm afraid that those of us who happened to buy the newer version is out of luck with regard to modding this light. Of course it's a very nice light in it's own right ... but I really wanted to tweak it
Of course, if I feel brave enough I may either try heating the light more than I have before and see if I can break the glue, or even machine flats on the head so I can get a better grip. Won't happen right now though.
Henrik