Getting started in vintage diving

Please register or login

Welcome to ScubaBoard, the world's largest scuba diving community. Registration is not required to read the forums, but we encourage you to join. Joining has its benefits and enables you to participate in the discussions.

Benefits of registering include

  • Ability to post and comment on topics and discussions.
  • A Free photo gallery to share your dive photos with the world.
  • You can make this box go away

Joining is quick and easy. Log in or Register now!

Well, I managed to find some zinc phosphate primer. There were some spots on the tank where the galv was rubbed off, so those needed recoating. This is what I got:

EtchPrimer.jpg


It states its suitable for bare metal and galvanized finishes. Is this okay? Do I need a top coat over this kind of etch primer?

At any rate, although I do prefer the galvanized finish in the long-term, after I started spot spraying the parts that needed it, it looked soooo purdy that I ended up spraying the entire tank. This is what the tanks look like now next to my Dacor LP72s:

PICT0021.jpg


I know the valves aren't the vintage valves - I'm still rebuilding them, but at least when I send the tanks off to hydro, they'll have valves on.

Okay, Herman, I won't cut up the back-pack. I'll keep an eye out for more :D

Here's the old beside the new... transitioning to a different form of diving:D

TankFamilyPhoto.jpg
 
Well, I really have to thank Herman for setting me straight earlier. As a result I've had a great day investigating the banjo fitting with some of my tanks. I turns out I have two more modern valves that also accept it (in the down position):

This is a Thermo valve

Picture2012-7.jpg


And this is a Japanese BBB valve

Picture2016-1.jpg


Now I have some tank/valve swapping to do. So I guess the answer in the short term is to just check each individual valve.

Ed, I'm really interested to see how those hold up to weather and age.
 
Its with meeeeeeeeee! :D

I've got my "Basic Scuba" book and my VDH explorer! :D Photos to follow later. I can see now why Robert's book is a "bible."

My VDH explorer comes with the tire style yoke screw and is the satin chrome finish. There's some weathered areas where the underlying substrate nickel has come off. After my test dives tomorrow, she's going off for a re-chrome. The question is: Maintain the satin chrome or go for the shiny chrome? :D

Another thing I noted: After trying out the mouthpiece... I need to get a bigger mouth.

______________

Jim, thank you for lugging all this all the way from Minnesota!
 
Last edited:
Dale, I could paint one of my Dacor tanks tonight and use them in the pool tomorrow just to see how dinged up the primer will get. One good thing about it though is that getting dinged would just reveal the galv underneath. It not even a heavy coat of primer, just a medium dusting with it. When I stare long enough at it, it almost looks translucent and I can still see the underlying substrate.
 
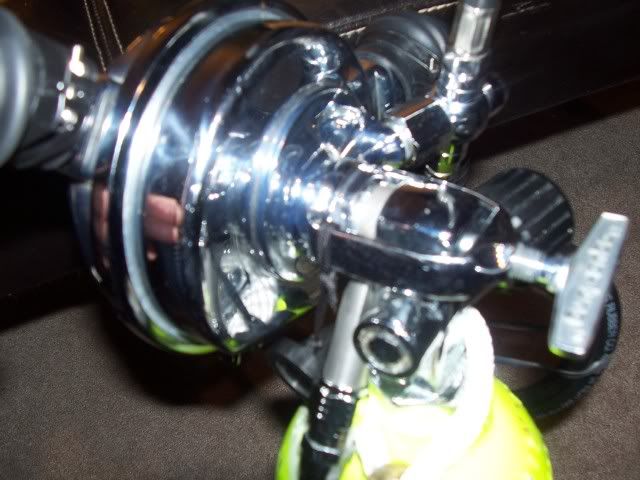
Ed I would not have it rechromed, at least not for a while. IMO, an old reg should have battle scars. :) Just dive it and learn how it works. A word of caution, rechroming the main body and HP nozzle can cause you some operational issues that are not obvious and can take some non standard repair work to fix. Rocket science it isn’t not but it is not reg repair 101 either. Until you fully understand the reg and how it performs I would not totally dissemble it.

Now that you have one, have you considered what post dive maintenance you will do?? Done properly, it is different than a single hose. Besides rinsing it off externally, there is the interior of the hoses and cans to consider. If you plan to dive again the next day then a simple a soak (dust cap on or attached to a tank) and rinse followed by flushing the mouthpiece and duck bill. Do this by holding the reg with the mouthpiece up and flow water into the mouth piece and out the duckbill. Now, hold the reg with the supply horn down so any water in the main can and supply hoses will drain toward the mouth piece. Shake the can and hoses to help any water out of the corrugations, then rotate it by the hoses so the mouthpiece is high and shake the exhaust hose to drain water into the duck bill, blow into the mouthpiece to force any remaining water out. You are good to go for the next day. If the reg is not going to back in the water for a few days or more, it's a good idea to do a full cleaning. For a full cleaning, you need to do some disassembly, I will give you 2 methods.

If the Explorer has a band clamp then remove the clamp, separating the 2 cans. The diaphragm will come out. Note any water inside the cans (a little is common) then rinse everything well. Hold the main can high with the outer can hanging and liberally flush water all the way through the hoses and out the duck bill (flat rubber thing in the outer can). While flushing the main can, DO NOT press down on the horse shoe shaped lever if the reg is unpressurized, with tank pressure on it, then is actually a good idea to do. This is what opens the second stage so opening it with water flowing over it and no tank pressure may allow water into the regulator section of the reg, not good but like a SH reg, if you do, just hook it to a tank and blow the water out. Once you have it flushed, hold the reg so the exhaust can is hanging from the main can and shake the hoses to remove as much water as possible. I prefer to allow mine to hang and dry for a day or 2 before I reassemble it, shaking the hoses every time I walk by it. The corrugations trap a lot of water.

As an alternative, you can remove the supply hose and flush the cans by running water into them and the hoses as above. Either method is fine, I prefer to separate the cans so I can inspect the interior but it is not necessary. The latter method is easier because it does not require you to realign the diaphragm or cans. A sharpie dot on the hose and can horn will make realigning the hoses easier. They do not have to go on in a specific way but once installed on the mouthpiece you will want them to be back in their original position on the can, otherwise it can pull the on mouthpiece and be a PITA during a dive.

Guess I better tell you how to reassemble it if you use method 1. :) Note there are 2 tabs on the diaphram, these set directly on top of the 2 ends of the horse shoe in the main can. To make them easy to align, I put a dot on the outer edge of the main can and one on the edge of the diaphram that are in line with the tabs and horse shoe ends. I use a sharpie pen. These serve as reference marks because you can not see what you are doing once the diaphrgam is installed, either tab can go with either horse shoe tip. Now set the outer can on top of the main can/diaphragm and align the top left corner of the label with the center of the supply hose, the hose should be roughly 120 deg apart. The duckbill may or may not be attached to the outer can by a dab of silicone, either is OK but you need to make sure the duckbill is laying flat and not bent. It will not function correctly if it is bent. You can look through the holes in the can to make sure it is flat before installing the band clamps. The band clamp is next, note that there is a notch in the clamp, this goes under the exhaust horn. Put the screw in the clamp and snug it up. You are done.
You can also build a hose dryer but that is another thread.

One more dive oddity of the DH you need to know about. It is fairly common for the duckbill in the exhaust to stick together after they have dried. As part of a pre-dive test you should exhale through the mouthpiece. If the exhaust seems too hard to do, a little harder blow will usually free it up, if not ran water into the mouthpiece, allowing it to drain to the duckbill and blown out with a little force will almost always do the trick. And it is common and normal for them to flutter with a good bit of noise when you do…..it is a duckbill after all.
.
Man.....looks like I need to write a book on DH diving. The chapter on post dive reg care is already done. :)
 
Thanks Herman! Very informative as always :D Good idea on marking the diaphragm and the cans for alignment. That's something I didn't see or may have overlooked in VDH.

I was just going to re-chrome the cans, and not the body - kind of a two tone look. Thing is, I was thinking of a shiny chrome, but the Pico Blvd address I made for my label means it should be satin... Oh well, maybe time for a new label as well :D
 
Thanks Herman, for the post dive care. I'm not comfortable disassembling mine yet, so I rinsed it in fresh water like a mother, then dried it on my kitchen counter, every which way it would hang, lay, etc. for a week. It was rinsed better than my laundry.

I'm planning on using it almost every weekend from here on out. Is my after care going to suffice, or do I need to open it up, say every month or so?

Thanks for all yours and everyones info, and Ed, thanks for asking all my questions! We must be on the same page....

Lisa
 
Lisa, I would suggest doing method 2 if it's going to set more than a day or 2. If you can use a screw driver you do it easily. Just remove the hose clamp on the supply side (can that is closest to the tank) and run water into the can, dump it out then stick the free end hose over the faucet and flush like crazy with warm water, cold is ok but warm will cut salt better and frankly, I like warm water on my hands better than cold. :) I hang the reg from the hose with the cans setting on something for support so as much water as possible can drain from them. Nasty stuff will grow in the hoses if they are not dried, which requires hose cleaning 201, also known as how to hide the hoses in the towels so your wife does not catch you washing them in her washing machine.
Hose realignment is not critical and using the dot method makes it easy. It does not have to be dead on, just close. If you get it too far off it will still work but may pull on the mouthpiece in a manner you don't like. After a rebuild, it usually takes me a couple of dives to tweek mine to just the right spot. If you forget to put dots on them, just lay it on a table, wiggle the hose some and allow it to assume it's natural position, then slide it on and clamp it down. As long as you still have one side connected to a can, the loose hose will want to realign itself with the connected one.
 
Might as well show the hose dryer while I am at it. It also demonstrates how I hang the hoses to allow them to drain. Here are photos of the one I use. It is made from a cheapie auto vaccum using the exhaust side ($10 at a discount drug store) and some pvc pipe. I used a new one that is dedicated to this use only, I did not want dirty air from a used one being pumped into the hoses. The plug in the mouthpiece forces air to continue down the hoses instead of exiting the hole. The plastic hose going into the cans is to put air into the cans to dry them, note the horn is down so any draining water can exit and not pool up inside the can. This one is set up to dry 2 DH regs at one time. Others have used a hair dryer on no heat as an air source. A while back there was a good thread on hose dryers on VDH. It is worth doing a search there and reading what others do to dry hoses.
normal_DSC00016-web.jpg

normal_DSC00018-web.jpg

normal_DSC00019-web.jpg
 
Herman, thanks for the visual aids!!! That's probably the neatest thing I've seen....maybe you could mass produce those and sell em! :D I def can use a screwdriver and use the one hose procedure. I have a spare bedroom, so I'm thinking I can set up a table and use it for the drying station.

I'll also check out the thread on VDH. Thanks again!


Lisa

PS: As far as the book goes, just piece together your posts, a voila....you're a regular Stephen King, without the horror.
 

Back
Top Bottom