OP
@rsingler, thanks for your thoughts. I think we are on the same wavelength.
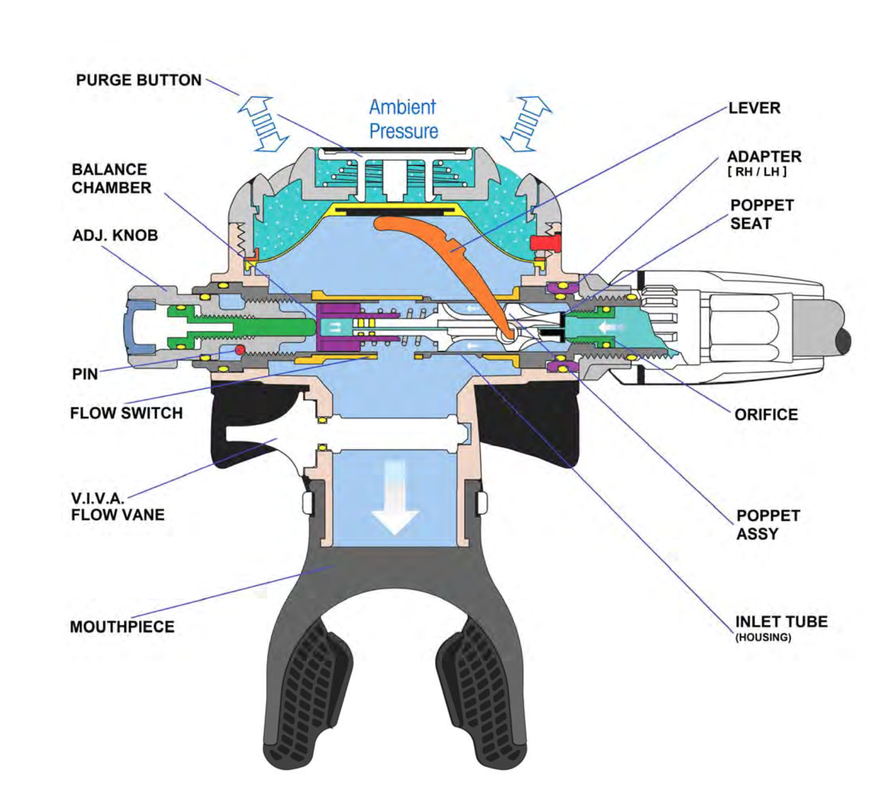
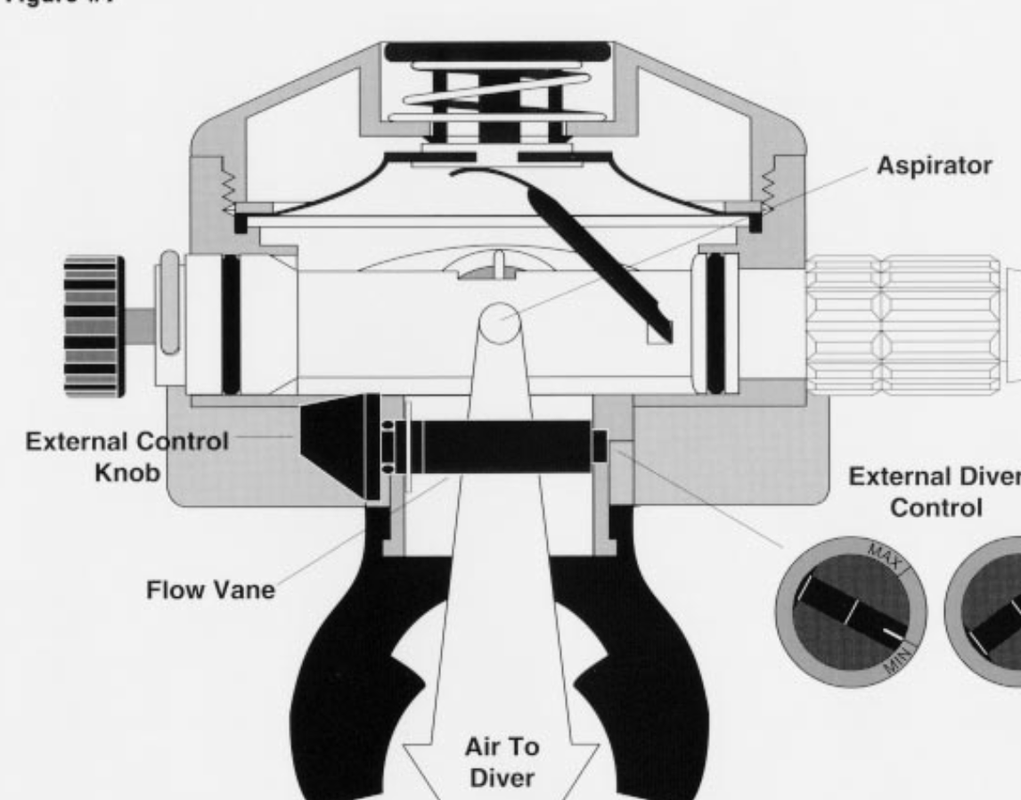
When I am setting up a second stage of this design, this case being a G260 (but it could be a 109, 156, G250 etc), I want the lever feet to be parallel to the broach in the air tube and for that to be a neutral condition without any preload on the lever by the diaphragm and cover purge button, Scubapro asks for 2mm (purge button depression) play in the case of the G260 (I use less) for this purpose. The orifice ideally, as you indicate, should seal with just a slightest kiss of the seat. That would introduce a slight rattle in the lever but nearly imperceptible. This result ideally cannot be any other way. A bad seat and/or orifice causes us to want to run the orifice in further and further to get a seal and this can drop the lever dangerously low (affecting flow volume). Or, attacking the problem (lack of sealing due to a bad seat or orifice knife edge) from the other direction by cranking in the Micro-adjust screw to attempt to get a seal of the poppet and orifice but this now resulting in a high cracking force out of specification.
"SP wants the seal to be just a kiss at IP, with cracking effort thus determined solely by the poppet spring tension."
This sentence from your post is exactly why I think the instruction at (9) above is incorrect or incomplete. The spring force against the poppet is solely adjusted for (cracking force) tuning purposes by the Micro-adjust screw. Thus the orifice position adjustment is setting the lever height and lever play (lever rattle) and the poppet spring force adjusted by the Micro-adjust screw is setting the cracking force (the external adjustment knob being turned fully out when tuning).
I just do not see why at this point Scubapro wants me to (9) must always now readjust my orifice position. It undoes what was just done.
Without Micro-adjust, such as is the case with a 109 or a G250, the only way to adjust cracking force ultimately is to grab another poppet spring and another and another until the perfect one is found. But not everyone has a box of leftover springs. Micro-adjust is a good improvement and does make the techs life easier.
James