The new G-250HP plastic orifices just plain suck. Can't get that extra 0.2" of cracking effort on a reliable basis. Some are OK, some not.
One of our regular post'ers commented on a PM I'd sent him about dressing old metal orifices. So here's what I do to keep using those metal beauties long after their chrome starts to flake off. It's basically a matter of using extremely fine grit emery cloth (Micro-Mesh), from 3,200 grit up to about 12,000 depending upon the metal, and using a rod to approximate the bevel on the outside, and a cone (pencil tip) to help round the inside.
Here goes:
Here's a Dacor Quantum orifice that's almost like the Scubapro, that I was working on today.
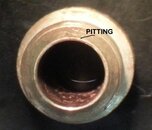 There was a slight roughness to the fingernail test from pitting in the chrome. The orifice had been frozen in the carrier, and it took five minutes in the ultrasonic with warm Tumble Juice (basically phosphoric acid, a glycol penetrant and a little detergent surfactant) to allow me to unscrew it from the carrier. As you can see, the chrome was even worse on the top:
 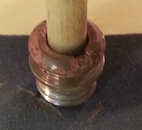 (as in, non-existent).
First, slide a rod through the center of the orifice. For the Dacor, a 3/16" dowel worked just fine. The Scubapro G250/109/156 orifice is slightly smaller, and I use a 1/8" soft aluminum rod for those. With the orifice on the rod, tilt it to approximately the angle of the bevel at the orifice tip, and let it slide down until the bevel is resting on some Micro-Mesh (search EBay for "MICRO-MESH FINISHING SET" and oliveoyle will sell you ten sheets of varying grit for $20 including shipping. Expensive, but I only use a 1x2 cm piece at a time). With the orifice resting on the micro mesh, apply a little pressure and rotate the orifice around the rod.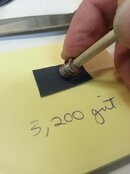
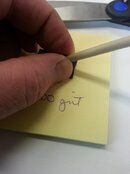 It's slow and tedious work, taking from 15-45 minutes depending upon the amount of metal to be removed. I've taken some huge dings out, and it was then just a matter of restoring the rounded bullnose of the orifice edge.
You do that by moving from the bevel to the face of the orifice. This is the dangerous part. A lot of us dress with a motorized draftsman's eraser, and spin it against the face of the orifice. With a mild eraser it doesn't do anything but polish the pits. With a gray/white abrasive eraser, you can take the orifice right down to the brass, and usually, the spinning eraser doesn't keep it perfectly flat. It takes off more on one side than the other, depending upon how the eraser was held. It's just too little, or too aggressive.
Instead, use the rod to hold the orifice roughly vertical.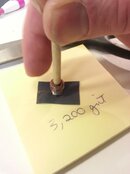 Then, just spin it with your forefinger at somewhat high speed for a couple of minutes. It'll wobble if your rod is small, but the wobbling is fairly evenly distributed. (No comments about my rod, please.)
  Resist the temptation to push down on the orifice in this position. Odds are you'll not have your rod perfectly vertical and will put an asymmetry into the face. Remember, the entire circle has to meet the puck simultaneously, which it can't do if one side of the circle is lower than the other because the rod was off vertical. In this photo I'm using 3,200 grit, but only for a short time. Even though the weight of the orifice on the emery cloth is negligible, it still takes it down. I move quickly to 4,000 - 6,000 - 8,000.
Next step is converting the slight flattening and broadening of the orifice mating edge to a rounded bullnose again. You do that by coming at the orifice from the inside. Here's where the cloth backing of the Micro-Mesh is crucial, because it allows it to "bunch up" around the orifice.
Take that 1x2cm piece and wrap it at an angle around a conical pen or pencil.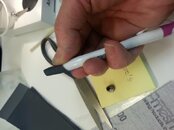 Carefully insert the wrapped cone into the orifice. As you push, allow the emery cloth to slide towards the orifice a little.
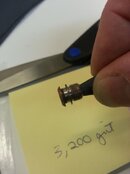 Now you can twist with some medium force (use finer grits here) and carve away a little of that square inner edge that resulted from sanding the face of the orifice.
I make regular checks with loupes or a 10X microscope, and sometimes have to go back to coarser grit if polishing with the finer stuff shows a residual gouge. It takes from 15-45 minutes per orifice, and is only worth it for my own regs or those of my friends. You'll never make any money converting leaky regulators off EBay. It just takes too much time. But hey! It's a labor of love, right?
Anyway, the end result for today's orifice looks like this:
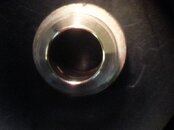 Compared with our original:
  (Of course, the top of the orifice still looks like crap, but WTH.)
This orifice kept its chrome, which is why it only took 15 minutes. It's more common to end up going down to the brass, if you've got a nick from a careless technician. You just take down as much metal as you need, and once you hit soft brass, it goes faster anyway. This means that your orifice will be more prone to corrosion if you let it sit moist from salt water, but a need for more frequent (annual) service is a better alternative than leaving the nick and the having the need for a higher sealing pressure on the spring.
With this orifice, I was able to get the cracking pressure down to 1.1" on the Dacor Quantum, and I expect it'll drop a little bit more as the puck takes an impression.
Take an old 109 that you want to restore, and give it a try! At the worst, you'll screw up and have to put a $5 plastic one in, but you were going to have to do that anyway. After one or two mistakes, it's smooth sailing. Just don't be afraid to take off metal. The bevel is less important than the rounded edge at the very end of the orifice. If you get that smooth and flat, you'll seal every time.
If you have time on your hands, you can do the same thing (in reverse) and restore the knife edge on a Mk5 or Mk10 piston. It's just a matter of patience: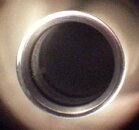
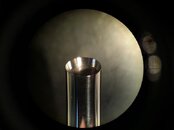 Here, most of the work is with the pen wrapped in Micro-mesh cutting metal on the inside. Add a little 12,000 grit to polish the shaft and you'll have a HP seal that is better than new.
One of our regular post'ers commented on a PM I'd sent him about dressing old metal orifices. So here's what I do to keep using those metal beauties long after their chrome starts to flake off. It's basically a matter of using extremely fine grit emery cloth (Micro-Mesh), from 3,200 grit up to about 12,000 depending upon the metal, and using a rod to approximate the bevel on the outside, and a cone (pencil tip) to help round the inside.
Here goes:
Here's a Dacor Quantum orifice that's almost like the Scubapro, that I was working on today.
 There was a slight roughness to the fingernail test from pitting in the chrome. The orifice had been frozen in the carrier, and it took five minutes in the ultrasonic with warm Tumble Juice (basically phosphoric acid, a glycol penetrant and a little detergent surfactant) to allow me to unscrew it from the carrier. As you can see, the chrome was even worse on the top:
  (as in, non-existent).
First, slide a rod through the center of the orifice. For the Dacor, a 3/16" dowel worked just fine. The Scubapro G250/109/156 orifice is slightly smaller, and I use a 1/8" soft aluminum rod for those. With the orifice on the rod, tilt it to approximately the angle of the bevel at the orifice tip, and let it slide down until the bevel is resting on some Micro-Mesh (search EBay for "MICRO-MESH FINISHING SET" and oliveoyle will sell you ten sheets of varying grit for $20 including shipping. Expensive, but I only use a 1x2 cm piece at a time). With the orifice resting on the micro mesh, apply a little pressure and rotate the orifice around the rod.

 It's slow and tedious work, taking from 15-45 minutes depending upon the amount of metal to be removed. I've taken some huge dings out, and it was then just a matter of restoring the rounded bullnose of the orifice edge.
You do that by moving from the bevel to the face of the orifice. This is the dangerous part. A lot of us dress with a motorized draftsman's eraser, and spin it against the face of the orifice. With a mild eraser it doesn't do anything but polish the pits. With a gray/white abrasive eraser, you can take the orifice right down to the brass, and usually, the spinning eraser doesn't keep it perfectly flat. It takes off more on one side than the other, depending upon how the eraser was held. It's just too little, or too aggressive.
Instead, use the rod to hold the orifice roughly vertical.
 Then, just spin it with your forefinger at somewhat high speed for a couple of minutes. It'll wobble if your rod is small, but the wobbling is fairly evenly distributed. (No comments about my rod, please.)
  Resist the temptation to push down on the orifice in this position. Odds are you'll not have your rod perfectly vertical and will put an asymmetry into the face. Remember, the entire circle has to meet the puck simultaneously, which it can't do if one side of the circle is lower than the other because the rod was off vertical. In this photo I'm using 3,200 grit, but only for a short time. Even though the weight of the orifice on the emery cloth is negligible, it still takes it down. I move quickly to 4,000 - 6,000 - 8,000.
Next step is converting the slight flattening and broadening of the orifice mating edge to a rounded bullnose again. You do that by coming at the orifice from the inside. Here's where the cloth backing of the Micro-Mesh is crucial, because it allows it to "bunch up" around the orifice.
Take that 1x2cm piece and wrap it at an angle around a conical pen or pencil.
 Carefully insert the wrapped cone into the orifice. As you push, allow the emery cloth to slide towards the orifice a little.
 Now you can twist with some medium force (use finer grits here) and carve away a little of that square inner edge that resulted from sanding the face of the orifice.
I make regular checks with loupes or a 10X microscope, and sometimes have to go back to coarser grit if polishing with the finer stuff shows a residual gouge. It takes from 15-45 minutes per orifice, and is only worth it for my own regs or those of my friends. You'll never make any money converting leaky regulators off EBay. It just takes too much time. But hey! It's a labor of love, right?
Anyway, the end result for today's orifice looks like this:
 Compared with our original:
  (Of course, the top of the orifice still looks like crap, but WTH.)
This orifice kept its chrome, which is why it only took 15 minutes. It's more common to end up going down to the brass, if you've got a nick from a careless technician. You just take down as much metal as you need, and once you hit soft brass, it goes faster anyway. This means that your orifice will be more prone to corrosion if you let it sit moist from salt water, but a need for more frequent (annual) service is a better alternative than leaving the nick and the having the need for a higher sealing pressure on the spring.
With this orifice, I was able to get the cracking pressure down to 1.1" on the Dacor Quantum, and I expect it'll drop a little bit more as the puck takes an impression.
Take an old 109 that you want to restore, and give it a try! At the worst, you'll screw up and have to put a $5 plastic one in, but you were going to have to do that anyway. After one or two mistakes, it's smooth sailing. Just don't be afraid to take off metal. The bevel is less important than the rounded edge at the very end of the orifice. If you get that smooth and flat, you'll seal every time.
If you have time on your hands, you can do the same thing (in reverse) and restore the knife edge on a Mk5 or Mk10 piston. It's just a matter of patience:

 Here, most of the work is with the pen wrapped in Micro-mesh cutting metal on the inside. Add a little 12,000 grit to polish the shaft and you'll have a HP seal that is better than new.
Last edited:


