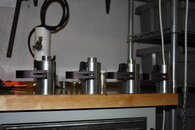
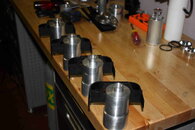
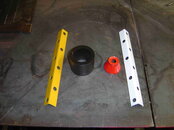
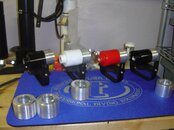
Check out my cans baby!!!

Please register or login

Welcome to ScubaBoard, the world's largest scuba diving community. Registration is not required to read the forums, but we encourage you to join. Joining has its benefits and enables you to participate in the discussions.

Benefits of registering include

  • Ability to post and comment on topics and discussions.
  • A Free photo gallery to share your dive photos with the world.
  • You can make this box go away

Joining is quick and easy. Log in or Register now!

Very good work 350xfire! I love that you put switches in the groove of canister lid it is much more clean than switch protector like H does. And looks you have nice organised workshop:) . Only these latches are not so good becouse thay have their ends turn up! They are more easy to open by accident so you have to put some rubber tape from car tube over them to cover ends and protect them. I used latches with ends down and at last time with protective bolts.


BTW: I have asked you for price because when I have to order parts like latches , electronics , plastics a lot of money takes post package from other countries , special from Germany which it is nearest to me. In our country we don't have some special shops to buy exact these parts. One shipment from Germany normaly takes arround 17€ and normally you can not buy all parts at one place. And for parts from DE takes arround month to get them!

At my luck I got direct supplier for AGRO glands in Slovenia and cheap :shocked2:amazing!
(once they send to me a gland with metal inner spacer; normaly are they made from thermoplastic which it is not the best plastic for that kind but it is cheap. And of course a hole in gland is for 0,3mm too small :-))

Regards !

Thanks. The latches have a lock on them making them impossible to open.
Let me know who your Agro supplier is. I need a cheaper souce so I can keep my price low.
Thanks
 
Any tricks you want to share WRT getting those flat latches onto the curved canister surface? :-)

Use #6 by 1/4" screws. I am using bead rolling screws but you can also use the pan head machine type stainless. Make sure you drill the hole as deep as you can without going through. I have stripped the threads off the delrin trying to drive a screw into a hole that was not deep enough. Drive them both evenly in. Do not go all the way in with one and try to get the other in. You'll strip the threads on the one that's out. You will not be able to perfectly seat them on the round surface just get them tight and as best as you can. This is the way everyone does it and it comes out nice enough. The smaller the can the harder it is, but it can be done.
 
How are the light heads coming? Any new news on the larger LED's?

Light heads are being threaded as we speak and should be threaded by tomorrow. I'll order the lenses probably tomorrow. I am having them custom cut by waterjet out of 3/16" glass. Then powder coating and assembly. I really hope to be done by Friday and may be a test dive Saturday night.

Larger LED is waiting for a battery pack that can drive it to its full potential. My power supply can only do .2 amps at 19 volts... Let me tell you, I'm impressed so far. The LED is meant to run at 21 volts and 1 amp. So it will be really bright. Light head will be similar, canister will be bigger. I don;t know if I can get the 18 batteries I want to use in a 2.75" can or if I'll have to go 3". Once I get the batteries in I'll be able to finish design on that one. Hopefully a week/two weeks or so longer and we'll have a really high power light ready.
 
You use OSRAM OSTAR (probably 6die) ?

Yes, for the 21W unit.

I think I'm going to try their 18W as well. It is a 4 die 14v unit.
 
Goodman Handles..... CHECK!
 

Attachments

  • IMG_0983.jpg
    IMG_0983.jpg
    351 KB · Views: 121
  • IMG_0985.jpg
    IMG_0985.jpg
    319.5 KB · Views: 136
Powder coated samples, CHECK!!
 

Attachments

  • DSC00124.JPG
    DSC00124.JPG
    158.2 KB · Views: 133
Here is half the powder coated bodies with goodman handles on. Gotta say they are coming out NICE!
 

Attachments

  • DSC00126.jpg
    DSC00126.jpg
    400.8 KB · Views: 143

Back
Top Bottom