Leisure Pro Brett
Contributor
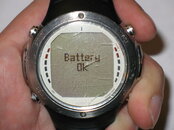
I recently came across a D6 from one of our vendors that was in dire need of a battery change. At his urging I gave it a try and took some photos along the way to share with Scubaboard. He was in a bit of a hurry so I didn't get to take as many pictures as I would have liked, but I think this will give everyone a pretty good idea of what's involved in the process. If you are looking for the D9 battery change it can be found HERE. As always my standard disclaimer applies: This information has no affiliation with LeisurePro, it is just something I did myself for the ScubaBoard community. Neither LeisurePro nor myself encourage anyone to change their own D6 battery. If you do open your computer and it floods it’s your fault, not mine, if your not comfortable with that then leave your computer alone. With that said, on with the show.
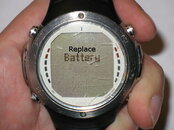
1.When you see this (or something like this) on the computer screen then it’s time to change your battery. Overall the process was pretty simple.
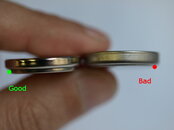
2. There are a few quick things to pay attention to before you crack your computer open. First is the battery you buy, there are some CR2450 batteries that will not fit. The neck less version on the right doesn’t like the battery compartment in the D6. The one on the left is the type you want to use in the computer. You will also need some silicone lube for the o-ring and a very fine tipped Philips screwdriver along with a T-6 torx driver or very small allen key.
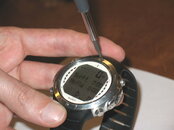
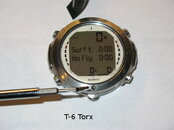
3. Using that T-6 torx driver gently remove the screws that hold the watch band on the computer. Even though this computer was very well used, the screws were easily removed. The pictures above show the removal of the screws located at top and bottom center of the screen.
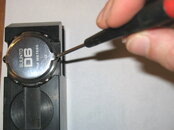
4. With the watch held firmly in place on a surface that will not damage the watch face use the fine tipped Philips screwdriver to remove the 2 screws that hold the case back on. Be careful not to strip the heads of these screws, they will need to function to re-fasten the case back at the end of the battery change. As I noted before, this computer was well used, but all screws were removed easily.
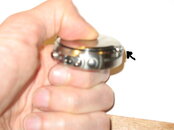
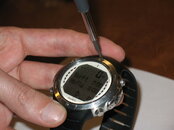
5. Once you have the band off and the case back screws out you will see that there is a small accommodation for a screwdriver just under the case back where one of the screws goes in. A slim flat head screwdriver in there will let you gently pry the case back off.
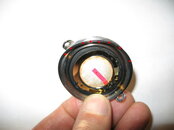
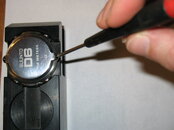
6. Once you get the case back off you will see that the o-ring lies in a groove around it’s outer edge. Gently remove the o-ring with your fingers so that you do not scratch any sealing surfaces. Keep it safe and clean if it is going to be reinstalled (It’s always best to replace the o-ring each time, I do not recommend re-using the o-ring).
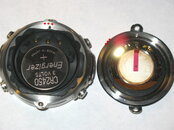
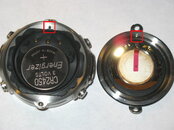
7. Next you will want to clean the sealing surfaces of the watch. They are in the groove that the o-ring sits in as well as the inside wall of the watch case, they are marked with red dots in the picture.
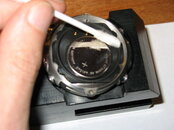
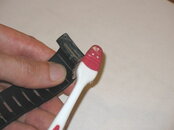
8. A q-tip is a great way to clean the exposed sealing surfaces so that they are ready when you put the watch back together. Keep in mind that you want to remove any lint that the q-tip may leave behind.

1.When you see this (or something like this) on the computer screen then it’s time to change your battery. Overall the process was pretty simple.

2. There are a few quick things to pay attention to before you crack your computer open. First is the battery you buy, there are some CR2450 batteries that will not fit. The neck less version on the right doesn’t like the battery compartment in the D6. The one on the left is the type you want to use in the computer. You will also need some silicone lube for the o-ring and a very fine tipped Philips screwdriver along with a T-6 torx driver or very small allen key.


3. Using that T-6 torx driver gently remove the screws that hold the watch band on the computer. Even though this computer was very well used, the screws were easily removed. The pictures above show the removal of the screws located at top and bottom center of the screen.

4. With the watch held firmly in place on a surface that will not damage the watch face use the fine tipped Philips screwdriver to remove the 2 screws that hold the case back on. Be careful not to strip the heads of these screws, they will need to function to re-fasten the case back at the end of the battery change. As I noted before, this computer was well used, but all screws were removed easily.

5. Once you have the band off and the case back screws out you will see that there is a small accommodation for a screwdriver just under the case back where one of the screws goes in. A slim flat head screwdriver in there will let you gently pry the case back off.

6. Once you get the case back off you will see that the o-ring lies in a groove around it’s outer edge. Gently remove the o-ring with your fingers so that you do not scratch any sealing surfaces. Keep it safe and clean if it is going to be reinstalled (It’s always best to replace the o-ring each time, I do not recommend re-using the o-ring).

7. Next you will want to clean the sealing surfaces of the watch. They are in the groove that the o-ring sits in as well as the inside wall of the watch case, they are marked with red dots in the picture.

8. A q-tip is a great way to clean the exposed sealing surfaces so that they are ready when you put the watch back together. Keep in mind that you want to remove any lint that the q-tip may leave behind.


