Spec Boot For Mk-15

Please register or login

Welcome to ScubaBoard, the world's largest scuba diving community. Registration is not required to read the forums, but we encourage you to join. Joining has its benefits and enables you to participate in the discussions.

Benefits of registering include

  • Ability to post and comment on topics and discussions.
  • A Free photo gallery to share your dive photos with the world.
  • You can make this box go away

Joining is quick and easy. Log in or Register now!

Sure. Send it to me. Address per PM.

Another potential project. If I can get them to work is anyone interested in color coded 109 (2nds) faceplates? I'm thinking Simpact 85 might work.

You betcha! As a matter of fact, I was going to hit you up on the feasibility of such a project once you sorted the current project out. For a while I was looking at dapping blocks on the bay, but a close inspection of a 109 metal cover gave me second thoughts.

Couv
 
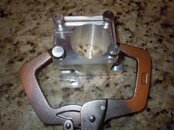
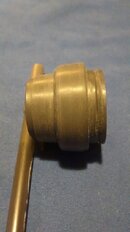
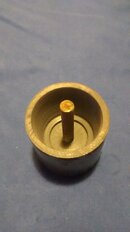
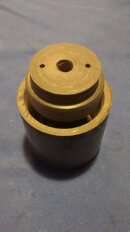
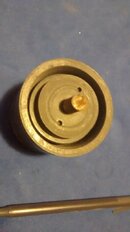
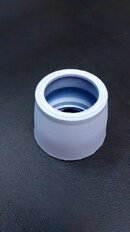
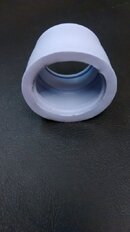
I have my first mold for a MK5 SPEC boot made. The inner part is machined PVC in the shape of the Ambient chamber with a little overlap onto the body, a ridge of PVC was left as a packing material reservoir.
rngpHBBySzPtqSvqvDsEUR_PZsbmzBy5Fz_6b5Bri9Q


The outer part is a hollowed out block of PVC leaving 4 mm at the ends and 1.5 mm over the reservoir.

_SYNDMV4TW13NtLHhSyOg8e8D2i3DO2D0eyt4XkyyIw


They mate together with a bolt and tenon/socket to ensure alignment. It takes 15 ml of material to fill.

gl72Yf2I28CZ-LDj6hGBZ_ueXUwwGX6w_tzX1w1v_ms
o3g5XKAaxLWhBz7l0dqxBspiGlQHyMhpk7g3_h32LZ0
 
The container for the liquid injection molding approach is almost done. I've parted the container and added a high-pressure window, see pic. It clamps to a piece of jig-plate. The last piece of this puzzle is how to make the connection to the injection nozzle. It could be as simple as using a 10 degree tapered end mill to make a cavity that one can push against with the caulk gun / two tube mixing tip apparatus.

After all this work, I'm going to hedge my bets and allow for a connection to an "Isco-like" syringe pump. -still wrenching on that design...
 

Attachments

  • Mold Container.jpg
    Mold Container.jpg
    100.5 KB · Views: 50
First test boot with OOMOO 30 came out nice. The flexible membrane part is a little thin, and there are a couple of pinhole bubbles. Once the MK 10 boot arrives from Lowviz I can modify my mold to match the thickness. The next batch will be vacuum degassed. But first my rig needs a new cover and some additional safety items. Plastic covers degrade over time and make a LOUD bang when imploding.

Lessons learned:
  1. Thicker plastic lid.
  2. Laminate a clear plastic coating (self laminating sheet) on both sides for shatter containment
  3. Put the vacuum pot under a wire grid to prevent bounce back.
  4. If there is crazing on the lid - retire it!
Yes it is a DIY vacuum pot based on a pressure cooker pot. The seal/lid was set for pressure (15 psi max for any pressure cooker) so I removed the lid and replaced it with a thick clear plastic lid.
 
I have a nice sheet of 3/4" acrylic.

-If interested, let me know what diameter you would like for a lid.

Fair consideration for all you taught me about casting and your suppliers... :)

That is super nice. I love working with SBers. I'll take you up on the offer, but have to measure it when home.
 
Can anyone think of a reason why I shouldn't take my first SPEC boot and put it on an non-critical (ie back up) regulator and 'pack' it with sea water on one of my dives this weekend? I can then compare the covered vs uncovered ports to see if it is flexible enough and how well it stays on.
 
Other than making me jealous that you're going diving and I'm not, I can't think of a reason. But how will you know if the boot held in the "packed" water? Will you be able to take it to a few (3-4) atmospheres?
 
I have my first mold for a MK5 SPEC boot made. The inner part is machined PVC in the shape of the Ambient chamber with a little overlap onto the body, a ridge of PVC was left as a packing material reservoir.

The outer part is a hollowed out block of PVC leaving 4 mm at the ends and 1.5 mm over the reservoir.

They mate together with a bolt and tenon/socket to ensure alignment. It takes 15 ml of material to fill.

2016-05-08 20.21.25.jpg 2016-05-08 20.21.39.jpg 2016-05-08 20.21.51.jpg 2016-05-08 20.22.25.jpg

My pictures got lost. Here they are again.

2016-05-10 12.20.38.jpg 2016-05-10 12.20.54.jpg

With the resulting SPEC boot. First pic shows and unwanted ridge that has been removed, and the membrane is a litle thin and contaminated with bubbles. I'm pleased with the first go.
 
Other than making me jealous that you're going diving and I'm not, I can't think of a reason. But how will you know if the boot held in the "packed" water? Will you be able to take it to a few (3-4) atmospheres?

I won't know if it contained the water, but should be able to tell if there is more breathing resistance. Planned depth 2.5 to 3 ATM. Really the test is 1. Will it stay on, and 2. Does it increase breathing resistance.

Guess I can put some food dye in the ambient chamber and see if the dye is still there at the end of the dive. Given that there are about 4-5 really small pinholes in the membrane part (trapped bubbles) I'm not sure I can pack it before submerging.
 
Back
Top Bottom