Rusty painted LP72 tank: worth saving?

Please register or login

Welcome to ScubaBoard, the world's largest scuba diving community. Registration is not required to read the forums, but we encourage you to join. Joining has its benefits and enables you to participate in the discussions.

Benefits of registering include

  • Ability to post and comment on topics and discussions.
  • A Free photo gallery to share your dive photos with the world.
  • You can make this box go away

Joining is quick and easy. Log in or Register now!

Thank you everyone for your comments. Mentally, I feel like I'm in a tough spot. Now that I've started this process, I kinda want to see it through. Plus, like I said, I've kinda gotten set on my vintage doubles with the original Healthways stickers (but with a modern manifold: I dive DIN and I want redundancy, not just capacity). But it turns out @Tracy's hydro place will hydro, sandblast and repaint both cylinders for less than $45 more total than I would pay for just the hydros.

So now I'm battling between cheap, lazy and hipster. I probably wouldn't put $45 into these if I do it myself, but it'll be a fair fraction of it, and $45 extra isn't exactly a lot of money in the first place. And it's nearly pushbutton. But I'll lose the stickers, and now I've become kinda emotionally invested in both them and the process.

I can't believe I've become this attached to a pair of stupid chunks of rusty iron with some vinly glued to it that I've owned for all of a few months. I gotta get out more...

In the end, I bought these to be used and abused in a local river, not to be a showpiece or somehow prove my credibility. So I'm going to go with the sandblast and repaint. (Besides, stickers are bad for the tank, right? Right?)

But in the end, I've just traded one tedious task for another: getting 50-year-old stickers off. Ugh.

Here's what I did for that: I grabbed a plastic scraper and scraped. It did nothing. Well, I don't care about the finish... so I grabbed a 1" putty knife and went at it, with reasonable care. It mostly came off, but there were still strips and spots of leftover adhesive. Next, I applied some Goo Gone and between a little more scraping, a small wire brush and some paper towels I was left with a sticker-free and adhesive-free tank.

For the second tank I tried some heat to see if it would help. Nope: made things a fair bit harder. The vinyl portion of the stickers was a bit easier to get off, but it turned the adhesive into chewing gum which smeared all over the place... More Goo Gone, more wire brushing, more paper towels, but it eventually came clean. (For the record, we're talking a relatively small amout of heat: not enough to heat the tank metal beyond noticeably warm. Tanks can be damaged by too much heat, but this level of heat was well below the heat they get when you fill them at 600 PSI/min, which is the recommended maximum rate, or what they would get in the back of a car in the summer.)

Goo Gone is quite oily. I don't know if the sandblasting will remove all of residue but I *do* know that oil and paint don't mix. So next step: degreasing. I diluted some Blue Bear degreaser in my stock tank / SCUBA gear wash tank. It's the most powerful degreaser I've come across, and my go-to when I need more than Dawn and I don't need O2-compatible (that's what Crystal Simple Green is for). They get a good soak and scrub, then a good long rinse. Hopefully that'll leave them nicely paintable.

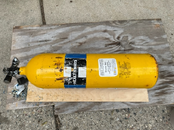
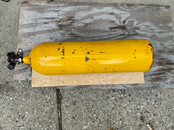
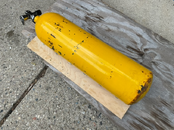
Some photos to show the progress. These are of the other, less corroded tank. They're kinda boring: stickers, no stickers, and a little bit better view of the boot corrosion on this one, which I won't bother to touch.

Looking at these photos, with all the stickers removed, this really is a no-brainer. The paint is a mess, and because they're not galvanized, the tanks are rusty everywhere the paint is damaged. Of *course* these should be sandblasted and repainted -- and when it's like $21 extra per tank, of *course* you let someone else do it. But those vintage stickers, yo...

I can't help myself: I've reproduced the Healthways stickers so I can print them up and reapply faux stickers when it's done... After taking a couple of hours to scrape and clean stickers *off* the tanks, you think I'd be reluctant to put more *on*. What can I say: I'm grooving on the retro. As simple as the design is, it's still a bit tricky. That font: it's clearly Franklin Gothic, but it's not 2020's Franklin Gothic: the 1 is condensed, the kerning is different, the weight is halfway between demi and heavy... No doubt the original was done by hand, so I could only get so close. Plus trying to figure out the exact shade of blue on a 50-year-old sticker... I'm going Reflex Blue, but who really knows? :)

The part of my personality that makes me a detail-oriented (and hopefully safe) technical diver doesn't just turn off when I'm not diving... :)

That's enough for today. I've got two bare and clean tanks (on the outside, anyway: I still haven't touched the inside), ready to head off for hydro, and a design to re-sticker the tanks if I maintain my temporary insanity. Sometimes I think drinking might be a more reasonable hobby...

ETA: You can see the tank is sitting on a board. That's my wheelie board from the first post. *Really* handy, if I do say so myself. And I used it today when I was disassembling a set of doubles: I used it when I needed to unscrew a tank from the manifold, rather than taking apart the crossbar and then taking the valves off. It'll be even more useful when it comes to putting the tanks back on, rather than fighting with installing the crossbar after the valves are on. So far, it's been more useful than I thought. Essential? No: you could do a similar thing just by putting something soft and smooth under the tank (like a towel) and rotating it on that. But seeing as I now have it, it does have benefits.
 

Attachments

  • StickersA.png
    StickersA.png
    507.2 KB · Views: 122
  • StickersB.png
    StickersB.png
    519.4 KB · Views: 114
  • StickersC.png
    StickersC.png
    549.6 KB · Views: 135
  • NewHealthwaysBand.png
    NewHealthwaysBand.png
    20.3 KB · Views: 117
Thank you everyone for your comments. Mentally, I feel like I'm in a tough spot. Now that I've started this process, I kinda want to see it through. Plus, like I said, I've kinda gotten set on my vintage doubles with the original Healthways stickers (but with a modern manifold: I dive DIN and I want redundancy, not just capacity). But it turns out @Tracy's hydro place will hydro, sandblast and repaint both cylinders for less than $45 more total than I would pay for just the hydros.

So now I'm battling between cheap, lazy and hipster. I probably wouldn't put $45 into these if I do it myself, but it'll be a fair fraction of it, and $45 extra isn't exactly a lot of money in the first place. And it's nearly pushbutton. But I'll lose the stickers, and now I've become kinda emotionally invested in both them and the process.

I can't believe I've become this attached to a pair of stupid chunks of rusty iron with some vinly glued to it that I've owned for all of a few months. I gotta get out more...

In the end, I bought these to be used and abused in a local river, not to be a showpiece or somehow prove my credibility. So I'm going to go with the sandblast and repaint. (Besides, stickers are bad for the tank, right? Right?)

But in the end, I've just traded one tedious task for another: getting 50-year-old stickers off. Ugh.

Here's what I did for that: I grabbed a plastic scraper and scraped. It did nothing. Well, I don't care about the finish... so I grabbed a 1" putty knife and went at it, with reasonable care. It mostly came off, but there were still strips and spots of leftover adhesive. Next, I applied some Goo Gone and between a little more scraping, a small wire brush and some paper towels I was left with a sticker-free and adhesive-free tank.

For the second tank I tried some heat to see if it would help. Nope: made things a fair bit harder. The vinyl portion of the stickers was a bit easier to get off, but it turned the adhesive into chewing gum which smeared all over the place... More Goo Gone, more wire brushing, more paper towels, but it eventually came clean. (For the record, we're talking a relatively small amout of heat: not enough to heat the tank metal beyond noticeably warm. Tanks can be damaged by too much heat, but this level of heat was well below the heat they get when you fill them at 600 PSI/min, which is the recommended maximum rate, or what they would get in the back of a car in the summer.)

Goo Gone is quite oily. I don't know if the sandblasting will remove all of residue but I *do* know that oil and paint don't mix. So next step: degreasing. I diluted some Blue Bear degreaser in my stock tank / SCUBA gear wash tank. It's the most powerful degreaser I've come across, and my go-to when I need more than Dawn and I don't need O2-compatible (that's what Crystal Simple Green is for). They get a good soak and scrub, then a good long rinse. Hopefully that'll leave them nicely paintable.

Some photos to show the progress. These are of the other, less corroded tank. They're kinda boring: stickers, no stickers, and a little bit better view of the boot corrosion on this one, which I won't bother to touch.

Looking at these photos, with all the stickers removed, this really is a no-brainer. The paint is a mess, and because they're not galvanized, the tanks are rusty everywhere the paint is damaged. Of *course* these should be sandblasted and repainted -- and when it's like $21 extra per tank, of *course* you let someone else do it. But those vintage stickers, yo...

I can't help myself: I've reproduced the Healthways stickers so I can print them up and reapply faux stickers when it's done... After taking a couple of hours to scrape and clean stickers *off* the tanks, you think I'd be reluctant to put more *on*. What can I say: I'm grooving on the retro. As simple as the design is, it's still a bit tricky. That font: it's clearly Franklin Gothic, but it's not 2020's Franklin Gothic: the 1 is condensed, the kerning is different, the weight is halfway between demi and heavy... No doubt the original was done by hand, so I could only get so close. Plus trying to figure out the exact shade of blue on a 50-year-old sticker... I'm going Reflex Blue, but who really knows? :)

The part of my personality that makes me a detail-oriented (and hopefully safe) technical diver doesn't just turn off when I'm not diving... :)

That's enough for today. I've got two bare and clean tanks (on the outside, anyway: I still haven't touched the inside), ready to head off for hydro, and a design to re-sticker the tanks if I maintain my temporary insanity. Sometimes I think drinking might be a more reasonable hobby...

ETA: You can see the tank is sitting on a board. That's my wheelie board from the first post. *Really* handy, if I do say so myself. And I used it today when I was disassembling a set of doubles: I used it when I needed to unscrew a tank from the manifold, rather than taking apart the crossbar and then taking the valves off. It'll be even more useful when it comes to putting the tanks back on, rather than fighting with installing the crossbar after the valves are on. So far, it's been more useful than I thought. Essential? No: you could do a similar thing just by putting something soft and smooth under the tank (like a towel) and rotating it on that. But seeing as I now have it, it does have benefits.
There are reproduction stickers out there. A search many find what you need, at a hefty price no doubt but at what price does the love affair end? I had a similar issue with the old Aqua Lung stickers on my 50's and 1 72 I got over it.

Old school 72's are still a sweet tank to me, I own 6 and of those 5 are galvanized with is the way to go if you go looking for more steel tanks, or paint over galvanized; the paint chips but the galvanize protects.
 
Go to a digital sign shop and have them print you some of those stickers. They can easily do multi color designs on white high performance vinyl. You may have to provide some measurements and give them colors, and pay an artwork fee, but it is certainly do-able.
Also, you won’t have to worry about copyright infringement or licensing, Healthways is long gone.
 
I wouldn't repaint them with enamel, I would definitely use the ZRC galvilite cold galvanizing stuff. It really works and its easy to maintain them after the fact, because of course they will get scratched up again. It's the closest you can get to hot galvanized.

But......IME LP72s don't make great doubles. I had a pair for years, thinking they would be much better than AL80s because as single tanks, they are way better. But my experience was the opposite of what I had expected; I like AL80 doubles more. It's a balance/stability issue, and I don't really have an explanation for it. As single tanks, LP72s are fantastic.
 
LP72s don't make great doubles. I had a pair for years, thinking they would be much better than AL80s because as single tanks, they are way better. But my experience was the opposite of what I had expected; I like AL80 doubles more. It's a balance/stability issue, and I don't really have an explanation for it. As single tanks, LP72s are fantastic.

Strange... I love mine have 3 sets.
If you normally don't need lead. 72s will be quite negative.... but with drysuit I need 13lbs.
 
So the tanks *finally* came back from the hydro. I was told 3 weeks or so, it was 5 weeks. Not terribly unreasonable, but what can I say: I'm impatient -- and our diving season is so short and I want to get them in the water! :)

They came back reasonably clean and painted -- certainly at least as well as I had been told to expect. The hydro place's normal job is cleaning and painting industrial cylinders, and you get an industrial paint job. It also hadn't dried/cured fully, and there were places where the paint was damaged. (For example, when I physically picked them up the first time, the paint where the two tanks were touching each other was stuck together.) The color was typical industrial cylinder yellow. The color was fine, but it was matte, not glossy. Which I fully expected, but was still fairly disappointed with.

Remember back in post #1 when I said things like:

I have very little attachment or investment into them right now, and I'm not really looking for a 'labor of love' here.

There's very little economic value in these tanks, and I'm not interested in pouring a large amount of either time or money into them. I have zero desire to make them works of art: just safe and functional.

Yeah, well, times change. So on the way home I picked up a can of Krylon Farm Implement High Gloss John Deere Yellow. There aren't a lot of choices in yellow spray paint, so I went with it. I wasn't thinking I would repaint the entire cylinder, just touch up some of the damage.

Well... the colors didn't really match, and of course the high-gloss didn't blend at all. So I *did* paint the entire cylinder -- then ran back to Lowe's to get a second can for the second tank. A bit of a sand of the rough spots with 220-grit sandpaper, and then spray the tank while rotating it while it was hanging. (I used a 4" toggle bolt with two toggles: one with the arrow pointing up threaded all the way up (which the rope was looped around), and one with the arrow pointing down pushed into the tank to hold it. When it's dry I'll unscrew the bolt from the toggle, then shake the toggle out.)

After they dried for like 5 hours I moved them under shelter with a fan blowing at them. They can stay that way overnight.

They look prettier in the photo than they actually are: I'm not great with spray paint. But I do like the glossiness better. The yellow is wrong, but it's done now, and it's gonna have to stay that way. I *did* end up printing up stickers... :)

Tomorrow I'm going to attack them with phosphoric acid and hopefully get the insides looking as nice as the outside. My goal is to use them Thursday. It would probably be smarter to let them sit and cure more fully. Maybe I'll use some self-control and wait until next week to use them. We'll see.

1656988134048.png
 
Self control is a good thing, but not easy.

Yeah, well, sometimes it's also enforced on you. I ended up not diving this Thursday, so they'll have to / get to wait. On top of that, I *thought* I had ordered a manifold for them; turns out I did not. Which is a bummer, because DGX just *DOUBLED* the price of manifolds... So not only do I have to wait to get the manifold, but I get to spend a lot more money for the privilege.

But at least the tanks will cure more... :) Silver linings, and all that.

I did manage to get the insides cleaned up. They're not quite perfect, but they are *plenty* clean, and given what they looked like before I started, I'm really pleased with the result. This was my first attempt at cleaning the inside of a tank, and I have to say that the process was straightforward with phosphoric acid. The process I used and results achieved are described in that above link.

So, now I wait for a manifold. (Not sure I would have bought the second set of LP72's I picked up today had I known that manifolds have *doubled* in price... Grumble, grumble. But LP50's are $264 each (also without a manifold...), so I saved over $400 even after the hydro...
 
So, here is the result of my hard work:

1657503189100.png
1657503240805.png


They look pretty darn nice in these photos, but the camera hides some of the flaws. I'm choosing to see the flaws as "antiqued" to give them that proper vintage look... :)

It remains to be seen how well the Krylon paint will hold up. Of course, the industrial enamel is below, so there should still be some protection either way. (Who had the bright idea that *paint* was enough protection for *steel* pressure vessels that will be used in water, and potentially in salt water?!?)

I have to say, I'm pleased with the stickers. Again, they look better in photos than in person, but from 4 feet away they're fine. They're just laser-printed on to Avery waterproof labels. I've used them in other contexts (but only with black-and-white text) and they've held up. I'm not expecting much, but it didn't cost me much, either.

Oh, and I mentioned on another thread: I found HOG manifolds under $140 from Piranha Dive Mfg. That's what's on the tanks. Chunky, and don't include valve plugs (but do include DIN to Yoke plugs). Knobs are stiff rubber (as they should be), not plastic. For more than $60 cheaper than DGX, I'm grateful to get them.

So all that's left is to use them. Sadly, I'm leaving on Thursday, and therefore likely won't get to use them until the following week at the earliest. But they're ready to go, just waiting to get wet.

Thank you to all of you who helped me get to this point. I appreciate your help. I hope that the tanks will appreciate ending their 30+ year surface interval, and I hope that I get to use them enough to justify all the effort.
 
So, here is the result of my hard work:

View attachment 732673 View attachment 732674

They look pretty darn nice in these photos, but the camera hides some of the flaws. I'm choosing to see the flaws as "antiqued" to give them that proper vintage look... :)

It remains to be seen how well the Krylon paint will hold up. Of course, the industrial enamel is below, so there should still be some protection either way. (Who had the bright idea that *paint* was enough protection for *steel* pressure vessels that will be used in water, and potentially in salt water?!?)

I have to say, I'm pleased with the stickers. Again, they look better in photos than in person, but from 4 feet away they're fine. They're just laser-printed on to Avery waterproof labels. I've used them in other contexts (but only with black-and-white text) and they've held up. I'm not expecting much, but it didn't cost me much, either.

Oh, and I mentioned on another thread: I found HOG manifolds under $140 from Piranha Dive Mfg. That's what's on the tanks. Chunky, and don't include valve plugs (but do include DIN to Yoke plugs). Knobs are stiff rubber (as they should be), not plastic. For more than $60 cheaper than DGX, I'm grateful to get them.

So all that's left is to use them. Sadly, I'm leaving on Thursday, and therefore likely won't get to use them until the following week at the earliest. But they're ready to go, just waiting to get wet.

Thank you to all of you who helped me get to this point. I appreciate your help. I hope that the tanks will appreciate ending their 30+ year surface interval, and I hope that I get to use them enough to justify all the effort.
Holy moly on 2 counts.. 1st off, great work. Probably too much work for me, but it's been fun watching from my couch!!

And 2nd "holy moly".. wth? I thought you were being dramatic about the manifolds being double, but they really are. I bought a manifold for $99 just 2 short years ago and now they're $199. That's crazy... I don't really blame DGX but the cost of things going up via inflation sucks everywhere I turn.

Good luck getting them wet... I always get a warm and fuzzy feeling the 1st time breathing on a set of tanks that I cleaned.. like I know it's done right. They look great in the pictures.
 

Back
Top Bottom