It goes without saying, but it needs to to be said anyway. Be sure the tank is empty before removing the valve and this needs to be said in triplicate if there is any potential for oxygen to be in the tank. Removing a pipe threaded valve from a full air tank has the potential to launch it through your roof. Removing one from a full O2 tank, has the potential for an explosion as the friction of the theads being turned will generate enough heat for ignition.
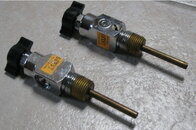
Some of the older 1/2" valves have been known to fail closed so that you cannot open the valve to release the contents. A tank in this condition, particularly an O2 tank, becomes a good candidate for the "I'd like to shoot a tank and see if it explodes" thread as I am aware of no safe way to remove the valve or release the contents.
Some of the older 1/2" valves have been known to fail closed so that you cannot open the valve to release the contents. A tank in this condition, particularly an O2 tank, becomes a good candidate for the "I'd like to shoot a tank and see if it explodes" thread as I am aware of no safe way to remove the valve or release the contents.
 ). The firsts technique can be very safe if you are somewhat familiar with the valves and you are careful. The second technique
well it is not too
too bad if you are very careful.
). The firsts technique can be very safe if you are somewhat familiar with the valves and you are careful. The second technique
well it is not too
too bad if you are very careful.")