Clearly I need to get out more…
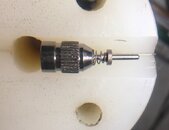
Here’s my procedure for overhauling a Jetstream servo or pilot valve that may be dribbling some gas… easily checked using my service test collar (shameless plug).
Often there are white crusty deposits on the tiny seat face that will have built up over time mainly through storing the reg with the +|- switch in the - position.
Typically the pin will sit at an angle off axis if this is the case .
First disassemble the valve and try to remove the deposits with a pickle in 50:50 white vinegar and water followed by an ultrasonic bath.
Fine 0000 steel wool used wet or as @rsingler advises using micro mesh on a wooden dowel as a final polish. Reassemble and test using the original seat, often just cleaning and polishing the seat face is all that is required.
I also designed a piloted carbide cutter to reface those seats too far gone but haven’t got round to RFQs yet… fairly limited market but in Australia the servo valve assemblies run A$120 each so well worth restoring if possible
Using a loupe check the face of the soft seat for tears or pitting, if it needs replacing the valve disassembly process is as follows:
Unscrew the valve from the stem
Push a short length of QTip plastic shaft into the end of the valve stem which will prevent the servo pin and spring from moving inwards, put servo assembly back on.
Use a piece of Blutack rolled into a small sausage to hold the tiny e-clip from springing off the conical spring as its compresed to reveal the e-clip from its cup, remove with jewellers screw driver and extract servo pin and tiny LP seat.
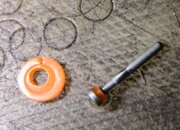
1) Use an old Cyklon LP seat as material (same colour, thickness and Duro material)
2) Drill 1.0mm hole which allows correct preload to the servo stem.
3) Drill a 1.5mm hole in a thick piece of plastic cutting board
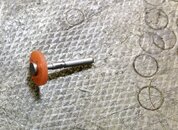
4) Push pilot stem though the 1.0mm hole in Cyklon seat
5) Push this assembly into 1.5mm hole, it will hold the stem with correct preload
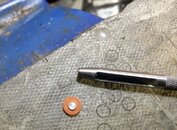
6) Use a very sharp 3.0mm hole punch which will pilot on the 3.0mm servo stem, lubricate with soapy water or silicone spray and one smart tap will punch it out.
7) Push captive pilot pin out from cutting board... done!
Theoretically this procedure will also work on XStreams but these have an additional plastic stem fitted to the end of the actuating pin, which prevents easy disassembly.
Not sure if this is simply pushed on or is moulded around some retention barbs but luckily so far none of my XSteams have ever leaked!
It’s now so easy to check


