Needed:
Instructions:
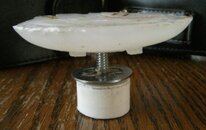
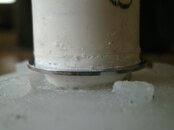
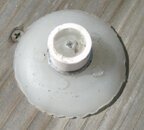
Casting the new diaphragm cover:
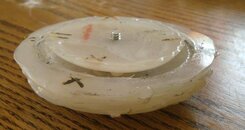
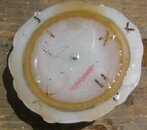
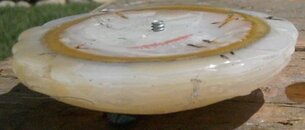

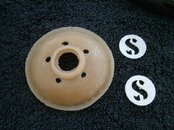
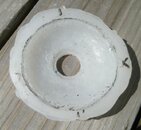
OK the edge looks a little ratty – but a whole lot better the the cover I made the mold from :-D
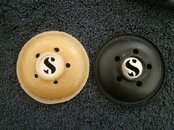
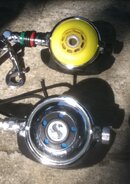
New made cover next to nice OEM cover.
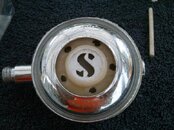
Finished results
I am currently working on a mold that does not damage one of my good covers. I plan on using 2 part casting plastic for this. I will report back on any successes.
If you want any more details, or if you would like to Beta test some of my earlier work (I have about 4 functional ones), just send me a PM. I am currently not planning on selling these, but might consider some trades.
FWIW I have a couple installed on my personal and active 109 adj regulators, with nothing but positive results.
- Old diaphragm cover.
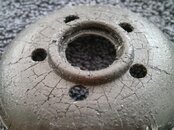 This will get further damaged.
 - Hot melt glue and gun
- SP metal logo or washer of the same dimensions
- ½” PVC pipe, 1” section
- Machine screw that will pass through the SP logo or your washer. It should be at least 1-1/4” long
- 2 part RTV (room temp vulcanization) urethane. I used the RTV Urethane system from TAP Plastics for my initial work, but switched to Reoflex 30 from Smooth-on.com. I like it’s consistency better. If you want a colored diaphragm cover add a small amount of coloring agent. So-Strong colorant from Smooth-On.com is compatible
- Small mixing container, with marks at 5 and 10 ml
- Stir stick. A tongue depressor with the end squared off works very well
- Mold release. I used Mann Ease Release 200
Instructions:
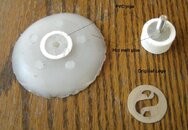
- Cut your PVC pipe section and lathe, file, or sand a small shoulder on one end so it will fit into the larger (outside) center hole in the diaphragm cover. You can use an appropriate sized washer to create this shoulder. You can fill any gaps with non-hardening modeling clay.
- Square the ends well. This will keep your mold level when casting.
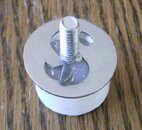
- Put the screw head-down in the PVC pipe with both standing vertically on your work space.
- Secure the screw in a vertical position anyway you want.
- Fill the PVC pipe with hot glue and place the SP logo (or washer) over the pipe. Make sure it is centered. Hold until the glue sets. You will now have a short section of PVC pipe with a small groove between the pipe and the logo. The screw will stand upwards for about a ½ inch.
- Clean your diaphragm cover well and use clay to fix any defects. It is not necessary or even easy to cover small surface cracks. They will show in the finished product, but that will give it an antique look without sacrificing function.
- Coat your diaphragm cover with mold release following the product directions
- Put the diaphragm cover on the pipe assembly by reinstalling the logo (or washer)
- Fill the inside of the diaphragm cover with hot melt glue. Glue will extrude from the 5 small water holes. This is no problem.
- Put the whole assembly in the refrigerator and walk away for 10 minutes.
- When cool trim the glue extrusion from the cover. Make it flush.
- Coat a flat work area with mold release
- Turn the assembly over and put the filled cover, pipe up, on your work surface.
- Coat the entire diaphragm with a thick layer of hot melt glue. You can work in layers or you can use a larger piece of pipe (with mold release) as a dam.
- Let cool thoroughly
- Mark the edges of both the outside and inside molds to keep the orientation consistant
- Push on the pipe while holding the outside edge of the outer mold to separate the 2 mold halves.
- Remove the old diaphragm cover and brush out any crumbles. The more you use the mold the fewer persistent crumbles you will have. They do not affect the function and when installed are not visible.


Casting the new diaphragm cover:
- Coat mold with mold release per the product instructions
- Assemble the mold, but leave a little extra space so the urethane flows in easier.

- Place on a LEVEL surface
- Mix at least 10 ml of the urethane per the product instructions
- Dribble the urethane mixuture into the mold from one spot. Let it fill to about 2/3 the way up
- Push the inner mold down into the final position and dribble more urethane mixture to fill the rim.
- Periodically check the level and refill the rim as needed over the next 2-20 minutes. Do not worry if the rim ‘spills’ a little.
- Walk away and DO NOT TOUCH for the next 16 to 24 hours (for the TAP product) Reo-flex cures sooner.


- After the cure time, unmold by pushing on the pipe while holding the rim of the outer mold. You may need to loosen up (or remove) the flashing.
- Put the diaphragm cover away for 7 days to fully cure. I do not recommend a heated “post-cure” in a hot melt mold. You may handle the diaphragm cover during this time.


OK the edge looks a little ratty – but a whole lot better the the cover I made the mold from :-D

New made cover next to nice OEM cover.

Finished results
I am currently working on a mold that does not damage one of my good covers. I plan on using 2 part casting plastic for this. I will report back on any successes.
If you want any more details, or if you would like to Beta test some of my earlier work (I have about 4 functional ones), just send me a PM. I am currently not planning on selling these, but might consider some trades.
FWIW I have a couple installed on my personal and active 109 adj regulators, with nothing but positive results.


![IMG_0185[1].jpg IMG_0185[1].jpg](https://scubaboard.com/community/data/attachments/125/125939-37ad7e9596c09093883b13df82ed8172.jpg)
![IMG_0181[1].jpg IMG_0181[1].jpg](https://scubaboard.com/community/data/attachments/125/125940-cdc392622cfa86d2d867d940266c77dc.jpg)
![IMG_0183[1].jpg IMG_0183[1].jpg](https://scubaboard.com/community/data/attachments/125/125941-3adecbf588fec51fbac8ddcf5b4eccf6.jpg)
