Um, maybe I'm misunderstanding the question, but if you have tank bands ie double bands, your NOT using an STA. The top tank band should be positioned so that the top of the band is where the curve on top of the tank turns straight. Once that is set, measure 11 inches from the bolt on the top band down and that will give you the location of the bolt on the second band. If your using a single tank adapter, aka STA, the bolt holes will be 11 inches apart.
You are using an out of date browser. It may not display this or other websites correctly.
You should upgrade or use an alternative browser.
You should upgrade or use an alternative browser.
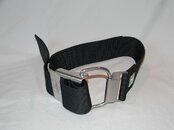
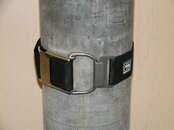
Highland Tank Bands with SS Cam Buckles and Halcyon STA
- Thread starter TheYellowSubmarine
- Start date
Please register or login
Welcome to ScubaBoard, the world's largest scuba diving community. Registration is not required to read the forums, but we encourage you to join. Joining has its benefits and enables you to participate in the discussions.
Benefits of registering include
- Ability to post and comment on topics and discussions.
- A Free photo gallery to share your dive photos with the world.
- You can make this box go away
TheYellowSubmarine
Contributor
Um, maybe I'm misunderstanding the question, but if you have tank bands ie double bands, your NOT using an STA. The top tank band should be positioned so that the top of the band is where the curve on top of the tank turns straight. Once that is set, measure 11 inches from the bolt on the top band down and that will give you the location of the bolt on the second band. If your using a single tank adapter, aka STA, the bolt holes will be 11 inches apart.
No doubles just yet. I'm using a STA, just replacing the *cam* bands with something easier to work worth
Dave616
Contributor
Does anyone have a diagram of how to thread the Highland tank bands? Thanks
Dave616
Contributor
Does anyone have a diagram of how to thread the Highland tank bands? Thanks
They are numbered on the back of the buckle just like Dive Rite buckles:
Dive Rite TV: How to weave a cam buckle
Hope that helps.
Does anyone have a diagram of how to thread the Highland tank bands? Thanks
A friend of mine just asked the same question. He is on the other coast so I tried to explain it and ended up E-mailing pictures. In the process I noticed that slot numbers on my plastic Oxycheq buckle are not the same, which made it all the more confusing. I didnt include the new resilient pad in the photos. Here goes, hope it helps:
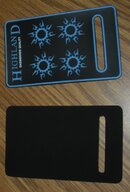
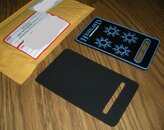
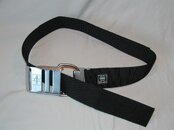
1 Orient Front.jpg and 2 Orient Back.jpg
Orient the band so that both Highland logos are facing in the same direction, stainless buckle to the left and the loop to the right. Connect the stainless hook to the buckle so the webbing is to the right. This step is not mandatory but makes the following directions work. For reference, the logo side of the buckle and webbing will be called front and the side of the buckle with numbers and the side of webbing without Velcro is the back.
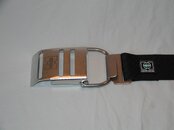
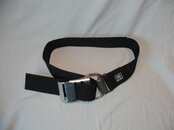
3 Step1.jpg
Pass the end of the webbing though the round-stock loop on the right end of the buckle from back to front. Velcro will face the front.
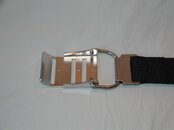
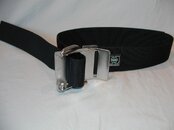
4 Step2.jpg
Pass the end of the webbing through slot 1 from the front to back. Slot one is the center of the three slots. Velcro will face back.
5 Step3.jpg
Pass the end of the webbing through slot 2, from the back to the front. Then pass the end past the end of the buckle through the round-stock loop from front to back. Slot 2 is the closest to the end of the buckle where the round-stock loop attaches. The Velcro is not your friend at this point but be patient.
6 Step4.jpg
Pass the webbing through slot 3 from the back to the front. The Highland logo stamped on the buckle should show.
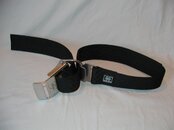
7 Assembled.jpg and 8 Installed.jpg
It should be ready to hook around a tank and cam tight.
Let me know if it makes sense to you or not.
Attachments
Dave616
Contributor
I wanted to update this thread since I have had the Highland Tank Bands for almost a year. I ordered two sets of these... man do I regret that. These tank bands are a pain in the a$$. The tank pad is not attached (at least on my 4 bands) and can come off quite easily. They are also much more difficult to cinch down. These take longer than normal bands to attach a tank.
My stainless steel Dive Rite bands are now my favorite, I'll be getting more to replace the XS Highland bands.
My stainless steel Dive Rite bands are now my favorite, I'll be getting more to replace the XS Highland bands.
Similar threads
- Replies
- 1
- Views
- 453
- Replies
- 32
- Views
- 6,539
- Replies
- 4
- Views
- 449
- Replies
- 16
- Views
- 3,493
- Replies
- 1
- Views
- 352


