


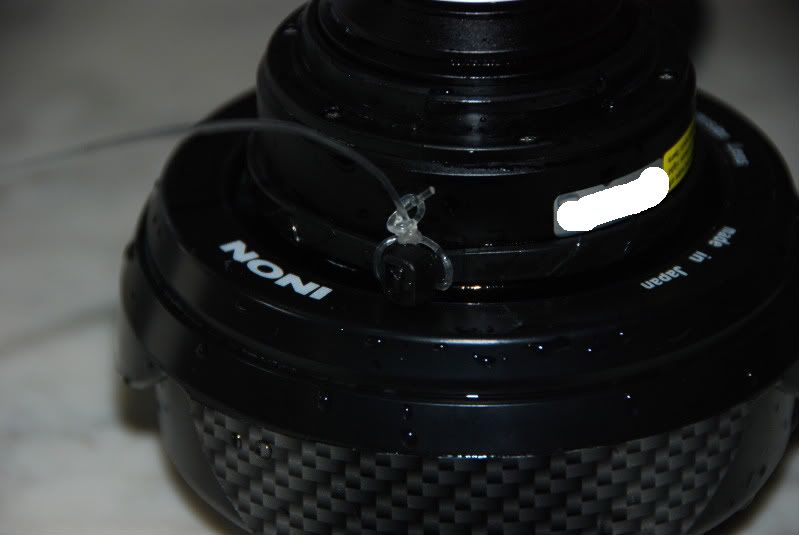
In conjunction with lens testing I posted in the Great Summer Wet Lens Shootout in the underwater photography forum I began to take a closer look at the 10Bar AD to 67mm adapter. I decided that I could reduce the thickness somewhat and improve the function with the Inon UFL165AD lens.
What I did was to first install the AD lens and note if it was "tight" or "loose" and mine was very tight indicating the grip length of the 10Bar adapter bayonet mount was not perfect. I then removed the lens from the adapter and then removed the 6 screws from the back separating the two pieces. I measured the front piece, the piece with the bayonet mount and mine was .34 inches thick.
OK, next I took two pieces of high quality paper wet and dry sandpaper, 180 and 400, and soaked them in warm water and set them on a piece of glass (I have a piece of plate glass I use for this type of thing) with a touch of Dawn soap. The soapy water sticks the paper nicely to the glass and then I put another drop of soap on top of the paper. Next, with the 400 grit I set the bayonet front piece down face first on the paper and worked it gently in a figure eight, rotating frequently to change pressure points. I went from .34 to about .30.
OK, the fit was better, now I could mount the lens and it was still snug but not tight and still locked nicely. Now, with the 180 grit, I set the bayonet piece down on it's aft side and sanded it using a figure eight and rotating frequently. Once it was down to about .26, I went to the 400 grit and finished up at about .25 OA thickness.
I reassembled the adapter pieces and found that the stack was now similar to my DIY version, still a touch thicker but very close and it did eliminate some vignetting to the point now that I could live with it for most shots. I could probably take it down to .23 and then I would be the same as my DIY version. I may do that next time I have time.
The goal, with the assembled adapter installed on the UFL165AD note that the metal surrounding the rear optical element is inset from the aft face of the adapter when installed into the 67mm FIX kit lens mount. With my DIY version this is FLUSH. This is the goal, flush to the aft surface of the FIX lens mount kit. If you go to far in addition to other bad things, if the lens is proud to the surface you may scratch the lens or camera port in use.
YRMV and I take no responsibility for the potential outcomes, especially if they are bad ones.
N


") . It is said you catch more flies with honey but then they are after all, flies, so not to sure I would want to catch them? This may be my new sig.
. It is said you catch more flies with honey but then they are after all, flies, so not to sure I would want to catch them? This may be my new sig.