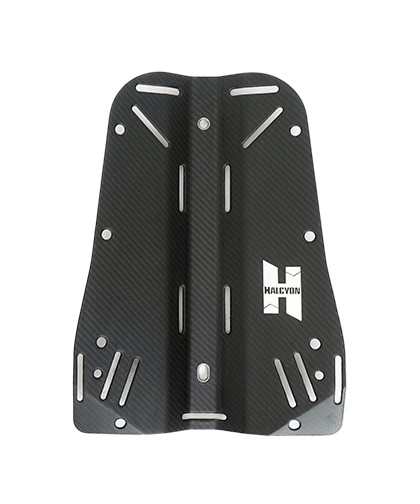
CF Backplate
Here is perhaps the most difficult system to make a backplate. I’ve made several backplates using aluminum and stainless steel now I want something new. I have some previous experience making composite parts, which is why I decided to make a carbon fiber backplate.
Design
I used my old design, just because I like it. I moved some grooves and hole positions because they were too near the outer edge for CF

Mold and Lamination
I designed the mold so that I could 3D print it. Because this was my first 3D printed mold, I made some mistakes with material selection and surface coating, but the final result is almost okay. After painting the molds, final grinding, and waxing mold was ready for lamination.
I prepared all materials ready because the epoxy I use has a handling time of just 30 minutes. For lamination, I used two layers of 240 g/m² for both surfaces; this gives a nice outlook, and inside I have 6 layers of 400 g/m² carbon fiber. This combination gives around 3.2 mm thickness.

Finishing
After grinding all the edges, I started to make holes using a milling machine. I designed and printed simple jigs to make the work easier. I also added some titanium grommets to every screw hole.
I planned to make a shiny surface, but for some unknown reason (not due to epoxy mixing), the thin surface coating layer did not dry well. I spent hours removing it, and the result isn’t very nice. For the next version, I will use a different resin.
Now I understand the process, tools, and materials, and I know how to do it next time. The next version will be perfect.

Br: Arto
Here is perhaps the most difficult system to make a backplate. I’ve made several backplates using aluminum and stainless steel now I want something new. I have some previous experience making composite parts, which is why I decided to make a carbon fiber backplate.
Design
I used my old design, just because I like it. I moved some grooves and hole positions because they were too near the outer edge for CF
Mold and Lamination
I designed the mold so that I could 3D print it. Because this was my first 3D printed mold, I made some mistakes with material selection and surface coating, but the final result is almost okay. After painting the molds, final grinding, and waxing mold was ready for lamination.
I prepared all materials ready because the epoxy I use has a handling time of just 30 minutes. For lamination, I used two layers of 240 g/m² for both surfaces; this gives a nice outlook, and inside I have 6 layers of 400 g/m² carbon fiber. This combination gives around 3.2 mm thickness.
Finishing
After grinding all the edges, I started to make holes using a milling machine. I designed and printed simple jigs to make the work easier. I also added some titanium grommets to every screw hole.
I planned to make a shiny surface, but for some unknown reason (not due to epoxy mixing), the thin surface coating layer did not dry well. I spent hours removing it, and the result isn’t very nice. For the next version, I will use a different resin.
Now I understand the process, tools, and materials, and I know how to do it next time. The next version will be perfect.
Br: Arto
")