New battery for my canister light
Firstly, I don't have the proper education nor much experience with lithium batteries so
the following isn't in any way a proper instruction and it may include wrong information.
I destroyed my old battery when we made winter diving in January. The battery hat safety locking mechanism was in ice and the lock was half-open when I jump into the water. 3 min/ 42m later my battery died… Time to make a new one and better!
About battery cells:
My choice is Sanyo NCR18650GA 3500mAh - Year after year this is inside the top 3 in every battery test.
Continuous discharge current (max) 10A is more than enough for my light. There are two cells available: Made in China and Made in Japan, which should in theory be similar, but they are not! Don't mix these cells in the same battery pack. Based on my tests, for some reason, the Made in China cells' capacity varies, however, all cells were still inside spec. I can't find this property in Japanese-made cells.
Step 1 Design
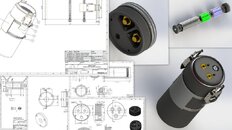
I spent one rainy weekend on the design and the result was two canisters sized 3S2P and 3S4P. Here are some photos so you can get the idea. I also add OPV (Over Pressure Valve) just in case. New construction is absolutely sealed.
 Step 2
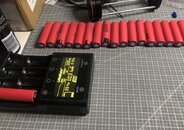
Buy enough batteries and test all of them. I use a LiitoKala charger/tester and then only use batteries that have a test result inside +/- 3% from each other - every new cell's discharge capacity has to be over 3500mA. (I use a 500mA charging and discharging current.)
 Step 3
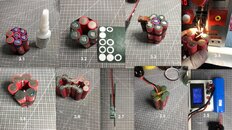
3.1 Glue cells together. CA is the best glue for this (one battery in the middle and a few rubber bands helps a lot). - For some reason, hot-melt glue doesn't work so well
3.2 Isolation tapes to the battery ends
3.3 (I made a simple tool that makes welding look more professional and symmetric)
3.4 Spot welding
3.5 Top part ready
3.6 Top and bottom part together
3.7 BMS installation, I use 20A
3.8 More isolation tapes to everywhere…
3.9 Warping, testing,ing, and labeling
 Step 4 Final installation
Step 5 Testing
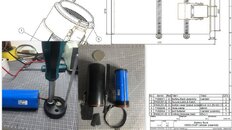
5.1 I make pressure test up to 100/30min. I don't have any window in my DIY pressure tester so my thinking is that if some gear doesn't withstand the pressure, it's better that it breaks in my lab.
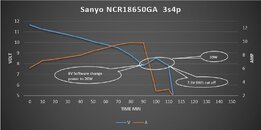
5.2 Burn test. - I take a sample every 10 minutes. This figure is very normal for my 80W light. I'm also happy with the new software now. When the voltage goes under 8V, the light automatically goes to 20W mode and can't change back to full power. The battery “recovers” and gives around 20 minutes of time to find a backup light or do something else. 20W light power is more than enough to continue diving.
 Step 6
Make a label that looks trustable enough for airport check-ins (I still need to update the label in the photo).
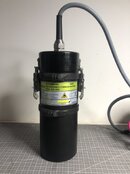 Final Specification:
- Waterproof 100m
- Model 3S4P
- Max output current 15A
- Capacity 14Ah
- Voltage 11.1V
- 115WAh
- Max charge current 2A
If you plan to make your own battery, the internet is full of good instructions, however, be careful not to burn down your home. Buy a spot welding machine and good enough tools for the job.
Good luck!
Br, Arto


