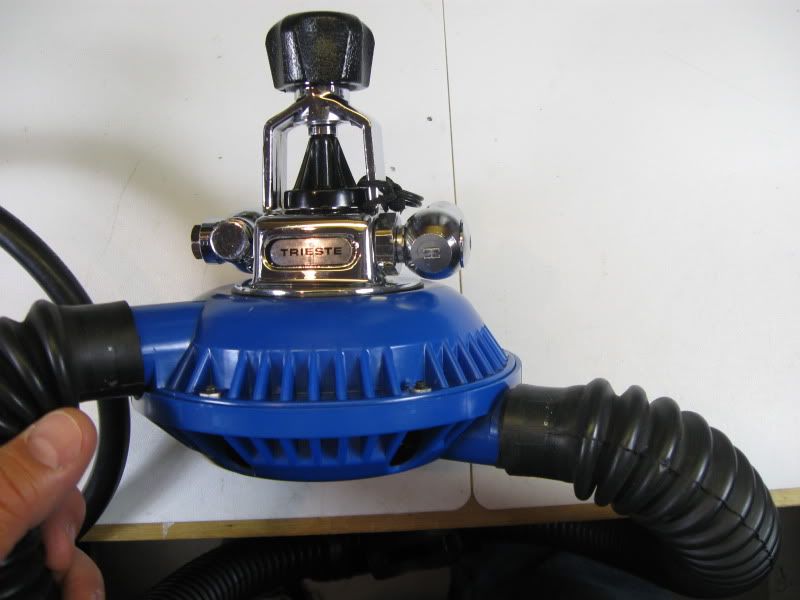
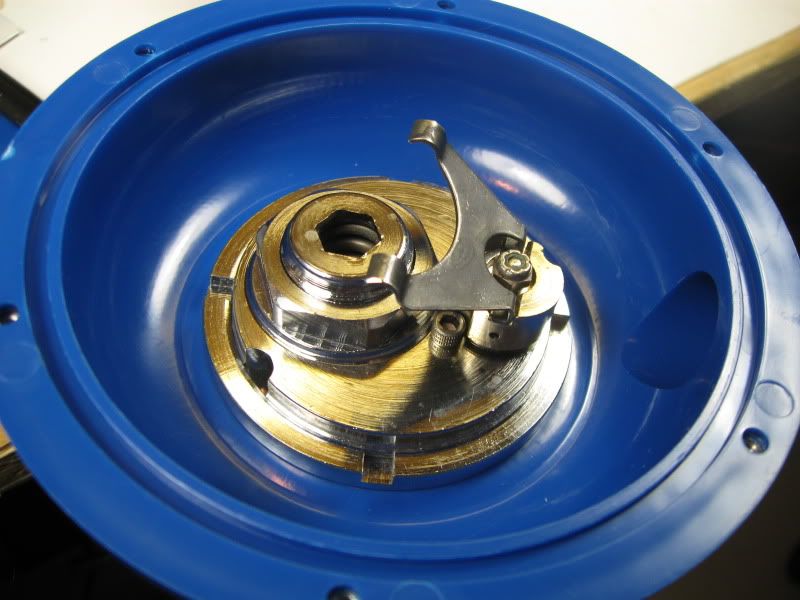
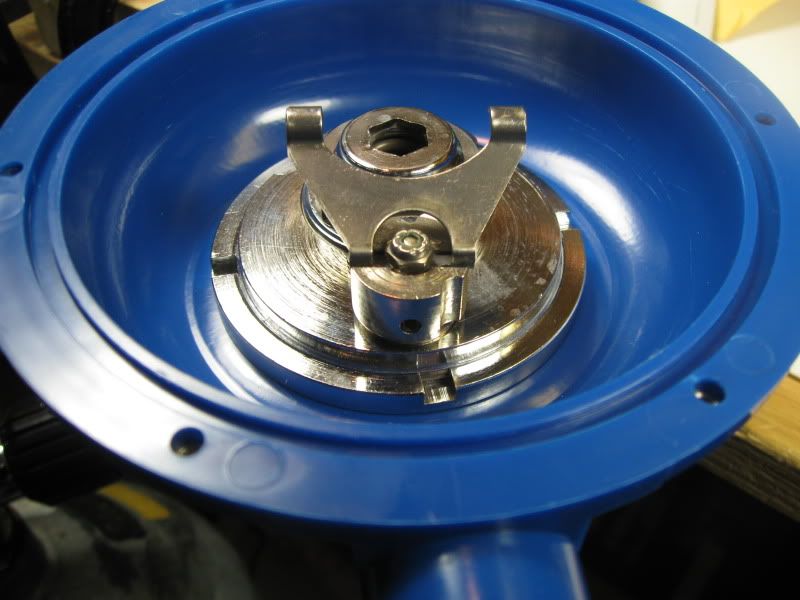
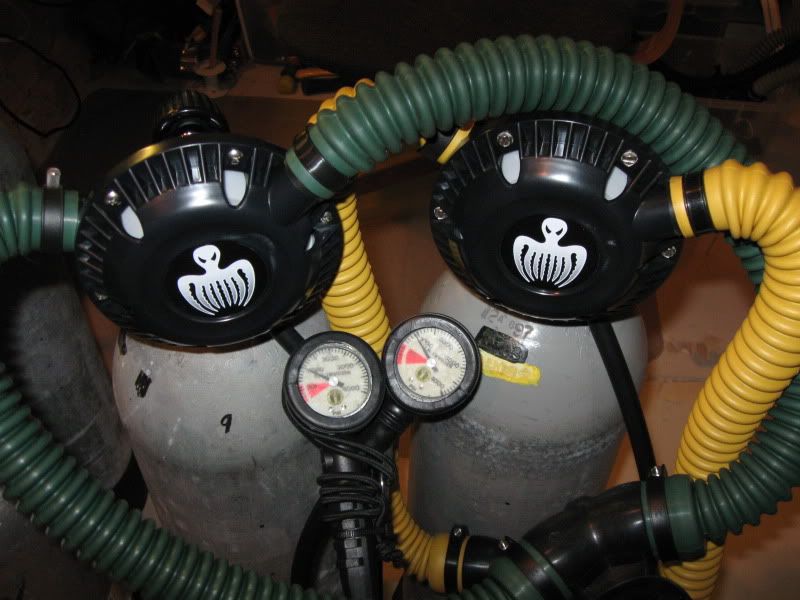
The Trieste II had several design problems. I have a Trieste II which breaths with less than 0.5 inches of suction effort, and goes down from there. I have made several modifications to it since I bought it new in about 1974. I have some photos to support the modifications that were made, some by a dive shop in BC Canada in the 1980s, and some by me. The dive shop asked that I send them the regulator, and they made modifications to the second stage housing.
--The problem with the second stage housing--it allows too much air to go back into the case, and not down the intake hose. The solution was to close off the back opening entirely, and open one on the side slightly.
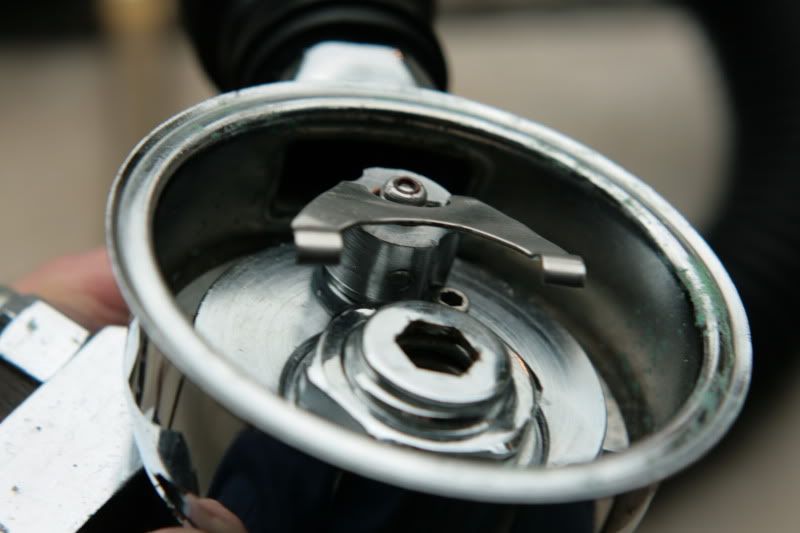
This photo shows the rear opening closed off (don't use lead solder though).

The right opening was left untouched.

The left opening was enlarged (I looked, and while I did at one time take measurements, I cannot currently find them).
--The Low Pressure Housing has a groove which aligns it to the intake hose. This groove has too much "play," and can allow the whole housing to rotate slightly from blowing air directly down the intake hose (see the photo above to see the set strew, which is not shown on some parts diagrams.
--The LP diaphragm is a problem, but not because it is too small. It is a problem because of the dome-shape. This shape causes it to be "stiff," but is actually a dome characteristic in structural building (it's strong). In order to pull it down, there is about a 1.5 inch suction effort, independent of the lever system (I measured it years ago) with the original diaphragm. I don't know about the silicone replacement now available, but Luis alluded to it above. What I did was to replace it completely with a home-made one. I took a diaphragm plate from another diaphragm, and glued it to a piece of rubberized fabric (much like the original MR-12 diaphragms). I cut it out large enough to fit the circle of the box's sealing surfaces. I then coated the sealing surfaces with silicone grease, and put a layer of clear Shoe-Goo on the surface (after I had built some books around the regulator to keep the sealing surfaces completely horizontal). The diaphragm was laid on this surface, then another layer of clear Shoe-Goo applied to the top of the diaphragm where the "bottom box" (now on top) would sit. I then gently placed the bottom box on top of the diaphragm, and put weights (books) on top. I allowed this to sit for about three days before separating the two boxes and examining the diaphragm. It looked very good, so I trimmed it to the right size, and had my own Trieste II diaphragm.

This is a top view of the diaphragm.

Here is a bottom view of the diaphragm.
This diaphragm holds a seal, and is very sensitive to inhalation (collapses easily).
--There is one more modification which must be made to complete this change; a baffle plate must be placed in the mouthpiece because this regulator will "blow by" the mouthpiece without it. I glued a Healthways baffle plate from their mouthpiece into the AMF Voit mouthpiece (actually a USD curved mouthpiece). This completed the changes.

One further change I made, which is no longer available, was to outfit it with "Superflex" hoses. These hoses are no longer available, but when they were I got them and I am glad I did. I think, with the greater number of convolutions, there is less air resistance down the intake hose, but have never quantified that.
I must tell you that if you decide to make changes on this level to this regulator, you must, must accept that you have modified a life safety device. These changes can lead to unexpected problems, such as the time when at 30 feet or so I exhaled, and went to inhale and had no air flow whatsoever! This was caused by the baffle plate coming loose, and adhering to the intake non-return valve, effectively sealing the intake tube instantly. Because of this, you will notice that I always dive it with the MR-12 second stage attached. In this case, I simply spit out the mouthpiece and switched to the MR-12 second stage to complete my dive (I was ascending to the surface at the time toward the end of the dive anyway). But whenever a regulator is modified to this extent, it must be tried out in a pool setting with a safe second immediately available in case of malfunction. In short, the modifications need to be validated in several tests to ensure that it is ready for open water.
John
--The problem with the second stage housing--it allows too much air to go back into the case, and not down the intake hose. The solution was to close off the back opening entirely, and open one on the side slightly.

This photo shows the rear opening closed off (don't use lead solder though).

The right opening was left untouched.

The left opening was enlarged (I looked, and while I did at one time take measurements, I cannot currently find them).
--The Low Pressure Housing has a groove which aligns it to the intake hose. This groove has too much "play," and can allow the whole housing to rotate slightly from blowing air directly down the intake hose (see the photo above to see the set strew, which is not shown on some parts diagrams.
--The LP diaphragm is a problem, but not because it is too small. It is a problem because of the dome-shape. This shape causes it to be "stiff," but is actually a dome characteristic in structural building (it's strong). In order to pull it down, there is about a 1.5 inch suction effort, independent of the lever system (I measured it years ago) with the original diaphragm. I don't know about the silicone replacement now available, but Luis alluded to it above. What I did was to replace it completely with a home-made one. I took a diaphragm plate from another diaphragm, and glued it to a piece of rubberized fabric (much like the original MR-12 diaphragms). I cut it out large enough to fit the circle of the box's sealing surfaces. I then coated the sealing surfaces with silicone grease, and put a layer of clear Shoe-Goo on the surface (after I had built some books around the regulator to keep the sealing surfaces completely horizontal). The diaphragm was laid on this surface, then another layer of clear Shoe-Goo applied to the top of the diaphragm where the "bottom box" (now on top) would sit. I then gently placed the bottom box on top of the diaphragm, and put weights (books) on top. I allowed this to sit for about three days before separating the two boxes and examining the diaphragm. It looked very good, so I trimmed it to the right size, and had my own Trieste II diaphragm.

This is a top view of the diaphragm.

Here is a bottom view of the diaphragm.
This diaphragm holds a seal, and is very sensitive to inhalation (collapses easily).
--There is one more modification which must be made to complete this change; a baffle plate must be placed in the mouthpiece because this regulator will "blow by" the mouthpiece without it. I glued a Healthways baffle plate from their mouthpiece into the AMF Voit mouthpiece (actually a USD curved mouthpiece). This completed the changes.

One further change I made, which is no longer available, was to outfit it with "Superflex" hoses. These hoses are no longer available, but when they were I got them and I am glad I did. I think, with the greater number of convolutions, there is less air resistance down the intake hose, but have never quantified that.
I must tell you that if you decide to make changes on this level to this regulator, you must, must accept that you have modified a life safety device. These changes can lead to unexpected problems, such as the time when at 30 feet or so I exhaled, and went to inhale and had no air flow whatsoever! This was caused by the baffle plate coming loose, and adhering to the intake non-return valve, effectively sealing the intake tube instantly. Because of this, you will notice that I always dive it with the MR-12 second stage attached. In this case, I simply spit out the mouthpiece and switched to the MR-12 second stage to complete my dive (I was ascending to the surface at the time toward the end of the dive anyway). But whenever a regulator is modified to this extent, it must be tried out in a pool setting with a safe second immediately available in case of malfunction. In short, the modifications need to be validated in several tests to ensure that it is ready for open water.
John
Last edited:


