My GoPro 3D setup

Please register or login

Welcome to ScubaBoard, the world's largest scuba diving community. Registration is not required to read the forums, but we encourage you to join. Joining has its benefits and enables you to participate in the discussions.

Benefits of registering include

  • Ability to post and comment on topics and discussions.
  • A Free photo gallery to share your dive photos with the world.
  • You can make this box go away

Joining is quick and easy. Log in or Register now!

I'll be happy to lower the cost of that sheet even further by purchasing your leftovers! All I need is 1.5" X 3" ;)

I thought you might be.

I'm waiting to learn whether they have anything with a wider spread---their web site mentions 80 degrees---and how delicate it is. Don't want to destroy it trimming it into shape.
 
Just got an RMA # from GoPro, they want to check out my left camera to see if it's causing my frequent lockup problems.


Will be getting a sample sheet Holographic diffuser in a week or so. They weren't sure of the exact spread angle but said it has a target spread of about 90 degrees.
 
Received a replacement GoPro yesterday but no explanation what, if anything, was wrong with the original.

No sign, yet, of the holographic diffuser---I hope they haven't forgot about me.
 
I've been up to my ears with music this week so haven't tested it. I'll try to spend some time with it this weekend (and maybe get in a dive) and report back.

Here's what they said about the original camera:

Looks like there was a faulty Bus Port (the port on the back of the camera) that was causing this issue.
 
Haven't had a chance to get pictures or test it underwater but the other day in Home Depot, the rack where all of the bungees, straps and trailer hitches are. There are small cardboard trays with the hitch adapters, etc in them. On the bottom of these trays are white opaque pieces of plastic. held it up in front of my DRIS 1,000 lumen last night and the beam went from a light saber to lighting up the entire room - brightly. I will be cutting a piece and trying it as soon as I can.

On another note, the DRIS light with the reflector removed throws almost the same exact beam as the Sea to Sea video light, and is slightly brighter. At 36" from a wall, it throws about a 36" circle on the wall, with very sharp edges. Haven't had a chance to play with it more.

I'll try to get pics posted of the freebie plastic diffuser from Home Depot this weekend as work allows.
 
Has the replacement fixed the lockup issues you had?

Short answer, no. I suspect the battery from the camera they replaced has problems too.

Long answer, with apologies 'cause this is convoluted:

First, let me define some terms since it's a 3D setup and there are multiple cameras and batteries involved. I have marked each camera L for left and R for right. The left camera was replaced and I'll call the replacement L or left as well. I will call the battery in the original left camera A, and the battery from the right camera B---this is necessary 'cause I'm going to swap batteries later.

Ok...yesterday I put the 3D setup together to test the cameras and found battery A---which had been stored loose---virtually drained while battery B, stored in the right camera fully charged. Both batteries were fully charged a week or two ago, before I returned the old left camera. I had just enough juice to shoot a short clip then turned them off and disconnected cable between the cameras so I could recharge them. When I disconnected the right camera it started recording video (even though nominally off) and hung when I tried to turn it back off, necessitating a battery pull.

I recharged the batteries, set them up again, and spent much of the afternoon shooting short clips turning the cameras off between clips. I wanted to go through multiple power cycles as this seemed to trigger latchups before. This actually went fairly well with no latchups, but after 3 or 4 hours and about 10 clips shot battery A (still in the left camera) was fully drained while battery B still had 3 bars showing.

This morning I re-charged the batteries and swapped them---A went into the right camera and B into the left. I set up the 3D configuration and at 11:55AM took 1 brief clip and turned the cameras off. My plan was to simply turn them on every hour or so to see if the batteries drained while off. Here's what happened:

12:55PM Right (A)=2bars, Left (B)=3bars. The left camera turned off normally but the right camera could not be turned off and was quite warm. I pulled and replaced battery B in the right camera and reconnected the cameras. The left camera now wouldn't turn on and I had to cycle its battery (A) too. Both cameras worked after this---I shot another short clip and turned them off.

1:55PM Right (A)= 2bars, Left (B)=3bars. Normal turn on and turn off, no clip shot.
2:55PM Right (A)= 2bars, Left (B)=3bars. Normal turn on and turn off, no clip shot.

I then left to go play music with friends, continuing the experiment when I returned:

7:30PM Right (A)= 2bars, Left (B)=3bars. Normal turn on and turn off (I thought), no clip shot.
8:35PM Right (A) was hot and displayed zero bars, Left (B)=3 bars. The right camera was hung, could not be turned off so I replaced the battery.

That ends the experiment. I connected the USB cables. The Right (A) camera is charging, the Left (B) camera isn't, the battery is still full.

Anybody still with me?

It seems clear to me there's a problem with the A battery and a possible, but not certain, connection between the battery problem and the hang-ups. I suspect the problem is related to the 3D cable connection too, but haven't tested the cameras independently to be sure. I'll run all this by their technical supprt and see what happenes. I was planning on getting a second set of batteries anyway & if they dilly-dally I may end up testing the cameras with new batteries.

---------- Post Merged on August 27th, 2012 at 02:40 PM ---------- Previous Post was on August 26th, 2012 at 09:26 PM ----------

Replacement battery is on it's way.
 
Last edited:
So...I recieved the replacement battery and made a dive a few weeks ago using two external white diffusers. The light spread was wonderful, but the intensity was pretty low:

Dive 307 090312 - YouTube

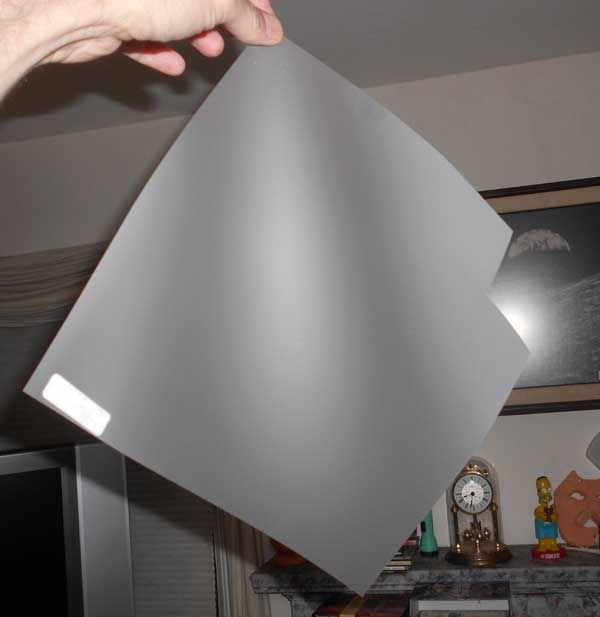
I just recieved a sample 10" x 10" Holographic diffusor sheet from Wavefront technologies.

WaveFront Technology Inc. - Tailored Micro-Diffusers - TMD Films

It's a microscopic engineered film on a 5Mil sheet of PET plastic, easily trimmed with a pair of sissors or razor. Here's a picture of the sheet with my first diffuser cut out of one corner:

Holographic-diffuser-sheet_zpsdfbfe415.jpg


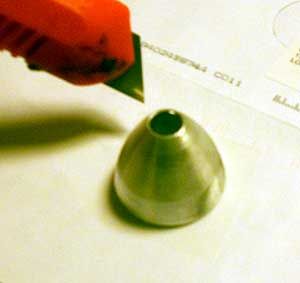
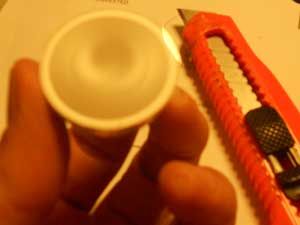
I trimmed it with a box cutter using the reflector as a template. This sandwiches it between the reflector and lense which could effect the o-ring seal, but I'm hoping it's thin enough not to matter.

trimming-diffuser_zpscbf5c330.jpg
trimmed-diffuser_zps3f11b362.jpg


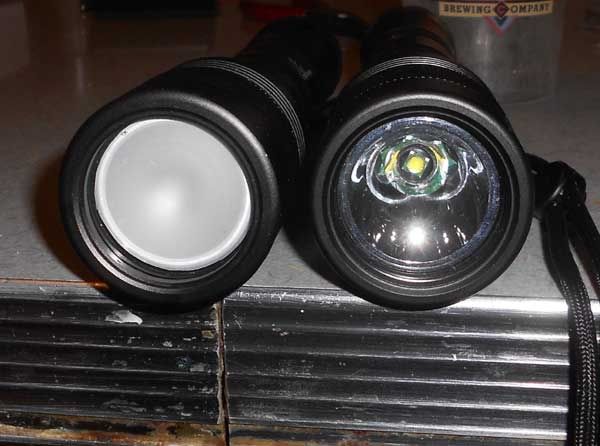
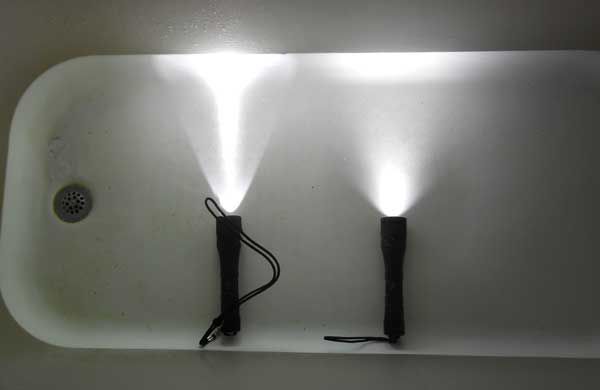
Here's my first prototype next to an unaltered light:

with-and-without-holographi_zps7c33448b.jpg


Here's a side-by-side comparison of the unaltered light on the left and the holographic diffuser on the right:


holographic-diffuser-side-b_zps94dec03b.jpg


The beam spread isn't as wide as the white diffuser, but the light is very uniform & these films are supposed to transmit up to 90% of the light where the white diffuser os only transmits about 45%.

I'm expecting a pair of steel 120's Tuesday & will try to get a dive in with the holographic diffusers soon.

---------- Post Merged at 09:27 PM ---------- Previous Post was at 09:23 PM ----------

Forgot to mention, this is a 60 degree spread film, the widest they make in routine production.


do you have any video with this yet?
 

Back
Top Bottom