Low flow through S600

Please register or login

Welcome to ScubaBoard, the world's largest scuba diving community. Registration is not required to read the forums, but we encourage you to join. Joining has its benefits and enables you to participate in the discussions.

Benefits of registering include

  • Ability to post and comment on topics and discussions.
  • A Free photo gallery to share your dive photos with the world.
  • You can make this box go away

Joining is quick and easy. Log in or Register now!

It was kind of a joke ... because the stock G250HP came with that bushing as a shim. SP 107.00.105.
You got me.
Damn. Learning something new every day. Scubapro is famous for "repurposing" parts rather than designing new ones. I'll have to look at the reg dimensions in more detail now, to see why the stock .216 spring needed such a long shim above its joint with the balance chamber.
But I think it's the other Mk25 ring 01.060.607.
Still... huge!

Thanks!!
 
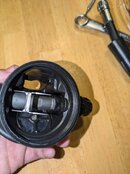
Based on your description, you may indeed be describing the click and resistance as the plastic disc on the back of the diaphragm drops with minimal effort on gentle inhalation until it hits a low lever, and you then feel "resistance" until the valve opens ("cracks").

If you can see the lever moving as you adjust the orifice, then here's a test.
Unscrew the orifice until the lever is at its highest position. Blow through the hose connection and screw in the orifice until it seals to breath pressure.
Connect your inline adjuster and pressurize the system. It will again leak. Screw in the orifice until it just seals.
Is the lever at or below the rim of the case? Did the lever drop before it sealed? In either case, your orifice knife edge is likely scuffed (assuming you're using a new seat). If you're trying all this with the old seat, all bets are off for reasons that are multi-factorial. It might work; it might not.

If the lever is above the case rim and didn't drop before sealing, you're halfway there. Now add 1/12 turn (5 minutes on the clock face). The lever may drop 0.5mm.
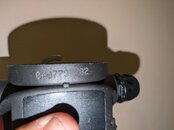
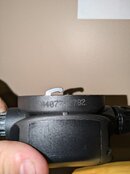
Now, with the reg pressurized add the diaphragm and begin screwing on the faceplate.
If the reg begins to leak, the lever is slightly too high for the case. When the faceplate is fully screwed on, once again slowly screw in the orifice with the in-line adjuster to drop the lever until it just seals (e.g., just fits under the diaphragm). Now add 1/12 turn.

Measure cracking effort and let us know.
I VERY much appreciate your help with this. I've got everything set up on my workbench to do this. Two questions:
1) I assume that the balance chamber adjustment knob should be all the way out?>
2) Would you expand a little on the "lever dropping" before sealing? I'm not quite sure what I'm looking at there.
 
I'm  very uneasy describing lever adjustment by post. It's how divers can truly injure themselves.
That said, you've clearly started experimenting, so let's keep you on track.

1) Yes.
2) You described that the lever "raises/lowers appropriately when orifice adjustment tool is rotated." When it lowers with clockwise rotation of the orifice, that's a "dropping lever".

So... let's watch that lever movement as you try to seal the valve. Raise the lever by unscrewing (counterclockwise). Seal the valve to breath pressure by screwing in (clockwise) a little bit at a time before each breath. Now go from a few psi to 135psi by pressurizing the reg. When you make that shift in pressure, the valve will again leak.

Screw the orifice in clockwise while you
a) listen for the leak to stop (valve seal), while you simultaneously
b) watch the lever with the reg held horizontal. Does the lever start dropping as you screw in the orifice before the valve seals? That's bad.
 
Thanks for the clarification. I thought that's what you meant, but I wanted to make sure.

Doing the recommended test, there was NOT an appreciable drop in the lever when I sealed between the "breath seal" and 135psi levels (I've attached before/after pictures...parallax being what it is, they aren't useful to confirm that I didn't see a drop while watching during the adjustment, but perhaps it shows that the lever remained above the case rim). As expected, there was a bit of a leak when the diaphragm and faceplate were reinstalled. After readjustment plus 5minute's rotation, cracking pressure was 1.1. The feeling of reduced flow with normal breathing persists, but notably I didn't appreciate the "diaphragm smacking" on inhalation this time.
 

Attachments

  • before.jpg
    before.jpg
    46.8 KB · Views: 51
  • after.jpg
    after.jpg
    52.9 KB · Views: 46
Hmmm

I'm out of suggestions, barring an eraser inside.
Seriously, It speaks to some kind of flow obstruction, OR a complete lack of Venturi flow augmentation. Couldn't say without doing a dynamic flow test and/or taking it apart.

I presume the VIVA vane inside the mouthtube is intact? And the test was done in "Dive" and not "Pre-dive"?

There's one more trick...
Is the scalloped cutout in the VIVA vane facing forward toward the diaphragm, or backwards towards the mouthtube?

If you want to send it to me, it'd be fun to evaluate and fix.
 
This trick was in the R190 manual and taught early on, but has been long forgotten in the recent Scubapro Technician Seminars.
Screenshot_20240706-174714_OneDrive.jpg

But removing and reversing that vane without breaking it takes a bit of finesse.
 
This trick was in the R190 manual and taught early on, but has been long forgotten in the recent Scubapro Technician Seminars.
View attachment 849849
But removing and reversing that vane without breaking it takes a bit of finesse.
So first of all, thank you SO much for taking the time to help with this, especially if it pushed you past your comfort zone. I've copies of Wolfinger and Harlow, but when it comes to fixing problems instead of theory or routine maintenance and tuning, I'm still very green. I've learned a LOT this evening.

In the meantime, attached is a picture of my flow vane (in dive position). The notch is, in fact, directed towards the mouthpiece (minimum viva). I'm not sure which is standard from factory, but reversing it according to your reference above is certainly the next step. Any tips to achieve the necessary "finesse?"
 

Attachments

  • PXL_20240707_010052471.jpg
    PXL_20240707_010052471.jpg
    79.4 KB · Views: 55
Yes, the rental position is the standard delivery from the factory, and as I noted, they don't even teach how to get max performance any more, because so many divers are less thoroughly trained than in the past. Freeflows often frighten folks as they lose 1000 psi of gas after giant stride.

Large curved needle nose pliers, grasping the vane from both sides closest to the knob.
Use the curve to brace against the opposite inside of the mouthtube and pry. It's gonna be stiff.
See the Scubatools picture here:

And reinserting it has to be perfectly on axis, to get the little end button into the recess. Otherwise, the thin vane will snap.
 
Another nice surprise!
The VIVA vane trick is authorized for the S600 as well:
Screenshot_20240706_190736.jpg
 
Another nice surprise!
The VIVA vane trick is authorized for the S600 as well:
View attachment 849865
I noticed that in the S600 manual, too, after you pointed it out in the r190 manual! I'm really surprised that a "high end" regulator comes standard in "rental gear" mode, and the fix isn't routine knowledge. Oh well, that's why I'm trying to learn every in and out of my own gear, and why I've found the fund of knowledge on this board to be irreplaceable.

I'll try the pliers trick, though with that tool being fairly inexpensive I might just break down and get one. I'll let you know how it goes!
 

Back
Top Bottom