Leisure Pro Brett
Contributor
Scubaboard has been a great resource for me and it’s truly a wealth of information for any diver. I have taken so much good information from here I think it’s about time to give some back.
I was recently getting ready for a dive trip and found myself with a low battery in my d9 and not enough time for it to get to aqualung for a change. I figured I could risk it and hope the battery held up for the dives or I could try to change it myself. After a little encouragement from Hoosier in this thread, I decided to give it a try myself. Since I couldn’t find any info on changing the D9 battery on the net I took some pictures of the process so everyone can see how it’s done. NOTE: This information has no affiliation with LeisurePro, it is just something I did myself for the ScubaBoard community. Neither LeisurePro nor myself encourage anyone to change their own D9 battery. If you do open your computer and it floods it’s your fault, not mine, if your not comfortable with that then leave your computer alone. With that said, on with the show.
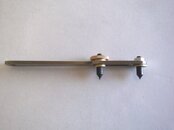
1. Here is the tool I used to open the D9, it was taken from my $15 ebay watch battery change kit that I got a year or so ago. At it’s widest setting it works great for opening the D9.
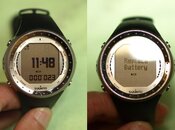
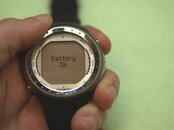
2. When you see this on your screen, it’s time to get the battery taken care of before it’s completely dead.
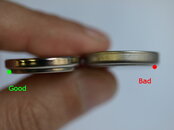
3. There are some CR2450 batteries that will not fit, the neck less version on the right doesn’t like the battery compartment in the D9. The one on the left is the type you want to use in the computer.
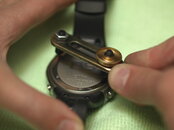
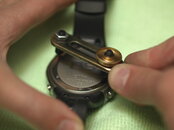
4. Be sure to place the face of the watch on a surface that will not scratch or damage it. You also want to make sure the surface is clean so that you will not contaminate the inside of the watch with dust or lint. Before opening the watch make a special note of how flush the retaining ring is sitting on the watch for reference when you are putting it back together. Using the wrench to loosen the retainer, hold your watch in place grabbing the bands where they connect to the watch case. Once it is loose you can just remove it the rest of the way with your fingers.
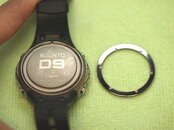
5. Once the retaining ring is removed make a quick check to remove any crust you may encounter on the bottom of the retainer or around the case back.
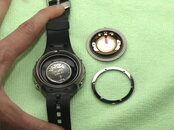
6. Remove the case back and clean it thoroughly around the sealing surface on the bottom side.
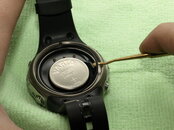
7. Remove the o-ring using a tool that will not scratch the watch case or harm the o-ring.
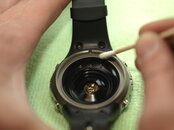
8. Remove the old battery and clean the thread area and sealing surfaces inside the watchcase to ensure a good seal when it is put back together.
I was recently getting ready for a dive trip and found myself with a low battery in my d9 and not enough time for it to get to aqualung for a change. I figured I could risk it and hope the battery held up for the dives or I could try to change it myself. After a little encouragement from Hoosier in this thread, I decided to give it a try myself. Since I couldn’t find any info on changing the D9 battery on the net I took some pictures of the process so everyone can see how it’s done. NOTE: This information has no affiliation with LeisurePro, it is just something I did myself for the ScubaBoard community. Neither LeisurePro nor myself encourage anyone to change their own D9 battery. If you do open your computer and it floods it’s your fault, not mine, if your not comfortable with that then leave your computer alone. With that said, on with the show.

1. Here is the tool I used to open the D9, it was taken from my $15 ebay watch battery change kit that I got a year or so ago. At it’s widest setting it works great for opening the D9.

2. When you see this on your screen, it’s time to get the battery taken care of before it’s completely dead.

3. There are some CR2450 batteries that will not fit, the neck less version on the right doesn’t like the battery compartment in the D9. The one on the left is the type you want to use in the computer.

4. Be sure to place the face of the watch on a surface that will not scratch or damage it. You also want to make sure the surface is clean so that you will not contaminate the inside of the watch with dust or lint. Before opening the watch make a special note of how flush the retaining ring is sitting on the watch for reference when you are putting it back together. Using the wrench to loosen the retainer, hold your watch in place grabbing the bands where they connect to the watch case. Once it is loose you can just remove it the rest of the way with your fingers.

5. Once the retaining ring is removed make a quick check to remove any crust you may encounter on the bottom of the retainer or around the case back.

6. Remove the case back and clean it thoroughly around the sealing surface on the bottom side.

7. Remove the o-ring using a tool that will not scratch the watch case or harm the o-ring.

8. Remove the old battery and clean the thread area and sealing surfaces inside the watchcase to ensure a good seal when it is put back together.


