Confirm part number to add adjustment to SP S555

Please register or login

Welcome to ScubaBoard, the world's largest scuba diving community. Registration is not required to read the forums, but we encourage you to join. Joining has its benefits and enables you to participate in the discussions.

Benefits of registering include

  • Ability to post and comment on topics and discussions.
  • A Free photo gallery to share your dive photos with the world.
  • You can make this box go away

Joining is quick and easy. Log in or Register now!

uncfnp

Solo Diver
Messages
7,096
Reaction score
6,393
Location
Home
# of dives
None - Not Certified
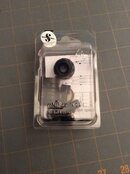
To the Scubapro gurus. I am taking advantage of an offer for the parts to upgrade my S555's with the breathing adjusting assembly. According the the S600 schematic I have, it looks like part number 11600031. The "Kit, New Knob Assy"

Hoping someone can confirm that this is the part number for all the components needed for the upgrade.

Thanks guys.
 
I have purchased a number of those kits (11-600-031) from an eBay provider to upgrade a S555, S360 and older S600's. When I tried from my LDS they provided only the knob, I used the same part number.

Depending on the barrel you may need to make a mod or get a new one! The barrel needs to have a 'lug' that the body of the adjuster engages. The kit comes with a spacer that has a lug, I have glued this to an older barrel.
 
Last edited:
Thanks Tbar. The price did seem too good. Will try to get futher clarification.
 
Update. Thanks to a friend going the extra mile he was able to confirm that the part number was indeed the full kit. So I placed the order and got the kit a few days ago. Haven't had a chance to modify my regulator yet but the kit looks exactly as I had hoped.
 

Attachments

  • IMG_2245.JPG
    IMG_2245.JPG
    74 KB · Views: 146
Update. Thanks to a friend going the extra mile he was able to confirm that the part number was indeed the full kit. So I placed the order and got the kit a few days ago. Haven't had a chance to modify my regulator yet but the kit looks exactly as I had hoped.

uncfnp,

I PM'd you regarding more info on this. Can you confirm that the part number was 11-600-031? In the exploded view of a 2012 model, it shows "Knob Assemby" as 11-602-031...it's close, but only seems to include the actual knob and spacer ring...

EDIT

I found an '05 exploded view with that assembly kit and part number (11-600-031). (Thanks VintageDoubleHose) Looks like a Rev A item, but I am not sure about all the revisions. I have seen revisions out to N and the exploded views I have, do not include which revision they represent. I have 3 S600's and they are all different from the covers, to knobs, to the case ring (or not), from composite jam nut to metal and spacer ring on the jam nut to no spacer ring...I'm not sure which revision is which....I think the most significant was from B to A when the Adjustment Assembly changed. The air barrel changed from plastic to metal at some point too. The Service Manual with A and B revisions is the only one I can find, and it also includes the S550 which I am trying to upgrade. The rest of the revisions seem to be cosmetic...maybe someone can clear that up or provide a link?

Edit#2

Found the entire S600 history. Guess I had to ask before I could find it myself!

Regards,

Jarrod
 
Last edited:
Another update. Just had a chance to work on my S555 and try the modification. Fits perfectly although I still need to adjust it. I seem to be genetically missing the brain cells that allows one to follow written directions so it will be trial and much error on my part to get it right.

Can anyone tell me if I need to turn the "adjustment screw" (part #32) clock or counterclockwise to increase the effort when the external adjustment knob is all the way out. Right now it starts to freeflow with the external knob about half way out.

Edit: By George I think she's got it! Now on to the next one.
 
Last edited:
I don't have an S555 diagram but if the adjustment you are asking about is the balance chamber: clockwise to increase, counterclockwise to decrease. Same for the diver adjustment knob. Generally, anything that increases spring pressure will increase cracking pressure.
 
Another update. Just had a chance to work on my S555 and try the modification. Fits perfectly although I still need to adjust it. I seem to be genetically missing the brain cells that allows one to follow written directions so it will be trial and much error on my part to get it right.

Can anyone tell me if I need to turn the "adjustment screw" (part #32) clock or counterclockwise to increase the effort when the external adjustment knob is all the way out. Right now it starts to freeflow with the external knob about half way out.

Edit: By George I think she's got it! Now on to the next one.


It is trial and error without an in-line adjustment tool, but can be done. I open the knob fully and adjust cracking pressure to just a SMALL hiss fully open. Then it breathes REALLY nicely at depth. It takes about 10 seconds with the tool. Unless you're lucky, somewhat longer without it.
 
It is trial and error without an in-line adjustment tool, but can be done. I open the knob fully and adjust cracking pressure to just a SMALL hiss fully open. Then it breathes REALLY nicely at depth. It takes about 10 seconds with the tool. Unless you're lucky, somewhat longer without it.
Hey Jarrod. Did you find the information you needed?

I have an inline adjustment tool but its not the orifice but the balance adjustment screw that was causing the freeflow. The service manual I had originally consulted was missing this key information but I found another copy and it had exactly what I needed. And with pictures! :wink:

Its the first diagram...
 

Attachments

  • IMG_2508.PNG
    IMG_2508.PNG
    194.8 KB · Views: 79
Hey Jarrod. Did you find the information you needed?

I have an inline adjustment tool but its not the orifice but the balance adjustment screw that was causing the freeflow. The service manual I had originally consulted was missing this key information but I found another copy and it had exactly what I needed. And with pictures! :wink:

Its the first diagram...

Cool. Glad you figured it out. I did get the parts I needed. It worked out very well. Now I have a couple of MK20's I'm trying to get MK25 upgrade kits for. Found composite pistons on the Bay...trying to find MK25 caps with the adjustable IP screw. Tired a screwing around with the shims!
 
https://www.shearwater.com/products/teric/

Back
Top Bottom