Burst Disk Differences?

Please register or login

Welcome to ScubaBoard, the world's largest scuba diving community. Registration is not required to read the forums, but we encourage you to join. Joining has its benefits and enables you to participate in the discussions.

Benefits of registering include

  • Ability to post and comment on topics and discussions.
  • A Free photo gallery to share your dive photos with the world.
  • You can make this box go away

Joining is quick and easy. Log in or Register now!

randy88k5

ScubaBoard Supporter
Messages
750
Reaction score
558
Location
New Orleans, LA
# of dives
200 - 499
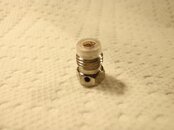
I am in the process of O2 cleaning a Thermo 200 bar DIN valve, and I am changing the burst disk. I anticipated that this would have the three-piece style, but the one that came out was the plug assembly. I have a few standard burst disk assemblies on-hand. However, the one I took out does not look exactly like the new one I have. The biggest difference I see is the nylon washer. I do not see where it will fit into this valve.
P5210076.jpgP5210078.jpgP5210079.jpg

I am a little new to gear servicing. Let me know what is the correct piece to use. Thanks.

-Randy
 
It looks like you are replacing a 3 piece assembly with a one piece assembly (or you had a one piece assembly separate.) Make sure you remove the washer, burst disc and of course the plug. Install the one piece in their place. Torque quickly to 80-100 inch lbs.

The only other thing is to make sure you have the correct burst pressure. Burst Discs - Northeast Scuba Supply
 
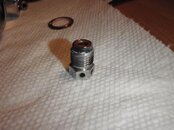
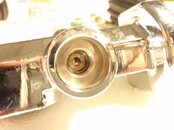
Well, I am fairly sure the piece that came off of the valve is a one-piece burst disk assembly. That is the picture on the the left. The middle picture is of the burst disk cavity. The third picture is a burst disk that I have already. I wasn't anticipating to use it on this valve, but I will if it is the correct one. I would like to get this done soon. However, I think the new burst disk I have is different than the one that came out. I don't see a plastic washer on the old one. Could it have been left out on a previous rebuild and not cause a problem?

Yes, the disk I have already is of the correct burst pressure.
 
No telling what was in there before, the important thing now is to make sure all the old pieces are removed from the cavity-only install the new one piece assembly. If it's the correct burst pressure and it screws in you have everything you need.

Think of it this way. The old method was washer-disc-plug.
The new one piece has all those elements in a single assembly.
 
The one that came out, used a copper washer that was built in. The new one uses a plastic/nylon washer that is built in. Go ahead and replace tot he proper torque. You should not have a problem.
 
Randy, what is the washer in the background in picture 1 ? It looks like it is of a larger diameter than the burst disk assembly.
Maybe it's just the photo. Did this piece go under the plug you removed ? I replaced a disk assembly on an aluminum tank that was
given to me. It was similar to the one you show in picture three. My nylon washer did not go over the end of the plug it was more or less
a nylon washer assembled over the disk during assembly. The tank valve has a raised portion that contacts the nylon washer which in turn
pushes the disk toward the plug. I believe this is what makes the torque a bit more sensitive than just snugging up a plug.
 

Back
Top Bottom