12 years ownership Bauer Mariner 200 K120.2 Block of 2010

Please register or login

Welcome to ScubaBoard, the world's largest scuba diving community. Registration is not required to read the forums, but we encourage you to join. Joining has its benefits and enables you to participate in the discussions.

Benefits of registering include

  • Ability to post and comment on topics and discussions.
  • A Free photo gallery to share your dive photos with the world.
  • You can make this box go away

Joining is quick and easy. Log in or Register now!

IyaDiver

Contributor
Messages
216
Reaction score
77
Location
Indonesia
# of dives
I been away from ScubaBoard for sometime now.
I want to share this information for members, hoping you guys can make your compressor/s last as long if not longer while STILL in mechanical pristine condition.

===================
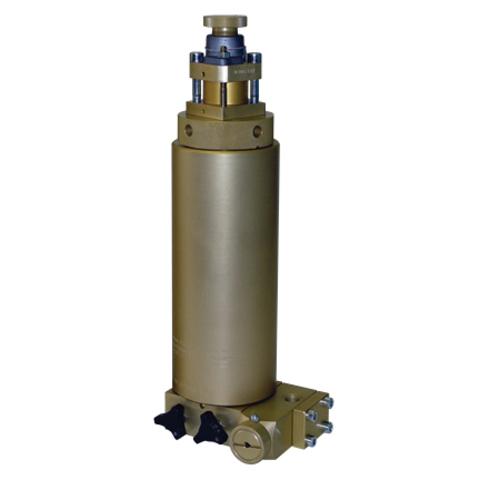
Model : 2010 Bauer Mariner 200 with P41 Tower and stand alone final water separator. 225BAR safety valve setting.
Age : 12 years today, Bought brand new.
Runtime : 4,000 hours today

Oil change frequency since day 1 to today is :
104 hours as 1st running in oil change.
Thereafter 200 to 250 hours oil and oil filter change or 1 year max. Bauer synthetic N28355 2.8 liter per oil change.
Total oil change in 4,000 hours therefore = 18th oil & oil filter change, last was 28th April 2022.
The only time after first running-in oil change which I changed oil and filter under 200 hours was due to Covid of 2020-2021 where
168 hours oil life but it is 21 month 8 days old. That was 27th July 2020 to 28th April 2022.

Filter cartridge change since Day 1 to today, P/N 67724 with Hopcalite ( CO remover ) = 77 pcs.
4,000 / 77 = 51 hours of average use per filter cartridge.

With the extra powerful 750 watt high speed high static blower, I can get final water separator to be as cool as 37C at 32C ambient and get 53 hours actually.
So, I am always within proper clean dry air.
j8.JPG


==================


Rule no 1 - Based on my 2010 Bauer K120.2 Mariner 200 Block. 3 stage design and 1,300 operational RPM and at 3,000 PSI air fill, not higher.
No nitrox Cont-Blend ever, not even Partial Blending.

If operating above 25C ambient temperature, DO install a 750 watt high static high speed electric blower to assist, if one need to run compressor
exceeding 25 minutes.
Heat is killer no 1. This Mariner 200 at 30-32C is already actually experiencing mild overheating. 2nd stage will be the earlier victim. Well before 4,000 hours
one can feel dollar wise the effect of the mild overheating lightening one's wallet.


Knowing heat can kill faster, it would be unwise if we do not monitor the heat buil-up in progress.
My version of portable ( can carry to locations ) Mariner 200 is costly and adding monitoring hardware and extra blower is low cost compared to potential damage
overheating will drain my wallet of $$ and the potential of carbon monoxide production at the overheating stages/cylinders killing people :eek:

Cheapest temperature monitoring for SKIN temperature of all exhaust/discharge pipe at all 3 stages and of the body of the P41 stand alone final water separator,
is either a 4 channels thermocouple or 2 of 2 channels thermocouple. Logging capability is nice but not crucial. Infra Red thermogun is not accurate, google Infra Red Emissivity. Best to get low end FLIR thermal imager if non contact temperature reading on large area is needed.

Able to read 1st and 2nd stage pressure is good too.


When at 2010, beginning of ownership
j4.JPG


Item 1 to 3 are extra stages pressure gauge, digital from Keller. Actually no need all these 3 expensive Keller LEO2 gauges,
capillary mechanical gauges from Wika for 1st and 2nd stage is good enough. Final stage or tank pressure one, Keller LEO2 is good as no mechanical
capillary gauge can give us resolution of 10 PSI.
Now my 1st and 2nd stage uses capillary mechanical gauges. I use the LE02 elsewhere.

Item 4 is Toxi-RAE C0 and Oxygen analyzer. CO alone is good enough.
I use this to monitor the ambient CO of the surrounding air and of the tank too.
Every 3 years I need to buy new sensor module.
Later on I settled for CO only Toxi-RAE and keep the Dual Toxi-RAE CO/Oxy for my own LOB dive trip.

Item 5 and 6 are 2 of Dual Channel Thermocouple from Taiwan, logging capable. At year 9-10th the LCD display has gone dark.
Today I have renewed the thermocouple reader from UNI-T ( cheap China made but okey ) and use thicker gauge Omega K-Thermocouple.

Item 7 is Bauer B Timer. It can detect stand alone final water separator temperature and we program our filter cartridge type and it will
calculate filter life as per dynamic changes of the water-sept temperature....which in turn define the P41 filter cartridge 67244 with CO Remover.
This unit will die usually at 2,000+ hours. I am on my 2nd unit and I have installed a battery powered vibration based hour meter too.
I got this one and so far 600+ hours OK
Item 8 and 9. Autometer engine oil pressure for compressor oil pressure and oil temperature gauge.
I kept it running for like 7-8 years and got enough data and replaced the pressure gauge with WIKA capillary mechanical pressure gauge.
No compressor oil temperature data anymore but I have enough data for it.
YOU MUST HAVE OIL PRESSURE GAUGE


Item 10. The grey blower was replaced months after I tested it and found it too weak. High static high speed one in place and I am on my 2nd unit.
1st unit last like 2,000+ hours. China made, what do you expect from its coil winding quality ....LOL.


Rule 2 - DO NOT TRUST 2,000 HOURS or 2 YEARS OIL CHANGE as per BAUER user manual, do not even do 1,000 hour. Synthetic Oil.
The compressor oil temperature at crankcase is at best 60C for my low hours per use. However, the oil film or oil mist at 2nd stage and 3rd stage can be very hot.
Typical compressor piston blow by is 5% as healthy ( as per Bauer Tech Doc ) and this blow-by into crankcase is not only AIR but water vapor too.
So your oil will be damaged sooner by water instead of anything else. The compressor oil at crankcase can not exceed 100C and there is no
way to boil off the water vapor in oil which at a mere 50 hours will become a few drops of water. Imagine your engine oil in a car and you do only
1 mile short run under 5 minutes every other day..... your engine oil will be damaged from water contamination.

1st to 2nd stage has no water separator, as is a 6 to 7x compression. So no matter what kind of dry humidity region you are at, 1st stage at 60ish PSI is at 100% humidty already. So its piston blow by is VERY WET with water vapor.

2nd oil change, 200 hours of use, see the water droplets
Before water in oil settled down.JPG


Water in Oil in pryrex 2.JPG


5th oil change after 245 hours of use. Below is water vapor soon to orgy into water droplets ...LOL
IMG_2229.JPG


Want to see how filty the oil filters can be merely at 245 hours of use ?
j5.JPG


j6.JPG

Imagine you trust Bauer 2,000 hour oil change ( and filter change ), your oil filter will get clogged first and you loose oil pressure to 3rd stage.
A guy I knew is the owner of one of Manado dive operator, land based one.
He was used to the older 75BAR oil pressure Bauer Mariner K120 without oil filter. Little did he knew and he is not RTFM kind of guy, that he needed to
replace or there exist an oil filter with this new 5 BAR oil pressure K120.2 block. His compressor jammed up within like 2 years from oil starvation. LOL.
2 years for him would be approx 1,500 - 2,000 hours of compressor run time. Him being old school, his oil change at most would be 400-500 hours I guess.


5th and 6th oil change oils when drained. Sometime lightning condition is tricky to photo oil in pyrex as what our eyes can see.
j7.JPG


WILL CONTINUE.....................
 
Magnificent!

despite not looking for longevity I would never be able to maintain you programme
 
Great report! Thanks for sharing your experience.
 
The heat is killer no 1 will apply to all compressors having the same 3 stages, presssure ratio, and similar
air velocity from the pulley fan and operational RPM.

Higher operational RPM like baby Bauer PE100 and Junior = FASTER DEATH under the same operating condition.

When one asked me : Please DEFINE an un-healthy compressor.
The answer is simple, regardless that your compressor is still spinning well and is capable of getting to maximum design pressure albeit slow, its actual state of health is : minimum blow by and minimum oil vapor release into the compressed air as per designer calculation WHEN NEW to an acceptable wear & tear level.

Stand Alone Water separators or combo water separator + filter housing like P21 ( P Zero ) and P31 do not get worn out like pistons or liners, but its pressure cycle life can be reached and need to be thrown away at that point. Bauer has documents for these pressure cycle life for all of their pressure vessels. I am attaching the one I have.

15 years is max too, by age. So 3 more years me got to spend easy US$3K for the P41 set.

Back to compressor HEALTH.
If you have excessive blow by, your compressor oil will be water laden and turn dark greenish in under
100 - 50 hours. Depending on how severe the worn out components responsible for the blow-by are.

This will also mean that the air production will be so OIL LADEN, your cartridge filter ( activated carbon ) can't remove them oil traces up to end of filter life, even if you are using the 30C ambient temperature which is the VERY SHORT filter life.

Those medias in the cartridge filters are calculated based on a HEALTHY compressor at 10C final water separator temperature, about there. This means ambient temp can be as low as 2-3 C.
10C final water separator temperature is probably as long as one can use the filter life for, unless one uses special refrigerated cooler like Bauer B-Kool.


Want to know a trick which I use to inspect a compressor stage 1 and/or 2 state of health without needing any tools ? It is easy, simply keep track of the condensate at 1st water seperator and final water separator oil laden level in the condensate water. Stage 3 health can also be tested this way, do it at final water separator.

Use a clean glass and catch the condensate of 1st water separator.
If it is whitish milky like below, that is already an UN-HEALTHY stage/s
BAD - Water Separator 1 , intermediate.JPG


If the milky is YELLOW-ish .... hhhmm, I feel so sorry for the compressor... as that is worse.
Yes... there could be oil residue inside the water sept housing, what you can do is run the compressor and discharge the condensate a few times fast enough and hence less old oil will join into the condensate and you will see actual discharged condensate state of oil laden. If you are not certain, clean the water separator to have it free of old oil trace and do the test again.


A healthy compressor will have near clear condensate like below.
Zone 1 is when micro bubbles will be gassing out of the water condensate, that is not oil laden, but gas laden. Zone 2 is 20 seconds wait till the gassing off will stop and that is the true liquid condensate.
Inspect how much or little oil that condensate is.
k1.JPG


Below is another view of the condensate of a healthy compressor in a plastic glass before the gassing off completed.
k2.JPG


Simple right ?:coffee:


How hot should we allow stage 1 & 2 to be ?
Under 135C skin temperature for its discharge pipe. Best 130C as maximum,cooler the better.
Remember, thermocouple I use, can only read SKIN temperature and not the true
peak compressed air temperature inside the stage 2.

Don't dream of achieving stage 2 temperature under 135C if the ambient is 30C or higher and running time 30+ minutes and no extra powerful blower assistance and pressure output at 2,600PSI and higher.

Stage 3 can be hotter by 15C compared to stage 2. So keep it under 145C.


Below is my latest temperature data of TODAY, where the way I placed the thermocouples and how I isolate it from the high speed air cooling effect is better than when in 2010 till last week.
k3.JPG


I am still working on stage 2 maximum contact at discharge pipe for thermocouple and wind proof sealing of the thermocouple. It would read 5C hotter both when done correctly.

Above is the temperature of a 3,000PSI non stop pressure test of 5+ minutes after compressor has run 30+ minutes filling half empty 3 of 80CF tanks and 1 of 50CF.
This is with high speed BLOWER assist. Ambient temp approx 32C.


Below is using FLIR at default 0.9 or 0.85 emissitivity setting, I forgot . This is old archive.
I will do a new thermal scan next week.

Stage 1
1st stage.JPG


Stage 2
The thermal image below is from my own compressor, BUT the compressor shown belongs to someone else and has 2nd stage overheated as an example. The brownish stain is compressor oil burnt as it leaks out of the Banjo fitting. That banjo uses polymer seal at its top side washer and not copper, hence it can burn out and leak compressor oil.
2nd Stage & Sample of  Overheated compressor.JPG


Stage 3
3rd stage v2.JPG


3rd stage.JPG


WILL CONTINUE.........................
 
Ooops, I forgot to attach the Bauer Pressure Vessel Life cycle.... attached.


WILL CONTINUE............
 

Attachments

  • Pressure Vessel Life.pdf
    2.4 MB · Views: 139
When one is thingking to buy a pre-owned Mariner K120.2 block, make sure get a 2007 or newer.
2006 and below , the oil injection at stage 3 is different. 2007 and up is cooler running because the oil injection for floating piston is at a more optimized location. This is a 5 BAR oiling system, not the 75BAR of the older K120 gen 1 block which its floating piston is smooth without any piston rings and was made of very fine honed steel, no oil filter. 5 BAR version uses aluminum piston with many rings and has oil filter
K120 II mariner 2006 and before, versus 2007 and up.JPG


Capitano and up is the Bauer model with proper pressurized 3rd stage oil injection for long life.
The smaller PE100/Junior and the like, has no pressurized oil injection at 3rd stage and so much higher operational RPM and is suitable for 2 divers weekend warrior and low hours use per year. Push that compressor hard = bye bye. No matter what brand the compressor is, 3rd stage without pressurized oil is a short lived compressor .....PERIOD.

Sorry, me no experience with 4 stages bigger Bauer.


SERVICE 500 HOURS, 1,000 HOURS and 2,000 HOURS.
It is in the parts catalog as A = 500 hours, B = 1,000 hours and C=2,000 hours.

I am attaching the Parts Catalog covering my compressor and the smaller Capitano.

If you do 250 hours (max 1 year) compressor oil change and using Bauer Synthetic or its BAUER-USA equivalent which used to be Chemlube 800, the supposedly 1,000 HOUR floating piston stage 3 will not get worn out even at my 4,000 hours.

Stage 3 floating piston at 1,300HR Dec 2013
Floating piston 1300 Hour.JPG

The 2 o-rings which are 500 hours rated, yes, the smaller one will be damaged by 500+ hours.


l1.JPG


2,372 HOURS 17th July 2017
l2.JPG

Floating piston still like a virgin.


At 4,000 hours, last week.
L7.JPG


Price feel ........US$500 for this floating piston

So I wasted money on oil 2.8 liters x 18 oil changes vs 6 oil changes if I follow 2 years max ( or 2,000 hours ) Bauer oil change reccomendation. I have ALL moving parts like a virgin and by 2,372 hours I have save US$1,000 too on floating piston. By 4,000 hours I saved US$2,000 on floating piston alone. I win hands down.


I did replace the 1st stage reed valve for fun sake. Its quieter if new.
Bauer Parts List, my version did not show hours life for it.
l3.JPG


1st stage liner wall is like a virgin....awesome !!!
L8.JPG


I followed all of Bauer's 500, 1,000 and 2,000 hour component life, except for some o-ring which is purely for oil seepage control and not of any air or oil pressure and the floating piston I do not follow Bauer 1,000 hour life. Me too lazy to change those o-ring because I need to remove the cylinder liner. All small intake & exhaust valves stage 2 and 3 are 1,000 hours service life and yes, do replace them per 1,000 hours if you can.


However, I cheated a bit.
1,300HR >>> 2,372 HR >>> 4,000 HOURS was the schedule and not truly per 1,000 hours LOL.


Any screw up or Murphy Law taking charge for the 12 years / 4,000 hours ownership ?
Sure, life is not perfect.
My staff in 2017 at approx 2,300 compressor hours, one of them forgot to remove the water condensate at 1st water separator in time.
Me in the tropics its humid like crazy, if one forgot to dump the water condensate at 1st WS unit per 10-15 minutes, this small WS can be overfilled with water-condensate very FAST !!

How do I know someone forgotten to dump the condensate in time ?
Well, I keep track of my filter weight brand new as when installed and after its done its service.
Per 49 to 52 hours of this 67224 filter service, its added weight is usually at best 200 to 220 ish grams.
These extra weight is water vapor at the 13X and whatever other nonsense our compressor produces.

l4.JPG


So I cut open immediately the filter cartridge and DANG !!! 13X all wet at zone 1.
At even 53 hours, those 13X at zone 1 will be as white as the zone 2 13X.
If you can see a tiny bit wet ( off-white or mild brown ) 13X, say a first 2-3cm air entry path , you have miscalculated your filter life or something went wrong.
Normal used 50 hour filter vs screw-up filter... forgot to dump water at WS #1.
l5.JPG


Well wet filter is not the sad part, I was fortunate there was no water hammer damage at stage 2 or 3.
But I got my 2nd stage liner cosmetically ruined due to this screw up.

Below is the 2nd stage condition per 1,300 and 2,372 hours. No surface damage, its just water stain.
Can't feel the stain at all, so me lucky mechanically.
2nd stage water stained.JPG


Recently, last week at 4,000 hours
l6.JPG


Today, this M200 K120-2 baby still looks good after 12 years.
l9.JPG


WILL CONTINUE........................

I will later share what will go bad and no life hours placed on it/them parts and what happen to operator/s who push their filter life limit beyond proper calculation and not only poor wet air they get, but high $$ damage of the PMV will happen.
 

Attachments

  • TCMP2-3_3.pdf
    2.4 MB · Views: 103
Thanks guys. I am happy if this thread can help others.

I shall continue.
The minor issues I had since day 1 were not severe in anyway, but one of them could be expensive for most people who has no access to the "locked" component and/or the country he/she is in requires some sort of approval.

The final safety valve of a Bauer uses a High Pressure Seat which Bauer technically will not sell you as spare part. This component will wear and/or crack eventually.

Below 2 images are from under 250 hours of use.
HP Seat - Final Safety Valve.JPG


The orifice of the stainless steel liner will seal the HP seat plastic face. As marked by red line.
The middle round brass of HP seat is where the push rod ( item 5 of later photo ) of the safety valve pushes away the HP seat from orifice to release air.
HP Seat - Final Safety Valve v2.JPG


What the local distributor would do is arrange to fix it for you and re-calibrate and re-SEAL it with that security wire tag. This is liability reason from Bauer point of view because of Germany's TUV standard, it has to adhere to. It is not cheap, I recalled it would cost like US$300 ish or so. I do not know about it today in 2022, but for me in Indonesia in 2010 - 2018 , the local distributor must send the safety valve assy to Bauer Asia Pacific in Singapore, hence the high cost.
Final Safety Valve.JPG


From my log book :

Trouble shoot 1
Approx early September 2010 on approx 175 total run hours , the high pressure final safety valve seat was dirty with green corrosion and was not able to slide freely within the stainless steel housing. It caused safety valve to discharge early at 2,000 psi due to HP seat unable to be pushed by air pressure to its proper seating position. Remedy, after every two filter change the final water separator and the 1st one need to be dismantled and clean out. It seems corrosive air was somehow formed.

2 Nov clean this shietty thing again.

==================


This safety valve 4 sided edges are the sliding edges into the stainless steel liner/housing.
Overtime this brass body HP seat will oxidized and become "fatter" a bit and rough and will hamper the sliding action inside the stainless steel liner. It is easy to fix, use 1,000 grit sand paper and clean its 4 sliding edges and lubricate it and the stainless steel liner.

See below, at 4,000 hour HP Seat body which was also cleaned at every minor overhaul I did at 1,300HR and 2,372HR. I will replace this HP seat before 5,000 hours. I have a few of them :yeahbaby:
HP Seat - Final Safety Valve v3.JPG


This cleaning is an easy job and is actually a must do maintenance item but one MUST break open the security seal.


Now, depends on what filter housing your are using, when I used to own a P21/P Zero equipped Mariner 200 (older 75 BAR oil pressure version) and Capitano 140 ( also 75BAR oil pressure version ), I like exercising this safety valve by using its venting feature. Spin clockwise and air will vent out of the filter/WS combo housing a P21/P Zero is. WS = Water Separator.

That venting exercise is good for this safety valve HP Seat confirmation of sliding action and to dry to spring shims. I use to carry on the boat for a weekend diving trip a Mariner 200 or Capitano 140 both gasoline powered ones. When on a boat, things get wet easy and venting using this safety valve get the rush of air to dry out the steel components inside the safety valve to prevent rust too.


Final Safety Valve Complete System.JPG

Item 6 and 7 are steel, item 5 is stainless steel.
Item 7 is actually a spring set in shim/washer shape which can fight the up to 4,5000 PSI setting.
Item 5 is what set the final MAX pressure sold to customer as 225 or 330 BAR system, its just the setting and nothing else is different between those two pressure settings.

Item 5 end rod is what pushes the HP seat middle round brass insert.

These assy come from Bauer dry, no lubrication.
I lubricrate item 7 for corossion protection and its mating surface to item 4.
Item 4 is a fine thread, it has to be lubricated properly or galling will occur because when under pressure
to spin it takes effort.

Since this Final Safety Valve Complete Assy sits on top of an internally very wet water separator or combo filter/WS like P21/P Zero, dump out water from the usual lower condensate valve/s first before venting this safety valve. So the safety valve assy gets dry air only.

For newbies take note :
This item #059410 I speak of is a Venting and Safety Valve and expensive at US$500 +-. Bauer 059410
This can be set to as low as 200 PSI and up to 3,300 PSI its locked limit if 225BAR version.
It can also be used as venting valve.
If one takes a closer look at its HP seat, it is very similar to scuba tank HP seat so this thing can last
many thousands of cycle open/close and you can use your finger without tools to set its pressure lower at say 2,000 PSI if you so wish .... but you will need to taped down the spinning knob as it will shake-shake and spin out of adjustment when pressure is low.

A Safety Valve or Relief Valve ONLY is cheap and will have its o-ring blown out by 500-700 cycles or less if you use it as venting valve. Like this US$81 type : Aqua Environment Model 504 - 6,000 PSI Adjustable Relief Valve- High pressure components for CNG and air systems.

FUN TIP.
If anyone owns a P21/P Zero like below
and wants a LOUD AUDIO pre-warning system at set pressure say 3,000 PSI , I can teach you a simple trick.
When I use to carry compressors for diving in remote areas, waiting for it to hit 3,000 PSI by sound is tricky, as the Honda powered ones are so noisy and we can't hear the safety valve venting at the set pressure. Usually per 10 minutes we drain the condensate at 1st WS and at the P21 /P Zero, but waiting for tanks to hit 3,000 PSI visually watching the gauge is time consuming. To over-vent is also a time and fuel wasting process.

Get a 1.5 liter plastic CocaCola type bottle and a whistle and some foam strip.
A 1.5 liter CocaCola bottle diameter can suit the diameter of the P21/P Zero body.
Install the whistle at the bottle mouth and foam + taped it down.
Cut the CocaCola bottle length and diameter to suit the filter housing outside diameter and
slide it in, use foam and duct tape for air leak control. Now you have easy a 95dB or higher audio alarm when tank is full at 3,000 PSI :lock:. I done this for years in the late 90s to early 2000s.


WILL CONTINUE....................
 
Now we discuss the PMV or Back Pressure Valve some people call it.
PMV.JPG


This PMV is very important for proper drying of the air for the filter cartridge and for the proper use life of the media 13X, Activated Carbon and Hopcalite. In the end it is about air quality = safety.
What higher level of needs if not safety of the air we breath ?

It is not cheap too and it is fragile if you are not discipline.
US$374 today , depending on Euro xchange rate.

When one owns a compressor, one has to adhere to the filter media life based on the final water separator temperature or combo filter + WS housing. I am speaking of properly kept dry media, like how Bauer vacuum packed their filter cartridge using aluminum thick foil. Only metal is water vapor proof, plastic is not. For those who loves to re-pack their own filter media and buy 13X in plastic bottle, do dry them out before use or you will never achieve 13X molecular sieve 20% by weight water vapor capture capability.

This is my calculation on how a 3 stage Bauer 1st water separator and the final one ( or #2) capability in taking water vapor out of the compressed air.

a1.1.JPG


The PMV as the name implies is a Pressure Maintaining Valve.
This is a pressure cheat device to assist Water Separator to squeeze water vapor as much as possible mechanically and not chemically like the filter media 13X molecular sieve. It is the cheapest air drier bang for the buck and no consumeables to spend.

It is simple physics.
This is water vapor at 100% humidity in cc/milliliters or grams per 1,000 liter of air at 45C.
Yep 65 ish milliliters or grams. Pure water is 1 gram per 1 milliliters or 1 KG per 1 Liter.
a3.JPG


You can verify the above here :

Why 100% RH ?
Because by the time the compressed air is discharging from 1st stage, that is 7x the ATM pressure.
So the humidity is already 100%, even when you start at a drier RH % but at 1 ATM.
Just imagine a simple version : 7 liters of air at 1 ATM, got squeezed to 1 liter ( 7 BAR ), the water vapor becomes saturated 700% as it has 1/7 less space to hang out at. Lets loosely use 1 BAR is equal to 1 ATM, easier.

At 2nd stage, its about 49BAR the air and its water vapor get compressed...more squeeze.
Then before the air is delivered to 3rd stage, 1st Water Separator ( with the cooler pipe assist) is used to cool and drain out the water vapor as liquid water at an efficient pressure of 49 BAR by means of temperature drop and pressure drop. Pressure drop is when you open the WS drain valve at the bottom.

The cooler the air, the less water vapor it can hold. Oil vapor get pulled out too from the air stream at the Water Separator. Would be nice to call it Water+Oil Separator actually.


This already kinda DRY air with some oil trace is then compressed at final water separator (#2) at 150ish BAR. Here is the pressure cheat again, more pressure allows more squeeze to maximize water vapor turning into liquid water and be thrown away....yes, with the aid of cooler pipe too and pressure reduction. So mechanical and some physics too.

So the pressure increase and maintaining it for a PMV, is for better removal of water vapor in the air.
If we do not use a good water separator, we go $$ broke fast if drying air is using 13X molecular sieve only. I mean REAL FAST.

Now, what happen when we use a defective OPEN-STATE PMV which can't maintain 150 BAR / 2,175 PSI ?
Well, from low pressure to 2,000 PSI ish your filter media would be drying a much wetter air because
those total volumes between 0 - 2,000 PSI did not get full advantage of a proper working PMV squeezing the air constantly at 2,175 PSI / 150 BAR to maximize water separator function.

Let me use my P41 Filter Tower & Water Separator system to visualize, it is better and easier to understand than when using a P21/P Zero combo filter+WS housing.


Assume we just finished filling 1 tank. In a P41 system pictured below, there is a check-valve between item 2 (WS #2) to item 3 which is P41 tower. Because of a proper working PMV , when we empty the filler hose item 4, the PMV will stop releasing air when lower than 150BAR or 2,175 PSI. So P41 filter tower will forever be at 2,175 PSI once it has done 1 tank fill. Assume its check valve from WS #2 is working fine.

When we start the compressor for next air filling, from 0 PSI to 2,160 / 149 BAR, no new air is YET filling the P41 tower's filter media. So, the WS #1 ( Item 1 ) and WS #2 ( Item 2 ) can then benefit the pressure cheat the PMV is offering and both water separators will do its work to its maximum design efficiency.
WS #1 will work at 49 BAR and WS #2 will work at 149 BAR.

If we use air capacity, an 80CF cubic tank which is an 11 liters tank,
149 BAR is worth 149 x 11 = 1,639 liters of air.
80CF = 2,265 liters or equal to an 11L tank at 207 BAR.

So a defective open-state PMV, will wet out filter media very fast because pressure cheat can't happen effectively.


pressure zones.JPG


Here are the 13X molecular sieve drying media content in grams for Bauer filter cartridge, the one with CO remover Hopcalite
b1.JPG


Let say your PMV is defective and in open-state. You fill up a truly empty tank of 80CF/11L size to
20 BAR/290 PSI , that is worth 220 liters of air. Your virgin filter media, the 13X will adsorb a lot of of water vapor because the tank itself is now the PMV.

220 liters is only 66 seconds from a 200LPM compressor.
Do you drain your water separators once per 66 seconds ?

Now, if the PMV is working and you are using a P41 system like mine set at 150 BAR, lets fill up a totally empty tank too. This is what will happen :
Compressor starting, pressure is building up fast, because the PMV is working and that means I only need to do maximum 2.5 liters of air to fill up WS #1 and WS #2 per 1 BAR increase of pressure, not the tank at all. 2,5 liters internal volume of 2 water separators is about right and on the caution side.
To get to 20 BAR, 2.5L x 20BAR = only 50 liters of air and none even enter the tank yet and the air can be dried at WS #1 and also WS #2.

Now lets remove calculation for vapor pressure yada yada and all the complex science .
We use super simple calculation for a compressor with failed open-state PMV.

Let use just 5 BAR / 72 PSI filling of an 80CF / 11 LTR tank and 45C is the final temperature at WS #2.
55 liters is what we need. At 45C this crazy wet 100% RH compressed air has 65 milliliters of water vapor per 1 ,000 liters of air. So we do calculation as : 55 / 1,000 x 65 milliliters = 3.58 grams or milliliters of water vapor. Is this 3.58 grams a lot for 13X inside a filter cartridge ? Hell yeah.

b2.JPG


See how a LOT is a 3.58 grams of WATER vs a P21 filter cartridge 13X capacity, which is only able to get rid of 13 grams of water. As I indicated by my rough calculation table, mechanical water separators when working well ( with its PMV ) and cooling down by the aftercooler pipes, are the cheapest hardware set to remove up to 99.6% of total water vapor in the compressed air, kinda amazing.


=================

Now we see how when activated carbon and molecular sieve gets very wet , because operator either has a failed PMV or miscalculated filter life or want to save money where he/she should not.........

This is what happen to the PMV , corossion and leak and PMV can't hold pressure = TOTAL LOSS
PMV v3.JPG

Above is a goner...bye bye PMV. Yes, simple corrossion on seal sealing surface.


PMV  v1.JPG


PMV v2.JPG


Why corrossion ?
Well activated carbon when saturated with water can be corrossive.
"Wet activated carbon tends to corrode mild steel, aluminum and some other metals. "

Carbon and aluminum is also not galvanic-ly compatible.
Carbon also some are made using acid-base treatment.

How about 13X when super wet ?
Well its not too friendly too, sandy residue like powder.
These are set of used P41 67224 cartridges I kept for experiment sake.
Its 13X was still SUPER dry when removed from service between 49 to 52 hours.
Overtime it will absorb ambient water vapor and started to ooze those powder/sand like thingy.
Imagine this goes into the fine tight tolerance surfaces of the PMV internals
Over Saturated Filter v1.JPG


Over Saturated Filter v2.JPG


WILL CONTINUE ........................
 
Thanks guys. I am happy if this thread can help others.

I shall continue.
The minor issues I had since day 1 were not severe in anyway, but one of them could be expensive for most people who has no access to the "locked" component and/or the country he/she is in requires some sort of approval.

The final safety valve of a Bauer uses a High Pressure Seat which Bauer technically will not sell you as spare part. This component will wear and/or crack eventually.

Below 2 images are from under 250 hours of use.
View attachment 750587


The orifice of the stainless steel liner will seal the HP seat plastic face. As marked by red line.
The middle round brass of HP seat is where the push rod ( item 5 of later photo ) of the safety valve pushes away the HP seat from orifice to release air.
View attachment 750589


What the local distributor would do is arrange to fix it for you and re-calibrate and re-SEAL it with that security wire tag. This is liability reason from Bauer point of view because of Germany's TUV standard, it has to adhere to. It is not cheap, I recalled it would cost like US$300 ish or so. I do not know about it today in 2022, but for me in Indonesia in 2010 - 2018 , the local distributor must send the safety valve assy to Bauer Asia Pacific in Singapore, hence the high cost.
View attachment 750588


From my log book :

Trouble shoot 1
Approx early September 2010 on approx 175 total run hours , the high pressure final safety valve seat was dirty with green corrosion and was not able to slide freely within the stainless steel housing. It caused safety valve to discharge early at 2,000 psi due to HP seat unable to be pushed by air pressure to its proper seating position. Remedy, after every two filter change the final water separator and the 1st one need to be dismantled and clean out. It seems corrosive air was somehow formed.

2 Nov clean this shietty thing again.

==================


This safety valve 4 sided edges are the sliding edges into the stainless steel liner/housing.
Overtime this brass body HP seat will oxidized and become "fatter" a bit and rough and will hamper the sliding action inside the stainless steel liner. It is easy to fix, use 1,000 grit sand paper and clean its 4 sliding edges and lubricate it and the stainless steel liner.

See below, at 4,000 hour HP Seat body which was also cleaned at every minor overhaul I did at 1,300HR and 2,372HR. I will replace this HP seat before 5,000 hours. I have a few of them :yeahbaby:
View attachment 750591


This cleaning is an easy job and is actually a must do maintenance item but one MUST break open the security seal.


Now, depends on what filter housing your are using, when I used to own a P21/P Zero equipped Mariner 200 (older 75 BAR oil pressure version) and Capitano 140 ( also 75BAR oil pressure version ), I like exercising this safety valve by using its venting feature. Spin clockwise and air will vent out of the filter/WS combo housing a P21/P Zero is. WS = Water Separator.

That venting exercise is good for this safety valve HP Seat confirmation of sliding action and to dry to spring shims. I use to carry on the boat for a weekend diving trip a Mariner 200 or Capitano 140 both gasoline powered ones. When on a boat, things get wet easy and venting using this safety valve get the rush of air to dry out the steel components inside the safety valve to prevent rust too.


View attachment 750602
Item 6 and 7 are steel, item 5 is stainless steel.
Item 7 is actually a spring set in shim/washer shape which can fight the up to 4,5000 PSI setting.
Item 5 is what set the final MAX pressure sold to customer as 225 or 330 BAR system, its just the setting and nothing else is different between those two pressure settings.

Item 5 end rod is what pushes the HP seat middle round brass insert.

These assy come from Bauer dry, no lubrication.
I lubricrate item 7 for corossion protection and its mating surface to item 4.
Item 4 is a fine thread, it has to be lubricated properly or galling will occur because when under pressure
to spin it takes effort.

Since this Final Safety Valve Complete Assy sits on top of an internally very wet water separator or combo filter/WS like P21/P Zero, dump out water from the usual lower condensate valve/s first before venting this safety valve. So the safety valve assy gets dry air only.

For newbies take note :
This item #059410 I speak of is a Venting and Safety Valve and expensive at US$500 +-. Bauer 059410
This can be set to as low as 200 PSI and up to 3,300 PSI its locked limit if 225BAR version.
It can also be used as venting valve.
If one takes a closer look at its HP seat, it is very similar to scuba tank HP seat so this thing can last
many thousands of cycle open/close and you can use your finger without tools to set its pressure lower at say 2,000 PSI if you so wish .... but you will need to taped down the spinning knob as it will shake-shake and spin out of adjustment when pressure is low.

A Safety Valve or Relief Valve ONLY is cheap and will have its o-ring blown out by 500-700 cycles or less if you use it as venting valve. Like this US$81 type : Aqua Environment Model 504 - 6,000 PSI Adjustable Relief Valve- High pressure components for CNG and air systems.

FUN TIP.
If anyone owns a P21/P Zero like below
and wants a LOUD AUDIO pre-warning system at set pressure say 3,000 PSI , I can teach you a simple trick.
When I use to carry compressors for diving in remote areas, waiting for it to hit 3,000 PSI by sound is tricky, as the Honda powered ones are so noisy and we can't hear the safety valve venting at the set pressure. Usually per 10 minutes we drain the condensate at 1st WS and at the P21 /P Zero, but waiting for tanks to hit 3,000 PSI visually watching the gauge is time consuming. To over-vent is also a time and fuel wasting process.

Get a 1.5 liter plastic CocaCola type bottle and a whistle and some foam strip.
A 1.5 liter CocaCola bottle diameter can suit the diameter of the P21/P Zero body.
Install the whistle at the bottle mouth and foam + taped it down.
Cut the CocaCola bottle length and diameter to suit the filter housing outside diameter and
slide it in, use foam and duct tape for air leak control. Now you have easy a 95dB or higher audio alarm when tank is full at 3,000 PSI :lock:. I done this for years in the late 90s to early 2000s.


WILL CONTINUE....................
I have the same filter setup; and the valve needed replacing. I did a little bit of engineering and removed the original valve assy and tapped some threads in the hole, fitted a bolt in the hole. I then added an external safety valve.
 

Back
Top Bottom