You are using an out of date browser. It may not display this or other websites correctly.
You should upgrade or use an alternative browser.
You should upgrade or use an alternative browser.
Snorkeling photos
- Thread starter Dave C
- Start date
Please register or login
Welcome to ScubaBoard, the world's largest scuba diving community. Registration is not required to read the forums, but we encourage you to join. Joining has its benefits and enables you to participate in the discussions.
Benefits of registering include
- Ability to post and comment on topics and discussions.
- A Free photo gallery to share your dive photos with the world.
- You can make this box go away
EastEndDiver
Contributor
EastEndDiver
Contributor
EastEndDiver
Contributor
EastEndDiver
Contributor
snorkelnow
Guest
Hi East End Diver,
What kind of image processing did you do (what program, options, etc)?
Thanks,
Amy
What kind of image processing did you do (what program, options, etc)?
Thanks,
Amy
Testudo
Contributor
The other
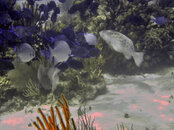
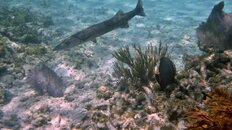
Nice work on the grouper. What did you use?
EastEndDiver
Contributor
Amy I use Photoshop Elements 9.I have been using versions of Photoshop since version 2.
I pretty much use Levels then color correction then adjust for lighting.I mostly use these tools in manual not auto modes.Although auto levels can work well in some cases.
Testudo on the Grouper I used auto levels then corrected for color using "remove color cast" then used Adjust lighting "Shadows/Highlights" .With "Shadow/Highlights" I always manually adjust by using the slide bar to about 20% darken highlights and about 10% Lighten shadows doing this sometimes gives the pic more perceived texture and depth in my eyes.
Sometimes auto levels overcorrects and you need to use the sliders which is easily accomplished by putting the one on the right to where the curve starts on that side and the one on the left the same for that side.
If you want me to try to fix another post it and I'll see what I can do.
snorkelnow
Guest
Hi All,
We want to make some prints to hang and did a trial today using several images and four different sources, Walgreens, Walmart, Costco and home printer (HP Photosmart).
Costco and Walgreens were about the same (except for cost) and Walmart was the worst quality (they appear to not take the full resolution image even when you are ordering 8x10).
Much to our surprise, the hands down winner was the home-printed image. At 8x10 there was much more detail than the others. I printed on HP premium glossy paper using best quality and an option called "Sharpen for Printing" which was selected by default. I think that sharpening is what has made the difference. We were comparing a grizzly bear image from the zoo (DSLR pic vs Canon ultrazoom) and with the external labs you could definitely see more softening in the non-DSLR as the image size got larger. From what I have read, this is expected. However, there was so much detail brought out of the non-DSLR in the home-made print that it is stunning. Much closer to DSLR quality. The home images were printed from the generic picture viewing software in Windows 7.
Anyone else done this kind of experiment or noticed something similar? I'd like to find some software to do print sharpening and then still send to a lab but it sounds like the sharpening needs to be tailored to what printer setup the final image is being sent to.
I had not heard of "print sharpening" but apparently the best looking image for screen viewing is softer than the best image for printing.
Anybody else experience this?
Here is a link that tells a little about it.
http://www.photoshopforphotographers.com/pscs4/downloads/Preparingfor-print.pdf
Thanks,
Amy
Amy, I'm quite surprised you got better results on your home printer. My personal experience (and most of the experiences I remember reading from others on Scubaboard) is that the commercial printers do a better job than what you can do at home. This makes sense to me, because the commercial printers in stores are much more expensive and are specifically made to print photos. I do all my printing at my local Fred Meyers (a Target-like store in the NW states). I've also heard several people on SB say they like Costco for printing. Sometimes the color turns out a little off in the printing, and I take the photo back to Fred Meyers and ask them to re-do it, which are are always happy to do. So I keep going back to them.
Similar threads
- Replies
- 3
- Views
- 639
- Replies
- 0
- Views
- 295
- Replies
- 0
- Views
- 168
- Replies
- 4
- Views
- 551


