Servicing Cressi XS Compact 2nd - seized nozzle body

Please register or login

Welcome to ScubaBoard, the world's largest scuba diving community. Registration is not required to read the forums, but we encourage you to join. Joining has its benefits and enables you to participate in the discussions.

Benefits of registering include

  • Ability to post and comment on topics and discussions.
  • A Free photo gallery to share your dive photos with the world.
  • You can make this box go away

Joining is quick and easy. Log in or Register now!

mwerle

Contributor
Messages
106
Reaction score
83
Location
Tokyo, Japan
# of dives
500 - 999
Hi all,

Servicing my regulators, and having trouble undoing the nozzle body on one of my 2nd stages. Obviously spraying WD40 into the assembly and letting it soak for a day or two is not an option, neither is heating the outer part with a blowtorch - great options when working on my motorbike, guessing not so great on a regulator..

Especially since it's the 2nd stage valve assembly there are orings and various other plastic bits and bobs inside it, as well as still being firmly embedded inside the 2nd stage housing.

I've tried the service manuals' recommended method of lightly tapping the body, then moved on to soaking in a (very mild) citric acid solution, and a sequence of heating/cooling with water.

So far it won't budge.


So wondering what the local wisdom is on how to unseize bolts when working on regulators?


Manual can be downloaded directly from Cressi if people want to know exactly which part I'm having trouble with: https://www.cressi.com/easyNews/NewsLeggi.asp?NewsID=71

The step I'm having trouble with is Page 21.
The threads that are seized together are from Parts 3 and 10 (Page 4) .

The outside bolt (3) is the bit that should be spannerred open, the inside bolt's (10) hex head is held in a (replaceable) plastic housing (9).


Cheers,
- Micha.
 
Hi Micha
One method I’ve used with good success on pneumatic spearguns (which often feature anodised aluminium components amongst moulded plastic housings) is the use of heat/cold cycles.
Put the reg in the deep freeze, for a few hours or overnight thenplunge it into a bucket of very hot water.
You may need to do this a couple of times in conjunction with penetrating oil (synthetic ATF fluid is also very good at creeping into fine cracks) then gently try to crack the corrosion bond with spanner or Allen key.
Wriggle back and forth and gradually you should be able to unscrew it without damage.
Good luck!
 
in conjunction with penetrating oil
I've actually tried a freezer/very-hot-water cycle already as well; guess I'll just have to keep at it. I've left it soaking in plain water while I'm at work..

As far as penetrating oils go, they can do Very Bad Things to various types of plastics. Is there something in particular which is safe to use on regulators? As I said, the part contains several plastic components as well as o-rings. The o-rings are disposable, of course, but most of the plastic parts aren't.
 
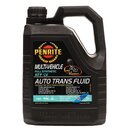
Yep that’s why I suggested synthetic Auto Trans Fluid, it’s thin but won’t damage plastic parts.
 
Looking at the manual, there is an exploded parts diagram on page 4.

My understanding is you are trying to remove the part labeled "3". I have a question and observation:

Q. Did you removed the locknut from the end of part labeled "10"...it is the nut and washer assembly labeled "11"?

Observation:
Perhaps a wide flat blade screw driver can be inserted from the other end of the 2nd stage body to hold part "10" in place while you remove part "3".

Look at page 29:
Part 3 (labeled orifice body in the picture) is female threaded and receives the male threaded "valve body". You either rely on the "injector venturi" to hold the valve body in place as you apply torque to the "orifice body" or use a screwdriver (perhaps one for the nut in a cyclinder valve hand-wheel).

Good luck.

-Z
 
Yep that’s why I suggested synthetic Auto Trans Fluid, it’s thin but won’t damage plastic parts.

To clarify, you mean Transmission Fluid?

Q. Did you removed the locknut from the end of part labeled "10"...it is the nut and washer assembly labeled "11"?

Observation:
Perhaps a wide flat blade screw driver can be inserted from the other end of the 2nd stage body to hold part "10" in place while you remove part "3".

Look at page 29:
Part 3 (labeled orifice body in the picture) is female threaded and receives the male threaded "valve body". You either rely on the "injector venturi" to hold the valve body in place as you apply torque to the "orifice body" or use a screwdriver (perhaps one for the nut in a cyclinder valve hand-wheel).

Yes, locknut was removed. I already considered using a screwdriver, but the LP Poppet Seat Valve still sticks out, so I'd need one with a slot cut out of the middle. Already looked online and can't find a large one (they are sold as "security" drivers and tend to be quite small).

And yes, the "Injector Venturi" is what holds part 10 (Orifice Body) in place and completely covers its hex-nut, so there's no space to apply additional counter-torque. The Injector Venturi is replaced as part of the annual service so it doesn't matter if it gets damaged, but of course I don't want to damage the surrounding regulator body.

Thanks for the suggestions so far.
 
Indeed, like this stuff... as a bonus your reg will shift smoother too :D

2C945626-A9DB-44E4-A237-D0B46ECE94B9.jpeg
 
To clarify, you mean Transmission Fluid?


Yes, locknut was removed. I already considered using a screwdriver, but the LP Poppet Seat Valve still sticks out, so I'd need one with a slot cut out of the middle. Already looked online and can't find a large one (they are sold as "security" drivers and tend to be quite small).

And yes, the "Injector Venturi" is what holds part 10 (Orifice Body) in place and completely covers its hex-nut, so there's no space to apply additional counter-torque. The Injector Venturi is replaced as part of the annual service so it doesn't matter if it gets damaged, but of course I don't want to damage the surrounding regulator body.

Thanks for the suggestions so far.

I made a valve handwheel nut driver by taking a cheap flat blade screwdriver and grinding a slot with my dremel tool....took less than 3 minutes total and only cost me $2 for the screw driver.

I hope you get it apart.

-Z
 
No luck so far. But just found a tool which is specially designed for this case - seems it's not such an uncommon occurrence! Will update once I receive it.

It also turns out that you can remove the poppet stem without taking the assembly apart first, leaving a plain slot on the inside.
 
No luck so far. But just found a tool which is specially designed for this case - seems it's not such an uncommon occurrence! Will update once I receive it.

It also turns out that you can remove the poppet stem without taking the assembly apart first, leaving a plain slot on the inside.

Are you referring to this tool?
Valve Body Holder for Cressi Compact

-Z
 
https://www.shearwater.com/products/perdix-ai/

Back
Top Bottom