Best bet it’s the same one in the 16/18 (and old early 19)
ie the 11 diaphragm + thrust washers should work (but I’m out of my depth)
No idea if the 14 can have the HP seat/orifice upgrade that the 16/18 got, you’d be able to use the current kits then
Again I’m out of depth
@axxel57 any thoughts?
Okay, back from holidays…..
I’m late, but I needed to do some research…
The history of the SP MK14 is a bit particular.
When the Mk14 came on the market in Europe in 1997 (one year later also in the US), it was the first SP membrane 1st ever.
Seems that SP felt quite under pressure to come out with membrane 1st on the market.
So they used in their MK14 design the same valve mechanism and components as the German Seemann Sub SL20/21 1st stage.
Seemann Sub (SS) had been acquired 1997 by the former Diving Division of Johnson Worldwide Associates Vice President Robert Stoss, so maybe they orientated their design on his SS 1sts and used those valve parts to get the MK14 as fast as possible on the market.
The performance was improved by the SP design against the SL21, the MK14 could flow about double as much air as the Seemann Sub SL20/21.
Further development of the SP Membrane Series let finally to the unique valve and parts design we nowadays know …..
In 2007 Johnson Outdoor bought Seemann Sub from Robert Stoss ( who bought early 2008 together with Doug McNeese SSI International) and SS became Subgear (SG), before in 2016 finally Subgear and SP became one brand.
Fun fact……
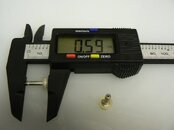
The Mk14 HP seats are not available anymore for many years in the Service Kits, but seems (according to the Catalog here in Europe) you can still get them ordering the SS SL20 Service Kit…
Does that make sense…..?
But probably nowadays nobody here at SP knows…..
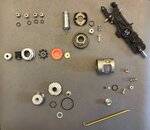
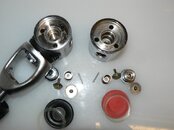
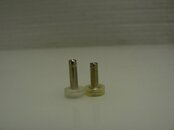
The membrane is the same as the ones of the Mk 16/18.
There are only two genuine Mk14 parts still available, the balancing chamber (10.705.102) and the Internal Disc (10.705.113).
I think that the reason, that there are hardly any parts and the HP Seat available for this relatively ‘young’ model ( that is quite untypically for SP) lays in the fact that the ‘original’ design was ‘non SP’.
The MK14 was not a big seller here in Europe, strange enough it was sold in the US years longer than in Europe, but the much better MK18 was never introduced to the US market.
Anyway, a nice Collectors Item.
If the OP needs a new HP Seat, he can contact me….