- Messages
- 82
- Reaction score
- 71
- # of dives
- I'm a Fish!
Hi Dark Siders,
While my mk25 is still soaking into fresh water, i am now taking care of a MK11 first stage i bought second hand to the same guy, which obviously didn't take good care of his equipment.
After having disassemble everything, i now have some questions. Some details differs from the schematic i have.
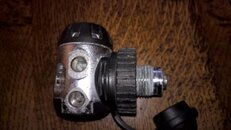
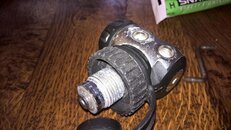
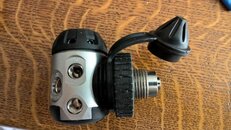
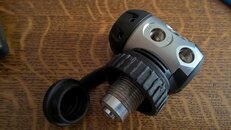
First here is the beast before disassembly :
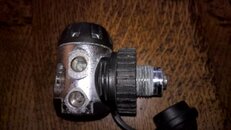
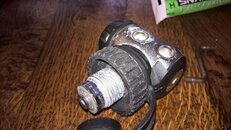
After comparing with my different schematics of mk11, i found that this model refer to the Mk11 2005-10 according to the saddle (13 on the schematic ) and the bottom bumper (41 on the schematic).
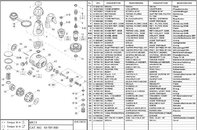
. First thing i noticed was the absence of the washer (36) between the spring screw(18) and the spring T.I.S (19).
I guess this washer is here to prevent galvanic corrosion. Actually the spring crew was a little bit corroded but i managed to clean it. Is there a way to source this kind of washer somewhere (in europe)??
Otherwise i'll order it when i'll be back to bali, it is much more easier to source part from scubapro there. For my personnal knowledge, what is the sping T.I.S made from? It looks like teflon coated with some blue stuff.
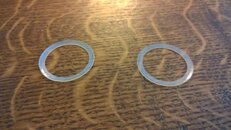
. Second thing i noticed when i compared the parts i have with the schematics, is that i actually have two washers (21). I can't remember where was the second one (which is not supposed to exists according to the schematics). As far as i can remember, it was on the other side of the diaphragm. Could someone confirm ? It is confusing when you refer to the manual which suggest than the two washers were stacked on the same side of the diaphragm. If so, why stack 2 washers ?
"With the universal tool, unscrew carefully the diaphragm retainer; remove the diaphragm disc and the 2 washers with the o ring extractor"
. Third thing is the HP Valve assembly. Here is how i found mine after the disassembly :
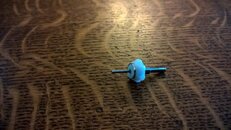
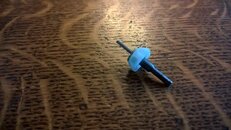
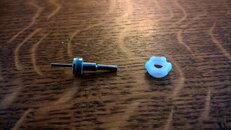
I recognize the diaphragm pin (24), the Hp Valve (28) and the soft seat incorporated in the HP Valve and finally the sleeve (29). I cannot take the diaphragm pin off the HP Valve, is it actually only one part or is there a way to take it off ? Same thing for the soft seat which seems to be integrated in the HP Valve assembly. Am i doing something wrong or is it actually only one whole part (pin+seat+hp valve),if so how can i change the soft seat ? Btw i am still waiting my mk11 service kit so i do not know what is inside.
The sleeve (39) which is supposed to come between the HP valve (28) and the sleeve (29) was not in the regulator. What is the purpose of this part and what are the consequences of its absence ?
. Finally, the orifice (27) seems to be actually part of the body.
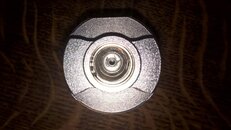
If i refer to the schematic it should be a removable part with an o-ring between him and the body. When i refer to the disassembly manual here are the instructions :
"Use the MK 16 tool and lightly push the tool against the orifice while blowing into the 1st stage body from the opposite side (diaphragm side) with the blowgun to carefully remove the orifice. With the o ring extractor tool, remove the o ring from the orifice."
So it must be removable, how do you do to remove it without this expensive speciliazed tool?
That is a bunch of questions feel free to answer them or not ^^
Thank you in advance
Best Regards
Robin
While my mk25 is still soaking into fresh water, i am now taking care of a MK11 first stage i bought second hand to the same guy, which obviously didn't take good care of his equipment.
After having disassemble everything, i now have some questions. Some details differs from the schematic i have.
First here is the beast before disassembly :


After comparing with my different schematics of mk11, i found that this model refer to the Mk11 2005-10 according to the saddle (13 on the schematic ) and the bottom bumper (41 on the schematic).

. First thing i noticed was the absence of the washer (36) between the spring screw(18) and the spring T.I.S (19).
I guess this washer is here to prevent galvanic corrosion. Actually the spring crew was a little bit corroded but i managed to clean it. Is there a way to source this kind of washer somewhere (in europe)??
Otherwise i'll order it when i'll be back to bali, it is much more easier to source part from scubapro there. For my personnal knowledge, what is the sping T.I.S made from? It looks like teflon coated with some blue stuff.
. Second thing i noticed when i compared the parts i have with the schematics, is that i actually have two washers (21). I can't remember where was the second one (which is not supposed to exists according to the schematics). As far as i can remember, it was on the other side of the diaphragm. Could someone confirm ? It is confusing when you refer to the manual which suggest than the two washers were stacked on the same side of the diaphragm. If so, why stack 2 washers ?
"With the universal tool, unscrew carefully the diaphragm retainer; remove the diaphragm disc and the 2 washers with the o ring extractor"

. Third thing is the HP Valve assembly. Here is how i found mine after the disassembly :


I recognize the diaphragm pin (24), the Hp Valve (28) and the soft seat incorporated in the HP Valve and finally the sleeve (29). I cannot take the diaphragm pin off the HP Valve, is it actually only one part or is there a way to take it off ? Same thing for the soft seat which seems to be integrated in the HP Valve assembly. Am i doing something wrong or is it actually only one whole part (pin+seat+hp valve),if so how can i change the soft seat ? Btw i am still waiting my mk11 service kit so i do not know what is inside.
The sleeve (39) which is supposed to come between the HP valve (28) and the sleeve (29) was not in the regulator. What is the purpose of this part and what are the consequences of its absence ?
. Finally, the orifice (27) seems to be actually part of the body.

If i refer to the schematic it should be a removable part with an o-ring between him and the body. When i refer to the disassembly manual here are the instructions :
"Use the MK 16 tool and lightly push the tool against the orifice while blowing into the 1st stage body from the opposite side (diaphragm side) with the blowgun to carefully remove the orifice. With the o ring extractor tool, remove the o ring from the orifice."
So it must be removable, how do you do to remove it without this expensive speciliazed tool?
That is a bunch of questions feel free to answer them or not ^^
Thank you in advance
Best Regards
Robin


