Hello,
My setup is a Gopro 11 with two Wurkkos D07 video lights (cheap Chinese lights).
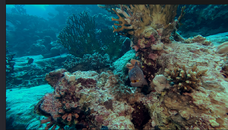
During a recent trip to the Red Sea (north route - wrecks etc) I had the GoPro set for auto white balance and now that I am post editing the clips I am regretting it.
For far away scenes (that lights don't have any effect), or too near (where everything is evenly illuminated by the lights) white balance correction is manageable.
But for scenes where the subject in the foreground is illuminated by the lights, while the background is illuminated by ambient light things turn nasty.
It is not that foreground or background get wrong WB - I can manage this. The problem is that WB (being in auto) is constantly changing during a clip hence at some point the foreground appears ok-ish, and few seconds later (within the same clip) it is not and so it goes back and forth.
Is there something like time depended WB correction? Eg apply for few seconds one correction, for the next seconds another (and blend them somehow together so the transition is not too obvious)? Ideally I would like to do this in Davinci Resolve. It should be possible, but I don't even know how this is called hence I don't know what to look for.
Any help will be greatly appreciated.
And of course I now know that WB stays in "native" for ever! But, is it too late to correct my recordings?
Cheers
My setup is a Gopro 11 with two Wurkkos D07 video lights (cheap Chinese lights).
During a recent trip to the Red Sea (north route - wrecks etc) I had the GoPro set for auto white balance and now that I am post editing the clips I am regretting it.
For far away scenes (that lights don't have any effect), or too near (where everything is evenly illuminated by the lights) white balance correction is manageable.
But for scenes where the subject in the foreground is illuminated by the lights, while the background is illuminated by ambient light things turn nasty.
It is not that foreground or background get wrong WB - I can manage this. The problem is that WB (being in auto) is constantly changing during a clip hence at some point the foreground appears ok-ish, and few seconds later (within the same clip) it is not and so it goes back and forth.
Is there something like time depended WB correction? Eg apply for few seconds one correction, for the next seconds another (and blend them somehow together so the transition is not too obvious)? Ideally I would like to do this in Davinci Resolve. It should be possible, but I don't even know how this is called hence I don't know what to look for.
Any help will be greatly appreciated.
And of course I now know that WB stays in "native" for ever! But, is it too late to correct my recordings?
Cheers