


nwbrewer
Contributor
After almost 300 dives the zipper on my Diving Concepts suit finally gave out in the shoulder area, making for a very wet, cold dive. Turns out its hard to maintain buoyancy when your suit is auto venting too.
New Zipper on Vimeo
I know enough people who had the same zipper failure mode , so I was prepared. A while back a buddy located some Tizip zippers in Ebay for $75, so we each bought one. The HOPE is that the more flexible plastic zippers will do better in the over the shoulder area than the traditional metal zippers have been. The zippers we got are actually the Super seal version, not the Master seal version that is used by Santi and others on their suits. Its a little more robust, but also not as flexible. Time will tell if this was a good call. More info on Tizip at their site - TIZIP waterproof zippers
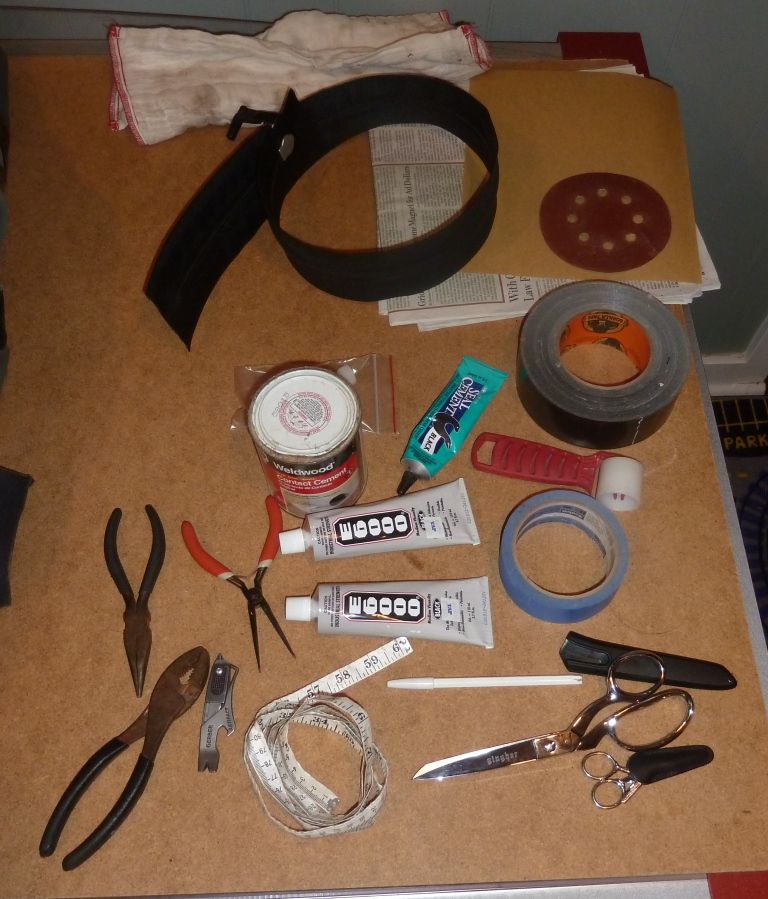
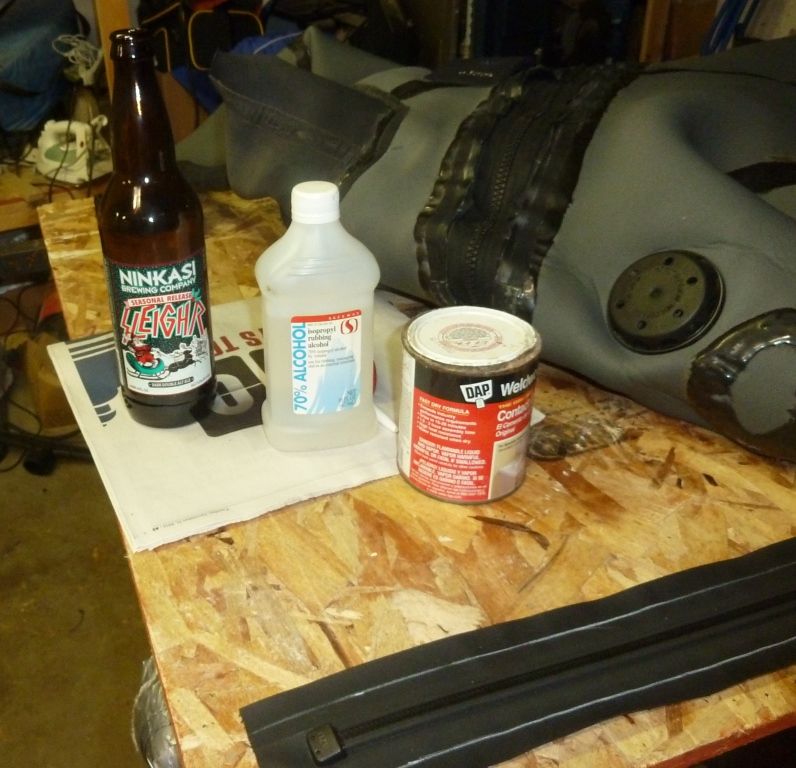
The first step in any project like this is assembling the correct tools.
Next, unzip the zipper, and turn the suit inside-out, as its easier to work this way.
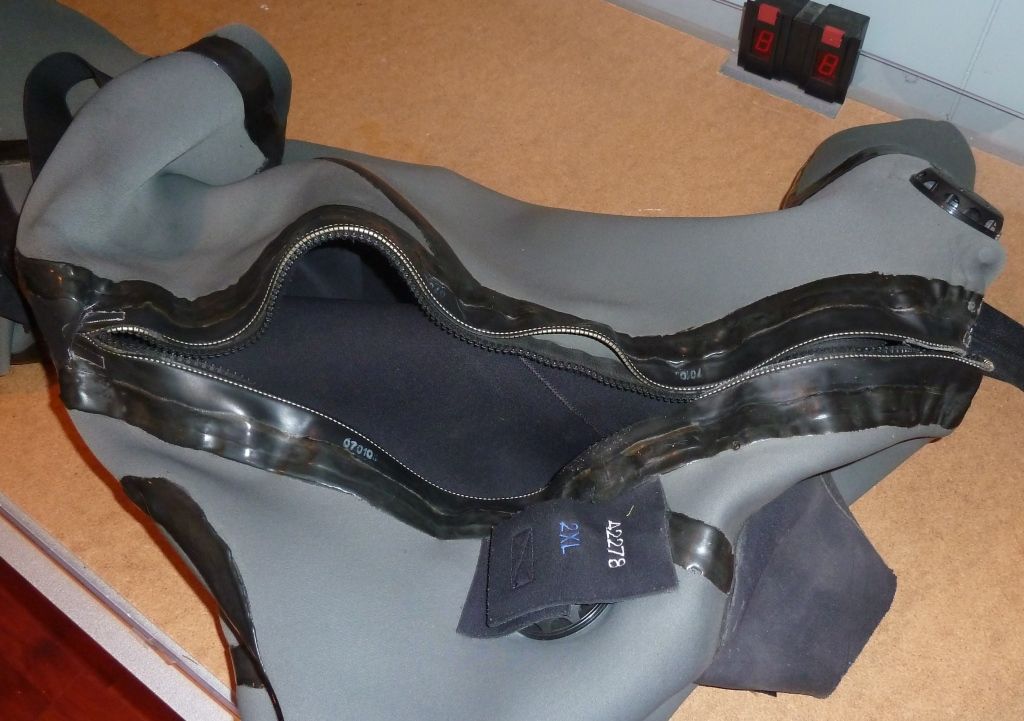
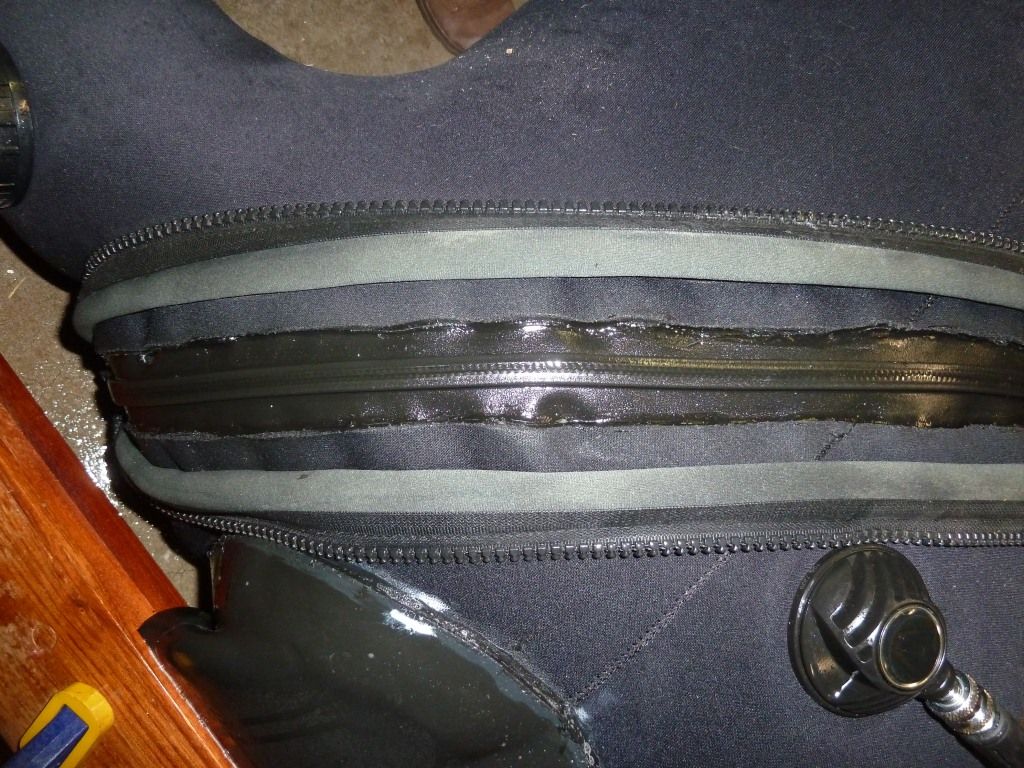
Cut the old zipper out of the suit using a razor blade and a set of sewing scissors. I chose to cut it back to the neoprene, leaving some of the old zipper still on the suit.

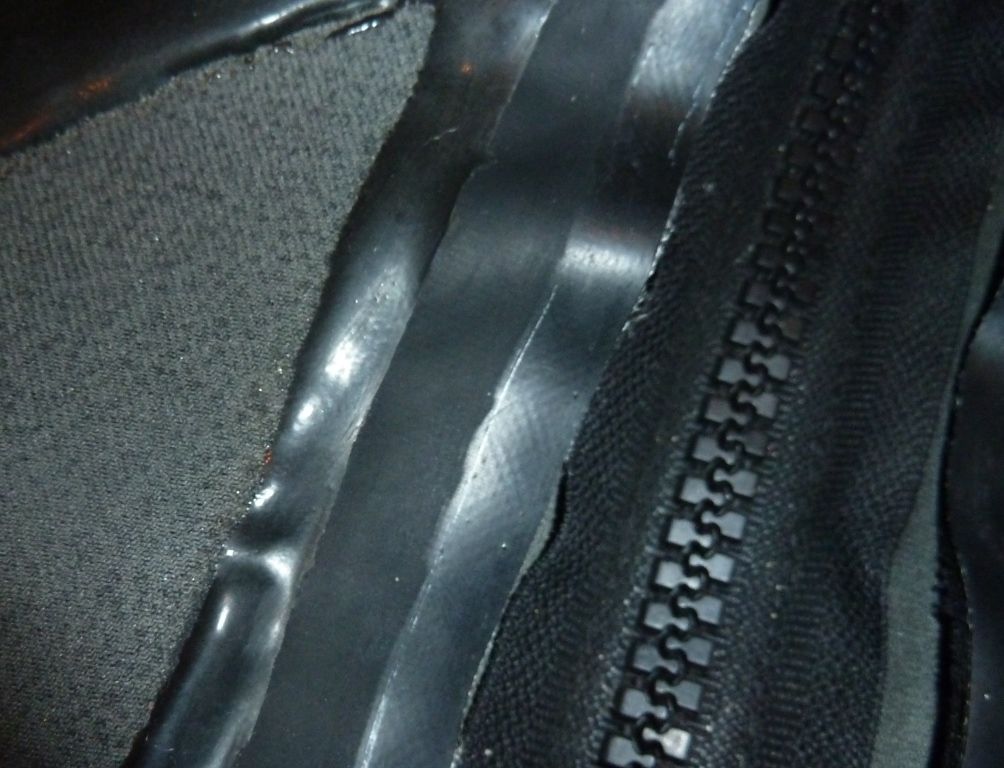
Some of the old sealant was beginning to peel, so I used some pliers and a razor blade, I removed the sealant off the old zipper. Looks much better for sticking the new zipper down. This was actually the most tedious part.
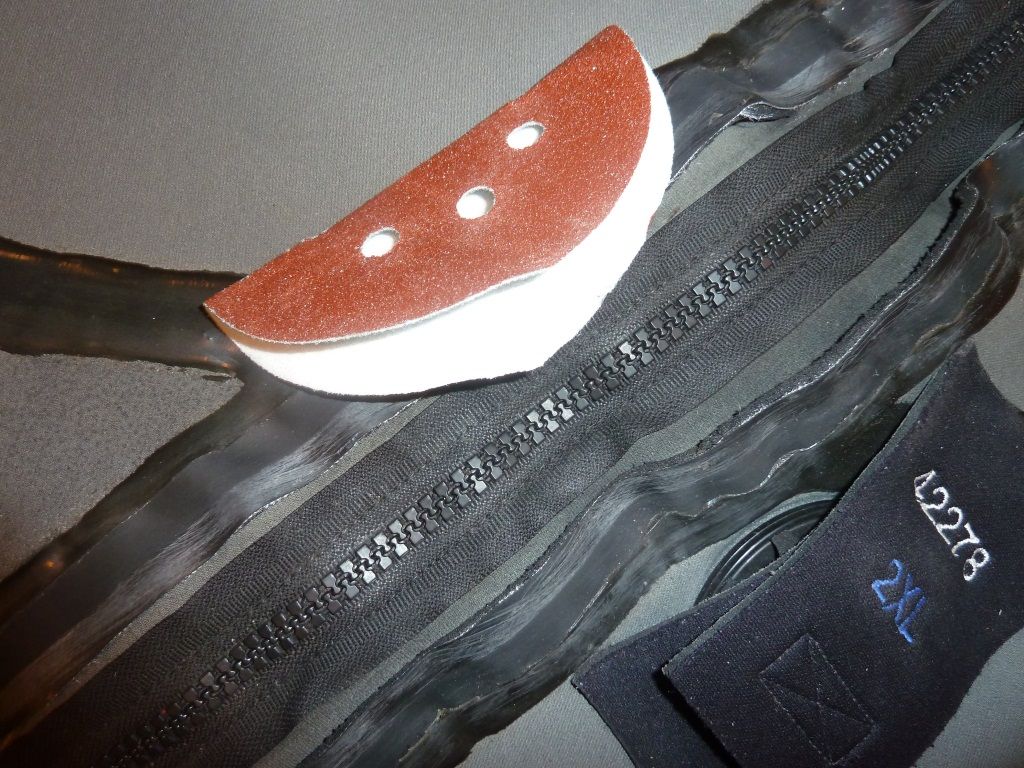
Use some coarse sand paper to rough up the old zipper to get the glue to stick better.
At this point I recommend moving to a well ventilated location, suit glue can be rather smelly. Use some Isopropyl alcohol to wipe down both surfaces. I used DAP contact cement, but if you want to get all fancy there are lots of Drysuit specific contact adhesives you can use. The beer is optional, but its good for while youre waiting for the glue to dry.
No picture of this, but its a good idea to measure the old zipper hole, and the new zipper to make sure the it will fit correctly. I had to cut back the neoprene a little to get a good fit.
Use a foam brush to apply the adhesive to the suit and zipper as recommended on the can. I added chalk likes to indicate where the glue should go.

I cut some 2 or so strips from a heavy duty garbage bag and applied them to the dry glue on the suit side. It should lightly adhere, and be easy to peel off.
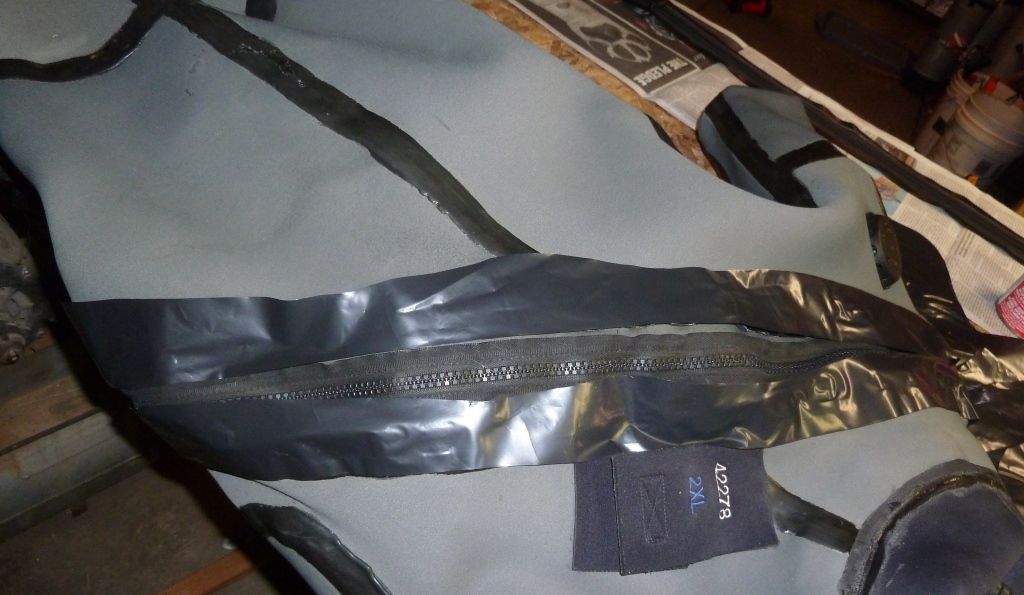
Lay the zipper where its going to go, and press the lower end down, and start working up one side of the zipper, peeling the plastic out and sticking the zipper down 3-4 at a time. When you reach the end, do the same to the other side.
When the zipper is completely adhered, go over the whole thing with a plastic roller. Not to bad looking huh?
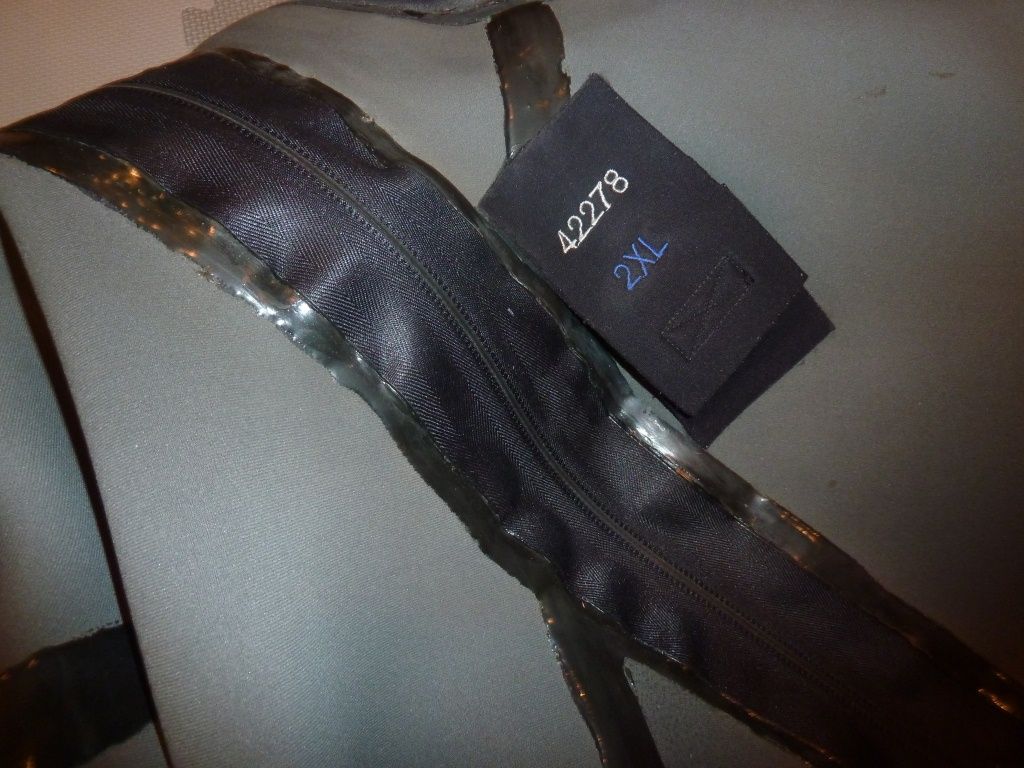
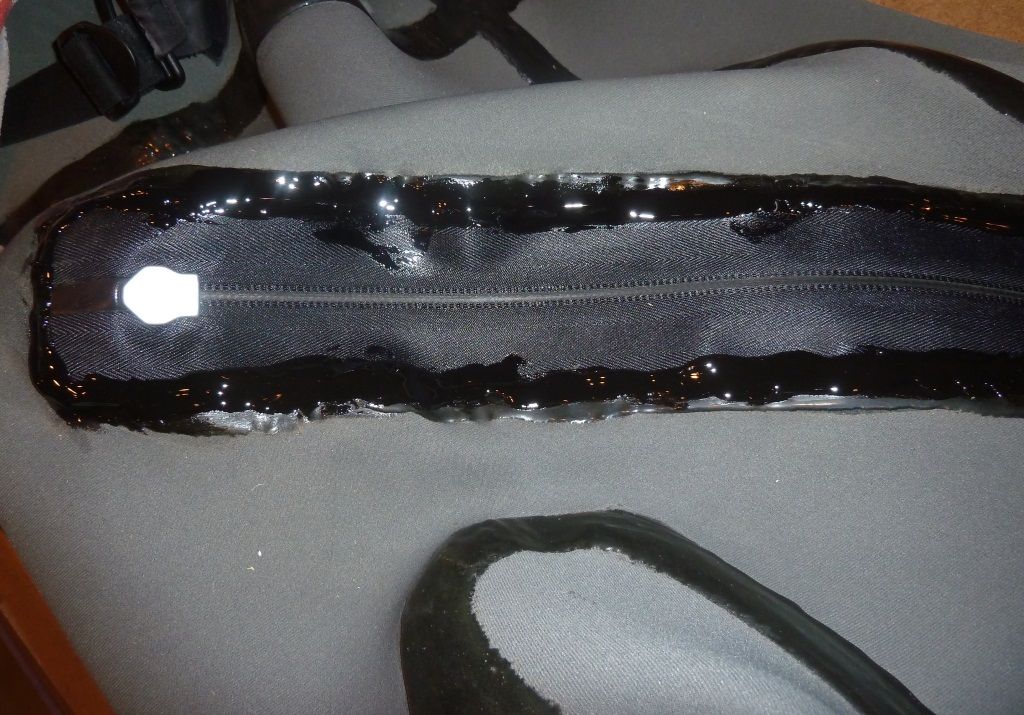
Next I used an applicator tip on a tube of black E-6000 to put a fine bead along the edge of the zipper. I then used my finger to really work it into the fabric.
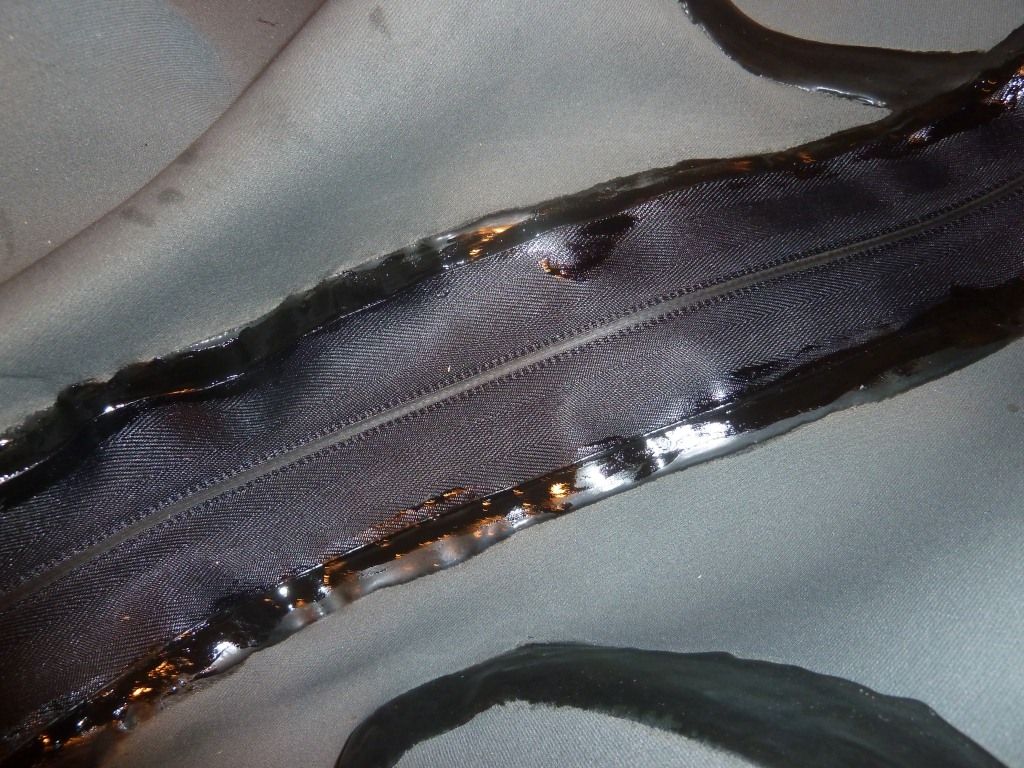
When that was dry, I applied a really heavy bead of E-6000, covering the outer edges of the zipper to seal it up. Came out a little ugly, but not too bad since its on the inside of the suit.
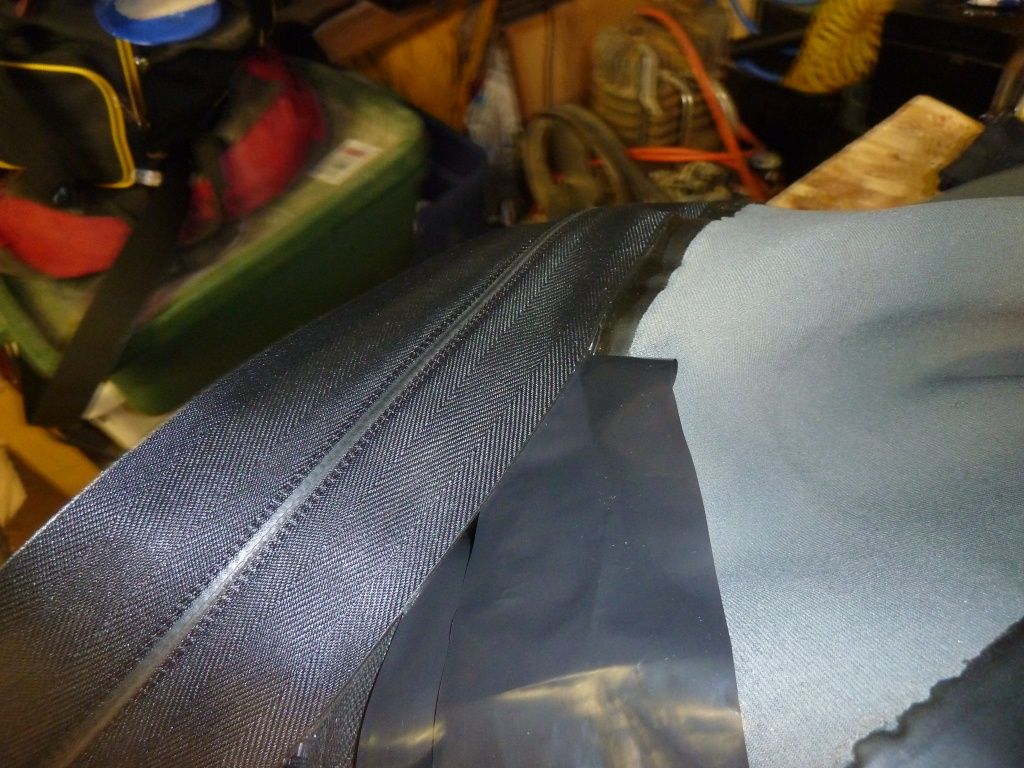
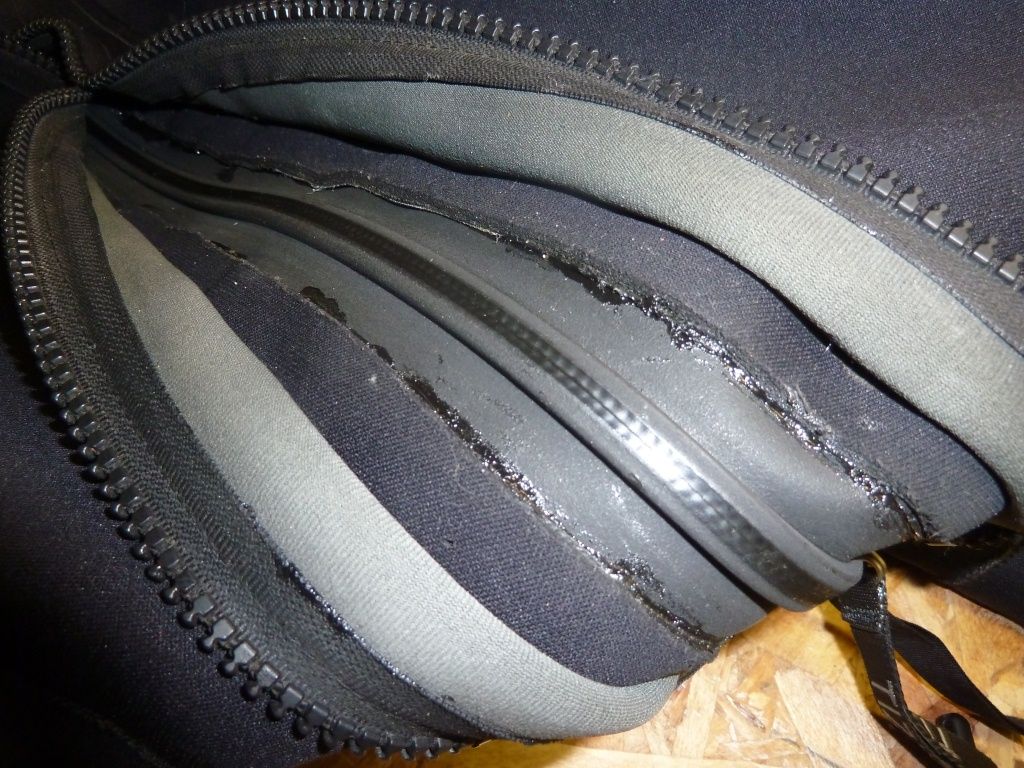
At this point turn the suit back right-side-out. Looks pretty good from this side!
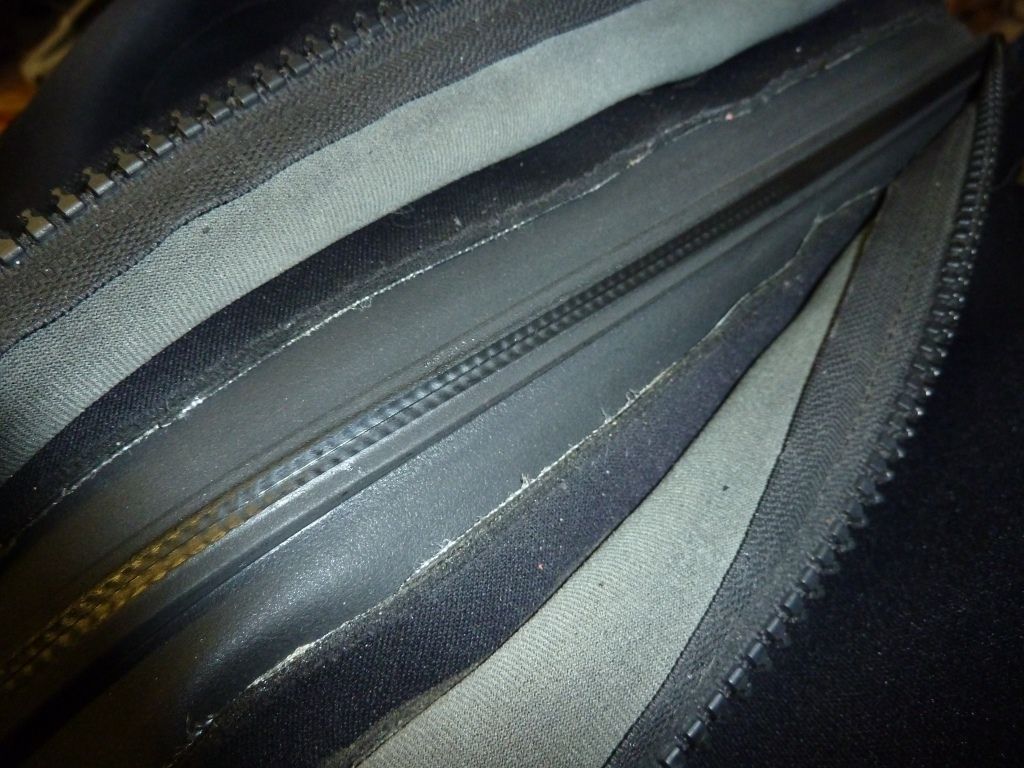
I really should have stopped at this point, but the but I decided on overkill, and used another applicator tip to put a small bead of E-6000 on the edge where the neoprene meets the zipper. If I was doing it again Id skip this since it look a little ugly and isnt really needed.
Leak testing at this stage is a really good idea. Inflate the suit, and spray with soapy water to look for bubbles. As with all my projects, I had some help.
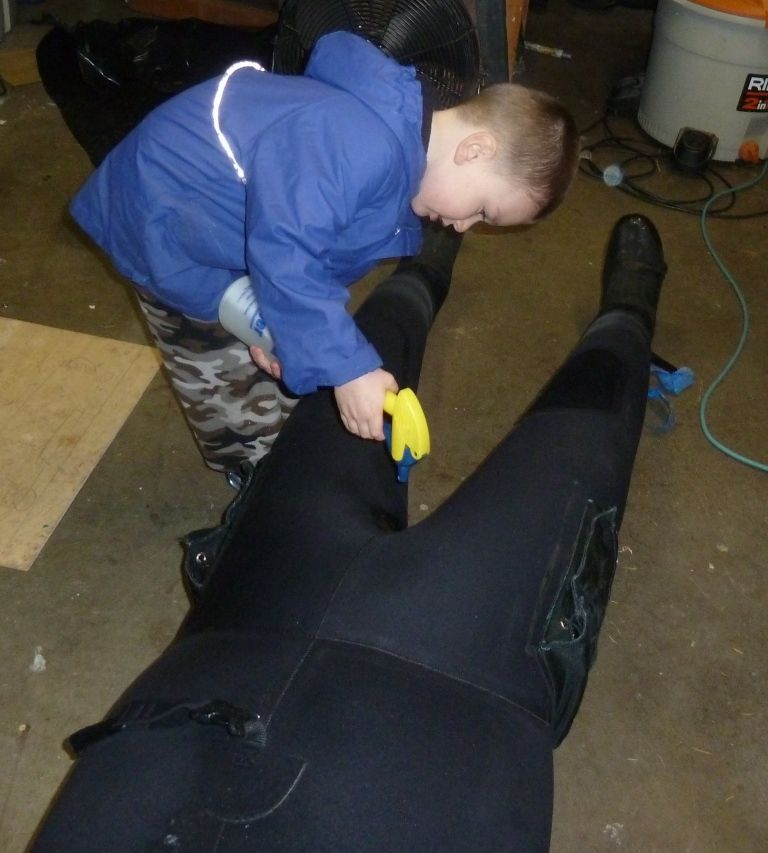
Yay for no bubbles!
*****BE SURE TO APPLY SILICONE GREASE TO YOUR ZIPPER BEFORE USE!!! ESPECIALLY AT THE BOTTOM END*****
All in all, its not that big of a DIY project, though parts of it are a little tedious. All in all I spent under $90 on the zipper install, so a few hours of my time was worth it. In the interest of full transparency, I **DID** leak on the first dive, I wasnt as careful applying the adhesive to the lower end of the zipper as I should have been, and it didnt adhere well. I think the pressure from my waist strap on my BC popped it loose. I peeled back about 3, cleaned everything well, and re-glued it. Its now nice and dry!
New Zipper on Vimeo
I know enough people who had the same zipper failure mode , so I was prepared. A while back a buddy located some Tizip zippers in Ebay for $75, so we each bought one. The HOPE is that the more flexible plastic zippers will do better in the over the shoulder area than the traditional metal zippers have been. The zippers we got are actually the Super seal version, not the Master seal version that is used by Santi and others on their suits. Its a little more robust, but also not as flexible. Time will tell if this was a good call. More info on Tizip at their site - TIZIP waterproof zippers
The first step in any project like this is assembling the correct tools.
Next, unzip the zipper, and turn the suit inside-out, as its easier to work this way.
Cut the old zipper out of the suit using a razor blade and a set of sewing scissors. I chose to cut it back to the neoprene, leaving some of the old zipper still on the suit.
Some of the old sealant was beginning to peel, so I used some pliers and a razor blade, I removed the sealant off the old zipper. Looks much better for sticking the new zipper down. This was actually the most tedious part.
Use some coarse sand paper to rough up the old zipper to get the glue to stick better.
At this point I recommend moving to a well ventilated location, suit glue can be rather smelly. Use some Isopropyl alcohol to wipe down both surfaces. I used DAP contact cement, but if you want to get all fancy there are lots of Drysuit specific contact adhesives you can use. The beer is optional, but its good for while youre waiting for the glue to dry.
No picture of this, but its a good idea to measure the old zipper hole, and the new zipper to make sure the it will fit correctly. I had to cut back the neoprene a little to get a good fit.
Use a foam brush to apply the adhesive to the suit and zipper as recommended on the can. I added chalk likes to indicate where the glue should go.
I cut some 2 or so strips from a heavy duty garbage bag and applied them to the dry glue on the suit side. It should lightly adhere, and be easy to peel off.
Lay the zipper where its going to go, and press the lower end down, and start working up one side of the zipper, peeling the plastic out and sticking the zipper down 3-4 at a time. When you reach the end, do the same to the other side.
When the zipper is completely adhered, go over the whole thing with a plastic roller. Not to bad looking huh?
Next I used an applicator tip on a tube of black E-6000 to put a fine bead along the edge of the zipper. I then used my finger to really work it into the fabric.
When that was dry, I applied a really heavy bead of E-6000, covering the outer edges of the zipper to seal it up. Came out a little ugly, but not too bad since its on the inside of the suit.
At this point turn the suit back right-side-out. Looks pretty good from this side!
I really should have stopped at this point, but the but I decided on overkill, and used another applicator tip to put a small bead of E-6000 on the edge where the neoprene meets the zipper. If I was doing it again Id skip this since it look a little ugly and isnt really needed.
Leak testing at this stage is a really good idea. Inflate the suit, and spray with soapy water to look for bubbles. As with all my projects, I had some help.
Yay for no bubbles!
*****BE SURE TO APPLY SILICONE GREASE TO YOUR ZIPPER BEFORE USE!!! ESPECIALLY AT THE BOTTOM END*****
All in all, its not that big of a DIY project, though parts of it are a little tedious. All in all I spent under $90 on the zipper install, so a few hours of my time was worth it. In the interest of full transparency, I **DID** leak on the first dive, I wasnt as careful applying the adhesive to the lower end of the zipper as I should have been, and it didnt adhere well. I think the pressure from my waist strap on my BC popped it loose. I peeled back about 3, cleaned everything well, and re-glued it. Its now nice and dry!
