I had made an inspection light a while back for an internet friend, and then more recently offered one to another.... then life got in the way and I took forever making it. With it taking so long any way, I went ahead and took the time to do it right (or as right as any of my projects get!).
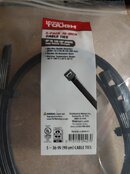
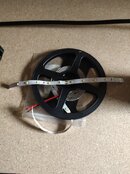
Parts:

Across the top is one giant zip tie (36 inch from Harbor Freight). On the left is a salvaged wall wort that puts out 11 volt DC that I cut the barrel plug off. Next to that is the 3d printed housing, lid, knob, and 10k potentiometer. Next is the roll of LED light strip (I used 2 segments of it, about 8.5 inches), and then a spool of low voltage parallel wire. Not pictured is a roll of 3/8 inch clear heat shrink.
Printed parts:

The lid for the housing has nubs on the bottom to capture the head of the ziptie, and the housing proper is notched for the wires and ziptie.
Wiring is simple, negative from power supply to negative to LED, positive from power supply to center prong of potentiometer, positive to LED to an outboard prong of the potentiometer (which prong you use determines which direction on the knob increases brightness). I wired this one to be clockwise=brighter:

After that, I assembled the housing and ziptied it together with a small ziptie (in case my mediocre solder job needs help), soldered the parallel wires to the positive and negative pads on the LED strip, and attached the LED strip to the end of the ziptie (the LED strip I have is sticky backed). Slide the clear heat shrink over the length of it and shrink it with a heat gun, and Bob's your uncle:
Full dim:

Full bright:

STL files attached, in case anyone wants to print the housing and make their own. Body is the housing, Body001 is the lid, Body002 is the knob.
Respectfully,
James
Parts:
Across the top is one giant zip tie (36 inch from Harbor Freight). On the left is a salvaged wall wort that puts out 11 volt DC that I cut the barrel plug off. Next to that is the 3d printed housing, lid, knob, and 10k potentiometer. Next is the roll of LED light strip (I used 2 segments of it, about 8.5 inches), and then a spool of low voltage parallel wire. Not pictured is a roll of 3/8 inch clear heat shrink.
Printed parts:
The lid for the housing has nubs on the bottom to capture the head of the ziptie, and the housing proper is notched for the wires and ziptie.
Wiring is simple, negative from power supply to negative to LED, positive from power supply to center prong of potentiometer, positive to LED to an outboard prong of the potentiometer (which prong you use determines which direction on the knob increases brightness). I wired this one to be clockwise=brighter:
After that, I assembled the housing and ziptied it together with a small ziptie (in case my mediocre solder job needs help), soldered the parallel wires to the positive and negative pads on the LED strip, and attached the LED strip to the end of the ziptie (the LED strip I have is sticky backed). Slide the clear heat shrink over the length of it and shrink it with a heat gun, and Bob's your uncle:
Full dim:
Full bright:
STL files attached, in case anyone wants to print the housing and make their own. Body is the housing, Body001 is the lid, Body002 is the knob.
Respectfully,
James