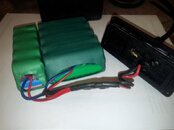
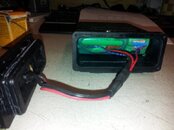
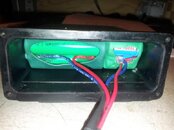
I should add a word of caution here. If you are not proficient in basic electronics don't panic, with caution and care you can do this. Maybe? But there are a few points to be cautious about.
First unwrap your old battery pack and carefully study the way the tabs are oriented and which pairs they are soldered to at each end. Pay careful attention to polarity of the cells. Positive end has a little groove around the circumference of the cell.
DO NOT remove the insulator that is covering the tabs until the pack is assembled and held with hot glue. If you remove these insulators then surely while you are trying to keep them straight you will manage to short one out to the wrong ends. it's easy to do and that thin metal tab will turn red hot instantly!
Hot glue guns usually are very poor way to glue anything but in this application they are ideal. The glue has good dielectric properties for electronic applications (fancy way to say great insulator

) and bonds well to the insulating plastic that is on the cells.
Best way to assemble them is to lay down a piece of good double sided tape on your work surface, then alternating polarities (pay very careful attention here), lay down 6 cells. Get your next 5 cells ready to go (correct orientation) and then run a bead of glue between 2 cells on the bottom row and immediately place the a cell from the top row on top of that bead of glue. This bonds those three cells together. repeat with the next grove until you have all 5 cells on top of first six cells. Pay very close attention to the orientation of cells from original battery pack, in particular which way the tabs fold. Most fold longitudinally with the length of the pack, but at one end there is 2 cells which bridge the top & bottom rows.
I should have remembered to take a few more pics during the assembly process.
Remember that these packs of cells are in SERIES, but the 2 packs are wired in PARALLEL.
Good Luck
---------- Post added March 7th, 2013 at 11:25 PM ----------
Did you put diodes between them ?
No. That would interfere with charging. Ideally I should have fused each pack, but I did not.
In a series assembly of cells it is important that all cell capacities be the same, but voltages can differ as you may be adding voltages up to achieve a specific voltage, but in parallel assemblies all voltages must be the same, but capacities can differ.
In an ideal world they would be the same, however as in everything in life it is a compromise. In this case I am cramming extra capacity in a pre-determined case size.
Where this may be a small issue is during rapid charging. The batteries will get warm and now there are more of them in a constrained space. If you're not in a hurry, better to do a slow charge (if your charger has that option). However I would still do a fast charge if I needed to.
If interested there is some info here
www.cdtechno.com/pdf/ref/41_7952_0112.pdf
This discusses parallel operation of lead acid batteries, but for our purposes the discharge and charge info is still valid for NiMH. Page 3 & 4 have some graphs illustrating discharge & recharge. I was going to paste the graphs here but public forums can sometimes get a little uptight about copyright issues.


 ) and bonds well to the insulating plastic that is on the cells.