Compressor Temperatures

Please register or login

Welcome to ScubaBoard, the world's largest scuba diving community. Registration is not required to read the forums, but we encourage you to join. Joining has its benefits and enables you to participate in the discussions.

Benefits of registering include

  • Ability to post and comment on topics and discussions.
  • A Free photo gallery to share your dive photos with the world.
  • You can make this box go away

Joining is quick and easy. Log in or Register now!

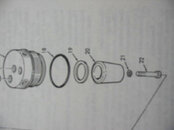
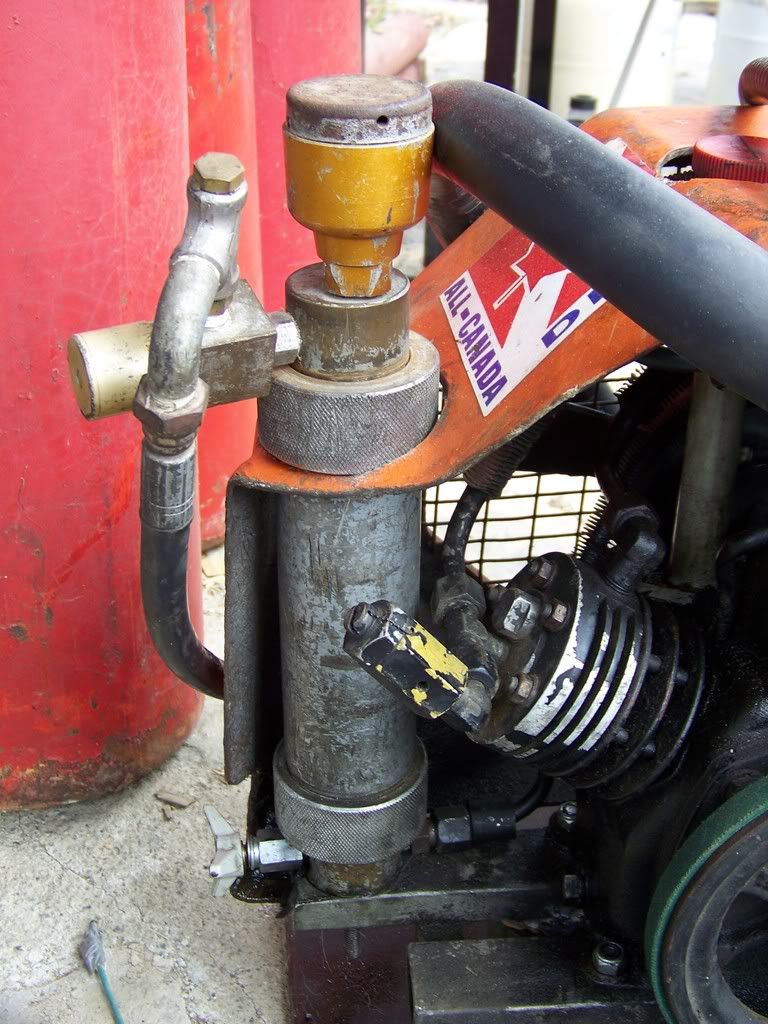
Well...you have successfully lost me..lol. I will snap a pic of my filter system and one of the cartridge. Something that I would plumb inline to replace the existing would be great, but I really don't want to spend more than the compressor is worth either...I can slow fill and change filters more often if necessary...I know the fellow I got it from used it for years just the way it is.

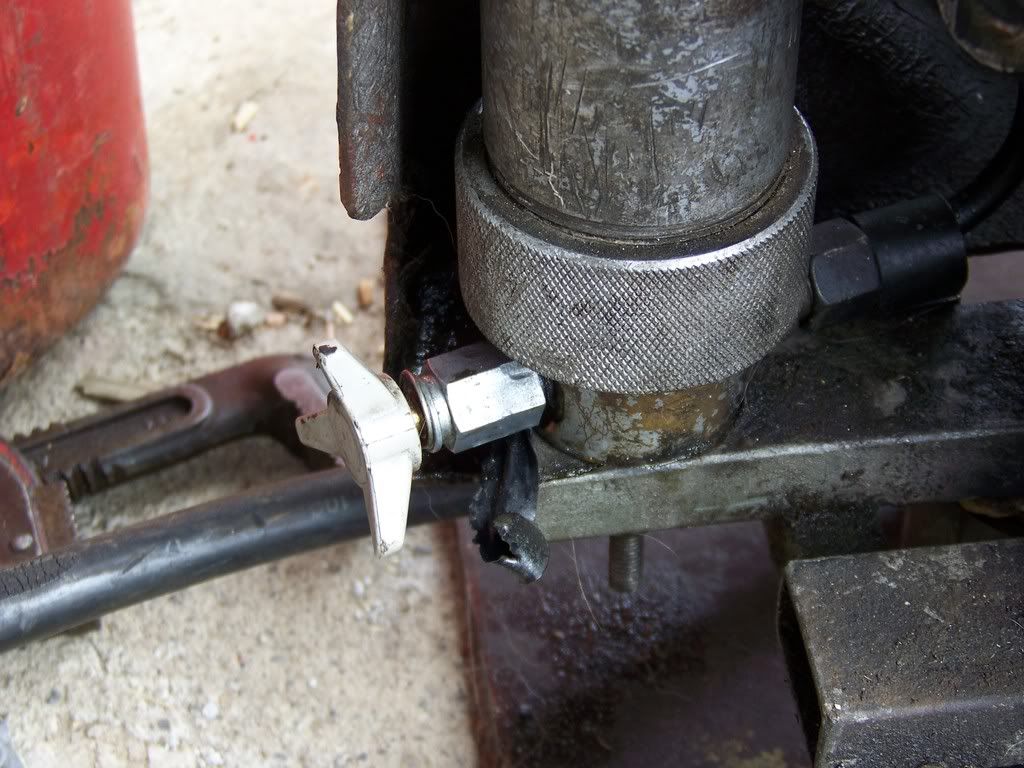
edit..I should add, that yes, my filter does drop in pressure when I release the water separator..but I also try to clear the line with freshly pumped air before connecting to my tank again..if that makes any difference..
 
Scuby, I have an idea how to convert that Bauer canister into a superb water separator. Remove the charcoal cartridge. Install an air stone (diffuser) in its place. I guarantee you will not see any neat water come out of that canister, ever. The air stone can be a simple ceramic cylinder or a fancier item. If a simple cylinder is used it will be necessary to make up a stainless tube to fit inside. The tube would be threaded on both ends and holes drilled in the upper section of the tube. The stone fits over the tube covering the holes in the tube and is held in place with washers, gaskets and a nut. Taking a short cut, it may be possible to buy a stone encased in a cartridge and just screw the thing into the brass head of the canister. However, it might be better to make one up from scratch. There must be a hollow or void in the cylinder so that water can accumulate and drain. The hole or holes in the tube must be near the top of the cylinder to prevent water from entering the tube.

The air stone is micro-porous and increases the contact area with the air flow tremendously. As a result, they have impressive ability to precipitate moisture.

Istrument & material
 
Last edited:
Interesting Pescy...lol...where does the water go? Or does it just dissipate/evaporate? What about the MS and AC...would one need that then? Or does the stone take care of all impurities?...as I see it is used in water treatment...I just happen to have a buddy that manages a large water treatment place and possibly he may have something I can use for a very good price..:)
 
Scuby, it would be helpful to see some pics.

Air entering the Bauer canister is deflected and slowed which causes precipitation. Condensate flows to the bottom. However, this method is only partially effective and leaves much air laden with vapor which tries to escape through the air stone. Because of its porosity, the effective area of the air stone is huge which means that water molecules are more likely to impact against its surfaces. This causes a loss of energy which prompts the vapor to precipitate thus removing the remaining moisture and oil which falls to the bottom as the air itself passes through the stone. At this point, the air is not contaminant free. There remains a small amount of oil and water in gaseous form which must be removed. Removal is accomplished by filtering the air through a chemical bed consisting of desiccant and activated charcoal.

The cheapest type of filter consists of a metal can which is hand packed with these chemicals. These are available from Shelden Sporting Goods and other sources. The most expensive filters are available from Lawrence Factor, Compressed Air Specialties, etc. Instead of hand packing, the canisters enclose a plastic cartridge which has been preloaded.

Moreover, if not already installed, a back pressure valve must absolutely be installed in the air line, mounted to the fill armature or one of the canisters.
 
The problem with this is that in most of the early Bauer stacks like his I have seen - the gold ones with the little 4" cartridge inside and the check/CBP valve in the top - the flow is, best I can recall, into the canister, then into the media cartridge from the bottom, up the tube, through the cover, built-in valve, and out. So if you replace the cartridge with an airstone or sintered element, the water that precipitates in the element will be driven inward in the directio of the flow, and up the tube. For the element to be effective flow should be from the inside out, so the element discharges into a low flow plenum where the water can drip down while the air goes its merry way.

BTW I have seen people make quite effective separators by taking the guts - sintered element and little spinner plate, etc - from a cheap LP unit, and putting them in a suitable HP container. Always wondered if their is any significant difference between the element in my $12.98 surplus LP separator, and the one Bauer wants $50-95 for.

Scuby, I have an idea how to convert that Bauer canister into a superb water separator. Remove the charcoal cartridge. Install an air stone (diffuser) in its place.
 
BTW I have seen people make quite effective separators by taking the guts - sintered element and little spinner plate, etc - from a cheap LP unit, and putting them in a suitable HP container.

That's exactly where I'd start if I needed to build a coalescing separator. For those less familiar many "shop air" application use a "FLR" at the point of use.

A FLR is a Filter / Regulator / Lubricator. The first part, usually can shaped, or bowl shaped is the referred to as the "filter" but is really a coalescing separator. These are sold separately, as are the elements.

A little time spent online with McMaster Carr will provide many many examples.

The real challenge for the DIY is adapting these elements to a HP container , or constructing a safe HP container.

Tobin
 
Hacker, the Stewart Warner 4 cfm compressor assembly was equipped with a coalescer with an air stone suspended at the outlet (overhead, hanging from the ceiling). This has a "particular" advantage over a bottom mount in which the air is injected through the bottom and flows out of the stone. In that arrangement, tiny particles of debris enter the stone and clog it up. However, I suspect that the bottom mount is a trifle more effective as a condenser but I don't know. I do know that the SW coalescer was very effective. The stone was hollow and allowed moisture to collect and drip down. So, the lesson is that there must be a small void in the stone, eg, the cylinder ID must be larger than the tube from which it is suspended. Thanks for bringing that up. I don't like loose ends.
 
Here is a pic of the Stewart Warner air stone as installed in the condensator can. The stone is cup shaped and fastened with a bolt. I guess the outlet port is drilled to the side of the bolt hole. I don't recall. Remember, scubadoo, if this is all too much, you can just stuff the existing cartridge with stainless ribbon or wool.
 

Attachments

  • SW filter.jpg
    SW filter.jpg
    25.7 KB · Views: 85
Ok..This is a bit much honestly..lol..What if I were to get a small flat, round stone that fit in place of one of (the first or bottom) pads in my packed cartridge?
When you say "pack the canister with stainless wool or ribbon...do you mean the HP canister around my cartridge of MS and AC? And what is this stainless wool or ribbon?

Here are a few pics of the current set up. Hope they are big enough...lmao...oops..

misc006.jpg

misc007.jpg

misc010.jpg
 
If a sintered filter is placed in the cartridge(the blue thingy) it is possible that the cartridge wall will collapse or air will slip around the edges. On the other hand, a thick wad of stainless ribbon will act as a condensation surface, not perfect but it should help. Objectively, both are mickey mouse solutions. Your canister is a coalescer of sorts and has the swirl feature which is a good first step for wringing out moisture. Going the next step to add a micronic element would complete the design. Tobin and Vance have already mentioned some possible sources for these elements. Aways back, I brought this up as an alternative design; my experience with the old style Bauer was not very positive and there is some concern that water will enter and shorten the life of the chemical bed (secondary/final filter). At first, I suggested adding a BP valve to the Bauer canister whereupon a big fog was raised. Guiding you through muddy waters might be difficult, so, I offered an alternative solution. The canister is already equipped with a Bauer valve. These can be adjusted by loosening the cap and nut. First, check the actual cracking pressure by hooking everything up to a tank with the tank valve closed and watching the gauge to observe at what point the pressure rises. It needs to be 2400 psi. Bauer used to set these to 500 so it will need to be checked and/or adjusted. Rotating the cap clockwise increases the pressure. This adjustment is fairly sensitive and a small adjustment can result in a large change.
 
Last edited:
https://www.shearwater.com/products/perdix-ai/

Back
Top Bottom