tmassey
Contributor
Uh oh, more auto-drain issues.
So the next time I ran the compressor, I tried to watch the pressure gauges instead of listening for the drains. Once again, when I start the compressor, the drains activate for 8 seconds, then close. Great: at least that's working. Then I watched the gauges. Once again, I can't see that the pressure ever drops like I expect it to. OK, fine, I'll use the wheels for the moment. I also dug out a multimeter to see if I can see what's going on with the solenoid timer, but the timer leads have plastic covers and there's lots of exposed 220V in the box and I don't really want to mess around too much while it's on, so I'm having a hard time getting a good measurement.
After about 30 minutes my tanks are full, so I decide to power off and unplug the compressor so I can work safely in the control box. I rig up a way to measure the signal and restart the compressor. 8 seconds of drain (as expected) continues *past* 8 seconds (not as expected) -- and it doesn't stop! OK, so I hit the big red button. Make sure everything is set up correctly, wheels are closed, etc. and start up again: same thing. Drains don't stop. Uh oh, now what've I done?
In the back of my mind I wonder if gunk has clogged something, probably the solenoid. I noticed when I re-connected the control gas tube, the plug I removed was quite gunky. The plug was at the bottom of a T at the bottom of the coaleser, and I suspect that there was 5 years of coaleser gunk sitting at the bottom of that T which has now tried to make its way through my newly-repaired auto-drains. But I'm *not* about to start tearing things apart when I just paid someone to fix it...
So, put in a call to Poseidon Air. Over the next week of back-and-forth, we try a few things. The most interesting things he has me do: Remove the wheels (back the wheels all the way out and use a 17mm wrench on the nut behind them) and check the tips at the end of the stem: they're all in place and undamaged. Remove the coil and put a screwdriver in the hole and make sure that the coil energizes (it attracts the metal screwdriver) and *stops* energizing: which it does.
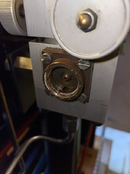
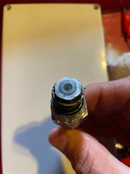
The final thing he has me do is use the hex flats on the solenoid stem to remove it from the body of the drain (not the screws that attach the whole assembly). As soon as I do, I see a healthy amount of crud on the solenoid soft seat. The orifice has a little crud as well. OK, obviously gonna have to clean that up.
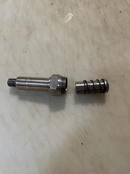
So I soak the the stem assembly in hot water and Dawn, and use Q-tips to clean out the orifice area. I also remove the control gas tube and soak it in hot water and Dawn, and use some pipe brushes to clean out the tube *and* the T as best as I can, too. They both have a fair bit of crud in them, but seemed to clean up well. The solenoid stem and orifice cleaned up quite nicely.
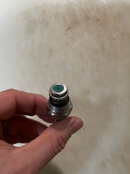
One thing that's not great: the seat has quite a set. It's probably 1/16" deep or so now, and it started its life out flat. It turns out that these seats are one of the parts in very short supply... so we'll see how it goes with just cleaning it.
OK, now that everything is clean, I put it all back together, and push the button... 8 *really* long seconds while it blows down... and then it stops! Yay!
I don't have time right now to run the compressor, so I shut it down after a few seconds. So far, so good: I seem to have auto-drains that at least *close* like they're supposed to...
Tomorrow I have to fill some tanks, so I'll run the compressor. Hopefully, I'll finally see if the drains are engaging like they're supposed to...
Here are some more photos for those keeping score at home: orifice and seat before cleaning; and the stem and seat after cleaning.
In the photos, you can see the "set" (or well *beyond* set) that this seat has. It seems to seal, but it would be nice to be able to replace it. If I can't get an actual OEM seat, I may have to consider making one of my own. I know I've read posts from others (@rsingler. @Couv and @Bob DBF come to mind) about making seats from generic material. Given that this is not a life-support application, I'm up for it. I know the general idea is "punch out the right size disc of rubbery material and shove it in", but that ignores a lot of details, of course. Does anyone have any suggestions on how I might pursue this?


