Unless your tablet is an Ipad with a Retina display you're likely not able to see them because your tablet resolution is about 1/2 that of normal computer screen. And it's a smaller physical screen so the effect is also minimized unless you zoom in on a section of the image.
There are two things you could be doing wrong in Picasa. If you're using one of their default crop options that are larger than the original image, what it's doing is trying to in effect make each pixel larger to fill the space leading to the distortion you might be seeing. Since the original didn't have the content, the software interpolates based on the surrounding pixels and tries to "guess" what goes in the newly created space.
The other is if you're using it to publish to the web, you'll notice that under Options, Web Albums: the JPEG Quality box - Preserve Original Image Quality (Uses More Storage) is unchecked. So as I mentioned previously, every time you re-save the image, Picasa is reducing the quality.
So at the very least, check that box. Since you're shooting .jpgs, the increased storage space needed will be minimal.
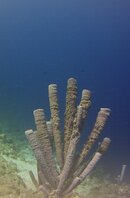
It's more obvious in solid backgrounds like yours compared to the rougher texture of the sponges. Although it has been uniformly applied across your image, you just can't tell. I even see it a little in the foreground, the rocks also look a little pixelated.
One trick any good photo editor learns is not to do too much - and more importantly not too many times. Repeatedly saving a .jpg after you make a change reduces the quality each time you do. Picasa may/may not have threshold level tools for their effects, I'm not that familiar with it.
A good trick is to always start with a clean original. Make a copy of it and don't use your source file. If you do multiple changes and don't like the result, start over with a new copy. You can't undo resolution/quality changes once they're saved. Except in a tool like Photoshop where you can undo everything back to the original if desired - and visually see it happen.
Mostly it just takes practice. I've been using Photoshop since about 1998.


") When I downloaded it and transferred to the tablet, there were no background squares using Snapseed. Still figuring out the downloading step let alone the editing techniques. Hats off to all you who do!
When I downloaded it and transferred to the tablet, there were no background squares using Snapseed. Still figuring out the downloading step let alone the editing techniques. Hats off to all you who do!