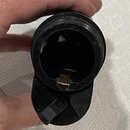
I have an SL4 that had a corroded switch which made it unreliable. I was able to successfully repair it today. It's a pain but here's how I did it:
1. Remove light head and batteries.
2. Remove switch lever by removing the screw and gently prying up on the switch lever.
3. Remove switch actuator by inserting small screwdriver in switch lever screw hole.
4. Remove o-ring from under switch lever.
5. I removed the switch contact in order to clean it.
However, it is quite difficult to remove and re-install without damaging the light. I recommend you leave it in place if possible.
Here's what the contact and actuator look like together. Note the index notch on the bottom (I think this is the correct orientation, but I can't prove it, except that my light works).
6. Clean corrosion off the actuator and contact as best you can. I also put some NOALOX on the copper (yes, I know it's for AL-CU wire connections) in an effort to prevent future corrosion.
7. Install actuator in light body, with the index notch down (away from the light head). Do not install the o-ring yet.
TIP: Put a tiny dab of NOALOX on your finger so the actuator sticks to it and you'll be able to more easily position it inside the light body.
8. Install switch lever and screw.
Do not install the o-ring. Doing this without the o-ring is MUCH easier and will let you adjust the orientation of the actuator.
9. Install batteries in light.
10. Use voltmeter to check that the actuator and switch lever are oriented correctly. Remove switch lever screw and reposition lever as necessary to align actuator with ON-OFF positions.
TIP: Leave batteries in light; they will help hold the actuator in position.
11. Carefully remove switch lever (remember what position it is in) and install o-ring (make sure it is lightly lubricated with silicone grease).
12. Reinstall the switch lever and retaining screw.
13. Install light head (lubricate the o-ring on the light threads with silicone grease).
14. Turn it on!!!
15. Go diving.


