Ready for First Digital Experience

Please register or login

Welcome to ScubaBoard, the world's largest scuba diving community. Registration is not required to read the forums, but we encourage you to join. Joining has its benefits and enables you to participate in the discussions.

Benefits of registering include

  • Ability to post and comment on topics and discussions.
  • A Free photo gallery to share your dive photos with the world.
  • You can make this box go away

Joining is quick and easy. Log in or Register now!

Ronsch

Registered
Messages
56
Reaction score
3
Location
Tallahassee
# of dives
500 - 999
I have my C-4040z and just got the Ikelite housing at B&H while doing the tourist thing in New York last weekend. What an impressive place ( the city too)! It looks like I'll end up taking Dee's advice about just using the internal flash for a while unless I win the lottery Saturday night. Trip is scheduled for a week from Sunday off Panama City. Backscatter might be a challenge as viz has sucked big time in that area this summer. I'll almost certainly be using the automagic setting as well.
 
Congratulations! :thumb: I'm still kinds partial to C-4040's!

Your first few dives in Program mode will help you get used to the camera itself. Learn to work the zoom lever, use the buttons to change from macro, spot macro, no macro, etc., Learn how to read and understand the LED window on top so you know at a glance what your camera is doing.

Just don't get hung on P mode, it's too easy to do so. But it notoriously chooses slow shutter speeds. For those baitfish balls you'll find in Panama City, you'll need a fast shutter to capture them. For example...

In this shot I used a faster shutter speed, 1/250 I think, so each fishes details were sharper. I ruined the photo by using Auto Fix but you get the idea....
aaf.sized.jpg


This one was taken in P mode because I wanted to see what aperture the camera chose. These were some of my first photos I used with PSElements and I lost the EXIF info and don't want to dig up the originals and re-do them! But if I remember correctly the 'shutter speed' was around 1/30. Neither perfectly right but you get the idea. I have since learned how to save the exposure information!

aag.sized.jpg


Move to Aperture Mode as soon as you're comfortable with the feel of the camera. You'll soon learn the actuality of depth of field. You can also do this in the pool before your trip so you'll be familiar with that camera before you 'waste' any dives learning it! Of course, no dives are ever wasted but you know what I mean!

My last step was to move to full Manual mode and I was scared to death! But now it's actually my favorite of the three. I have total control over the exposure. I'll admit, I got some really strange ones starting out but everything you learned in A mode finally clicks in the it's a piece of cake!

Don't forget to show us your first photos!
 
Hi Dee,

Sorry but I have left my manual at home (Australia and I am in Canada) and I cant figure out how to change these settings. I have exactly the same set up as Ronsch.

Can you walk me through the menu in a PM or even here if you like?

Andrew
 
Excellent advice from Dee. The shutter speed worked out perfect in that second photo. Kinda gives you the illusion or "feel" of fast-moving fishies.

From my limited experience, I'd have to say that for photos that aren't really close, I just turn off that internal flash. Unless you are shooting in absolutely clear water, it has the tendency to bounce off everything in front of the lens. The diffusor helps a little. If you want photos of backscatter, that should work out ok. :D 
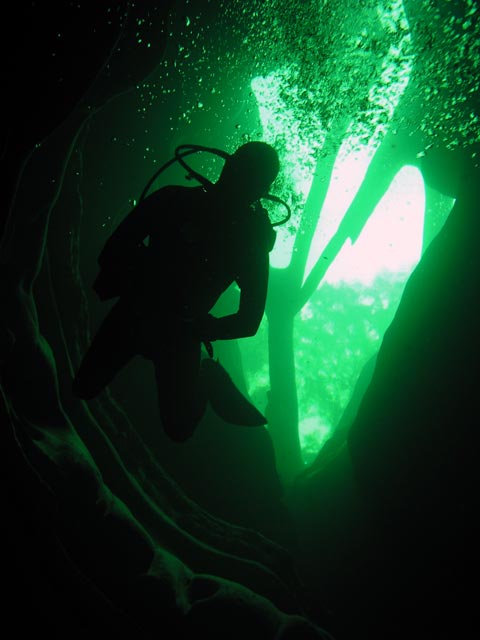
I just recently started experimenting with slow shutter speeds. You get some wierd photos when it's set to 1 second!

I recently did a trip to Blue Springs down here in FL, and found right away that the internal flash was going to make a mess. Here's a shot from around 60ft with the flash off, and shutter 1/60 ISO 64.

aaa.jpg


It probably could have stood to be a little sharper, but a higher ISO or the internal flash would have probably ruined it.

The internal flash works great for close up stuff, but for silhouette shots like that one the flash is better left off.

Hope you have fun!
 
I like silhouette shots to be totally in the dark, no highlights. The only thing distracting about yours is the sun area is so blown out. I'm still experimenting with settings to fix that...and I get plenty of them my own self!!!

Love that green water. :D :wink:
 
I just realized how distracting that makes the photo....and it was overcast that day!

Ah well...I wonder if there's anything in PS I can do to tone it down a little. The burn tool just wasn't working.

I'm also curious what setting on the camera could have helped that. Maybe a slower shutter speed? But then, I might not have got some of the surrounding walls. I wonder if aperture had anything to do with it?

Hmm...good point Dee. Now you've got me hunting for a solution. :D
 
I can do that! First, here's a link to an article written by Jeff Farris, aka Digital Diver, on getting started with Olympus Cameras. Jeff and his photos were very instrumental in my change to digital. This is the same advice I started with and I haven't found a reason to change any of it.

Olympus C-XOXO Primer

Now...to get TO those settings, I'll try to talk you through it. It's actually very easy. Wait...let me get my camera so I don't mess you up! :wink: OK....

On the back of your camera, press the OK/menu button

Choose the Mode Menu.

Using the down arrow, go to the bottom of the menu to 'Setup'

Use the right arrow, you'll be at All Reset at the top of the Menu.

Use the right arrow again to chose which mode. Use right arrow again to chose Custom.

This is where you set the settings in Jeff's article. One clarification I have is setting the flash. The setting underneath the Internal Flash, the one with the lightening bolt and SLOW, set it to Slow1. Another is the 'Fill flash'. There is so fill flash mentioned. You want the single lightening bolt symbol.

A couple comments....
I seldom use the internal strobe at full power. The .-7 setting that Jeff suggests has worked very well for me as a rule. I do increase it for wider shots but for macro, anything higher and you'll fry those little creatures!

I use Auto focus all the time. I turn the monitor off during the dive if I'm not taking shots but as a rule it's on most of the time. I get a full 2 dives with juice left over off a set of 2000NiMH rechargeable batteries. YMMV

For my local dives, when I'm just taking pictures to try new stuff, or just putzing around I'll use HQ. I can still get a 5x7 print if I take something worth printing. But on a dive trip I use SHQ...you just never know what you'll get so be prepared!

If you need more specific help, let me know.
 
Dr. Jay once bubbled...
I just realized how distracting that makes the photo....and it was overcast that day!

Ah well...I wonder if there's anything in PS I can do to tone it down a little. The burn tool just wasn't working.

I'm also curious what setting on the camera could have helped that. Maybe a slower shutter speed? But then, I might not have got some of the surrounding walls. I wonder if aperture had anything to do with it?

Hmm...good point Dee. Now you've got me hunting for a solution. :D

No...A slower shutter speed would only have allowed MORE/LONGER exposure. Remember the background is controlled by the shutter speed....so I would have gone with a faster shutter speed. Slowly bracketing until I got the whole area. Gee...guess you better go back and practice!!! :wink:

If there's a trick in PS7 to fix just that, I wouldn't know what it is. I only have PSElements. The burn tool won't help that large an area.
 
does anyone have a link to where i can pic up one of these cameras and there underwater housings?
and how much do hey run 4?
 
https://www.shearwater.com/products/perdix-ai/

Back
Top Bottom