PS Elements advice w/ these two shots??

Please register or login

Welcome to ScubaBoard, the world's largest scuba diving community. Registration is not required to read the forums, but we encourage you to join. Joining has its benefits and enables you to participate in the discussions.

Benefits of registering include

  • Ability to post and comment on topics and discussions.
  • A Free photo gallery to share your dive photos with the world.
  • You can make this box go away

Joining is quick and easy. Log in or Register now!

sirthx

Registered
Messages
35
Reaction score
0
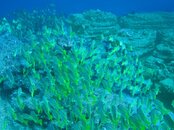
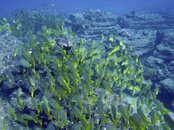
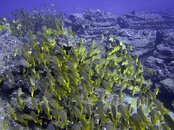
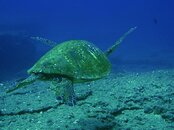
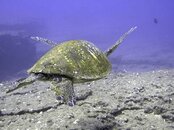
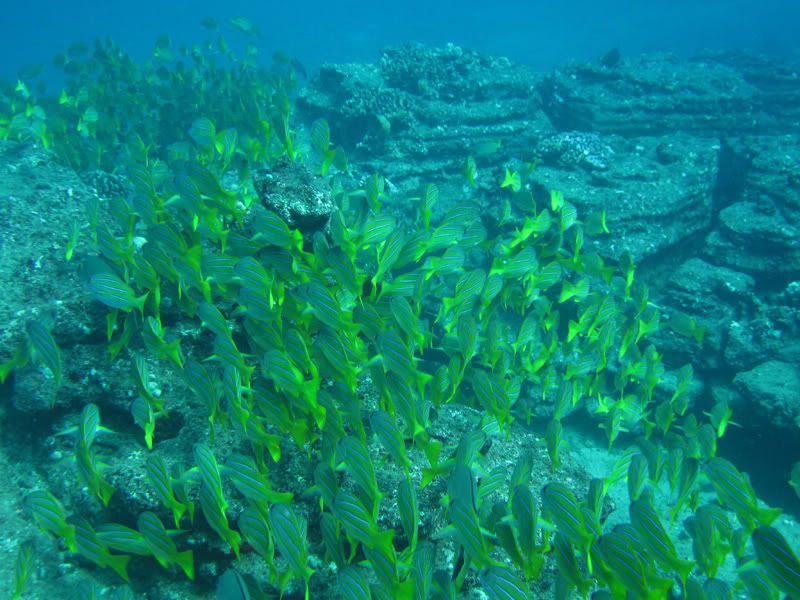
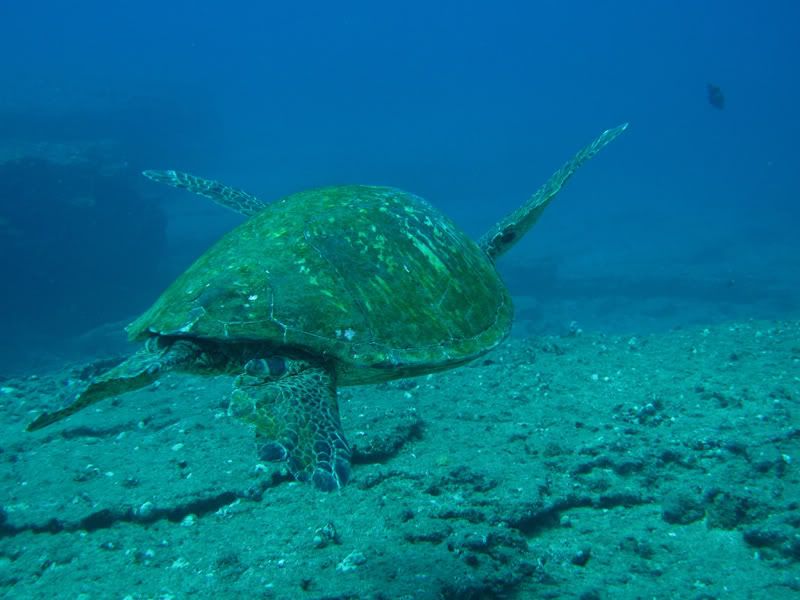
I have many shots from Kauai dives last week that are similar to these, so I thought I'd ask for help before I dove in and started processing. These are in about 60 ft of water. I know adding a bit of red back in can help but as a novice to UW photography I'd love to get a bit of a workflow going. I can't seem to get close to the yellow I'd like on these snappers, and on the Green Sea Turtle I'm not sure there's much I can do. (these are with no flash from a point n shoot so I know the logical next step is to get strobes for my dslr :))

Any advice greatly appreciated!!

-Mike

bssnapperspshelp.jpg


GrnSeaPShelp.jpg
 
Doing a "correct color cast" in PSE3 using a light spot in the lower right, followed by an autocontrast resulted in the 2nd pic. It didn't have enough color and looked overcorrected, so I reduced that layer to about 70% opacity to put back in some of the original, resulting in the 1st photo.

PSE did most of the work, so it takes just a few seconds per photo. If you have a few photos that you really like, then you can take more time and see if doing individual RGB levels adjustment gets a better correction. When making the RGB level corrections, be sure and also move the center sliders around a bit -- it often helps the overall color balance to move the red center slider a bit to the left, and the blue center slider off to the right.
 

Attachments

  • bssnapperspshelp copy.jpg
    bssnapperspshelp copy.jpg
    89.6 KB · Views: 35
  • bssnapperspshelp copy2.jpg
    bssnapperspshelp copy2.jpg
    89.2 KB · Views: 44
Doing a "correct color cast" in PSE3 using a light spot in the lower right, followed by an autocontrast resulted in the 2nd pic. It didn't have enough color and looked overcorrected, so I reduced that layer to about 70% opacity to put back in some of the original, resulting in the 1st photo.

PSE did most of the work, so it takes just a few seconds per photo. If you have a few photos that you really like, then you can take more time and see if doing individual RGB levels adjustment gets a better correction. When making the RGB level corrections, be sure and also move the center sliders around a bit -- it often helps the overall color balance to move the red center slider a bit to the left, and the blue center slider off to the right.

I didn't play to much with 'color cast' because I didn't think there was much of anything really black or white to work with. I'll mess with that, spend some time and see what happens.

Much appreciated!!

-Mike
 
Posted for my wife (the PS expert in our family):

I use PS7 but many of the same commands might be available in PSElements.

I have attached my versions with some quick changes. One of the easiest changes is to add adjustment layers (Image > Adjustments > Auto Color, Auto Contrast, and Auto levels). These 3 commands often made a big difference without having to have a keen eye for colors or remember a complex series of layering commands. Often, I take a look at these as the first step in my image processing.

A slightly more complex adjustment can be accessed under Layer > New Adjustment Layer where you can adjust the Brightness/Contrast and Color Balance. These give you a bit more control with making changes to the image (again without requiring multiple sets and layers).

One of the best "advanced" tricks that I picked up involves turning the water that nice deep blue. I really can't take credit for the technique. I learned it from a DVD that I got for Christmas. The Underwater Workshop is absolutely excellent (even if you don't have the latest version of PS. The author walks you through image adjustment in many different ways and shows you each step using screen shots). To turn the was blue... look under Layer > New Adjustment Layer > Hue/Saturation. This will open a popup. At the top you can "edit" a color and "Master" is selected by default. You want to change that to "Blue". Then click the eyedropper on a blue area of you picture. (btw... sometimes this automatically changes the selection from "blue" to "cyan"... don't worry if this happens). Next, move the "Hue" slider to the far left (it will change all of your blues to some odd colors). You will also notice changes on the rainbow spectrum at the bottom of the box. You will drag the vertical bars on the spectrum so that they are further apart and encompass more of the blue portion on the bottom line of the spectrum (You may also need to drag the little arrows further apart... the arrows include the feathering while the bars include the main color definitions). Finally, you will shift the "Hue" slider back toward the center (until you are happy with the color).

I hope this helps,

DamselDoc
 

Attachments

  • bssnapperspshelp.jpg
    bssnapperspshelp.jpg
    118.7 KB · Views: 31
  • GrnSeaPShelp.jpg
    GrnSeaPShelp.jpg
    82.2 KB · Views: 30
Posted for my wife (the PS expert in our family):

I use PS7 but many of the same commands might be available in PSElements.

I have attached my versions with some quick changes. One of the easiest changes is to add adjustment layers (Image > Adjustments > Auto Color, Auto Contrast, and Auto levels). These 3 commands often made a big difference without having to have a keen eye for colors or remember a complex series of layering commands. Often, I take a look at these as the first step in my image processing.

A slightly more complex adjustment can be accessed under Layer > New Adjustment Layer where you can adjust the Brightness/Contrast and Color Balance. These give you a bit more control with making changes to the image (again without requiring multiple sets and layers).

One of the best "advanced" tricks that I picked up involves turning the water that nice deep blue. I really can't take credit for the technique. I learned it from a DVD that I got for Christmas. The Underwater Workshop is absolutely excellent (even if you don't have the latest version of PS. The author walks you through image adjustment in many different ways and shows you each step using screen shots). To turn the was blue... look under Layer > New Adjustment Layer > Hue/Saturation. This will open a popup. At the top you can "edit" a color and "Master" is selected by default. You want to change that to "Blue". Then click the eyedropper on a blue area of you picture. (btw... sometimes this automatically changes the selection from "blue" to "cyan"... don't worry if this happens). Next, move the "Hue" slider to the far left (it will change all of your blues to some odd colors). You will also notice changes on the rainbow spectrum at the bottom of the box. You will drag the vertical bars on the spectrum so that they are further apart and encompass more of the blue portion on the bottom line of the spectrum (You may also need to drag the little arrows further apart... the arrows include the feathering while the bars include the main color definitions). Finally, you will shift the "Hue" slider back toward the center (until you are happy with the color).

I hope this helps,

DamselDoc

Very cool! Thanks very much for the tip. I'm definitely going to try that. I have PS7 on my laptop (from an old job) but I don't have the software to load on my desktop, which is where I do my editing. So I can use that as a fall-back if I have trouble with Elements. Thanks again!!
 
Another feature that I use in in PS7 is the "Unsharp Mask" (under "Filters"). I don't know if Elements has anything similar, but I have found that the filter can make the image really crisp.

DamselDoc
 
How about this? I did it in about 10 seconds with Aperture's white balance tool and auto level adjustment.

Gil
 

Attachments

  • GrnSeaPShelp.jpg
    GrnSeaPShelp.jpg
    22.6 KB · Views: 32
Last edited:
This was done using adjust color/remove color cast and auto color correction. It does look like it lost some definition when I uploaded it.

Gil
 

Attachments

  • bssnapperspshelp.jpg
    bssnapperspshelp.jpg
    88.1 KB · Views: 31
https://www.shearwater.com/products/teric/

Back
Top Bottom