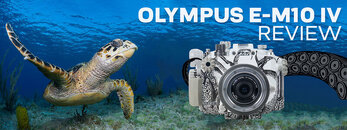
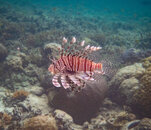
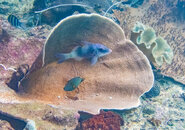
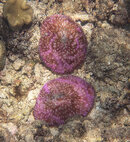
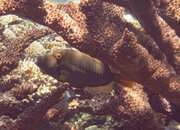
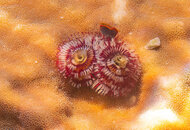
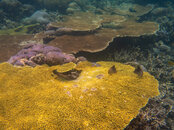
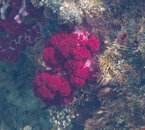
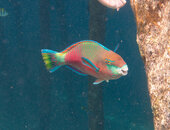
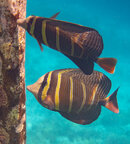
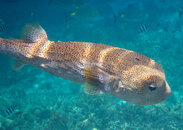
I took the Octo-housing with the Olympus EM-10 mk IV on an eight day snorkeling tour of the Dampier Strait area of Raja Ampat. Here's a review:
I was looking for an upgrade to my Olympus TG-4 as a snorkeling camera. While I had gotten some great shots with that camera, I was looking for something that would give me a higher keeper rate and a better ability to crop photos, while at the same time being light and compact enough to carry via a wrist lanyard.
I found my new set up – with the super light EZ 14-42mm lens – was exactly what I was looking for. The camera is not much heavier than most compacts (about 17 oz with battery), while the much larger sensor led to a much higher keeper rate, and I could crop photos to 100% without having the image fall apart. I did not use any strobes – these usually aren't needed when snorkeling, since you're close to the surface, and you are usually in constant motion, so it is often difficult to get close enough for strobes to be effective. (The camera has a built-in flash, but it doesn't work with this housing.)
Specific notes:
– the shutter button on this camera is quite sensitive. With burst mode enabled, it is difficult to only take a single shot, but I found taking a three or four shot burst was almost always beneficial because – especially underwater – all the shots were slightly different, with different lighting.
– I found the lens sharp despite its light weight. You can get quite close and approach macro image sizes with the lens; it is wide enough to capture big creatures as well, though of course not true wide angle.
– The housing performed flawlessly with a couple of exceptions. First, after about an hour or so of heavy burst shooting, I would usually get some condensation on the inside of the port. But this did not affect photo quality as far as I can tell. I was staying at a resort with high humidity and without air conditioning (Papua Explorers Eco-Resort), so that may have been a factor. I tried putting a desiccant pack in the bottom of the housing, but it shifted and jammed the zoom gear. On my next trip I might experiment with taping the desiccant pack to the bottom. Second, the instructions didn't make clear that the vacuum system will start flashing red (which is the color for a leak) when the case is open and the battery is low. This happened towards the end of my trip, and it took me a while to figure out what was happening.
– If you use the back screen for focusing and composing (as with the TG-4), you need to set the brightness to maximum. I failed to do that on my first outdoor test and could basically see nothing in the screen and was forced to shoot blind. Being used to the TG-4, it didn't occur to me at the time that I could use the viewfinder instead! And since then I personally prefer the viewfinder (I also set its brightness to maximum); it is obviously shaded from any glare and I think pressing the housing to your face helps steady the camera. (It can be hard to see the entire frame through the viewfinder when wearing a mask though – so if that is critical the back screen would be a better option.) I did still use the back screen on a couple of occasions because it reduces the distance between you and the subject, and it worked fine. The housing comes with a rubber shade for the back screen, but I found this made the housing awkward to transport and didn't really help much with glare, so I didn't use it. (Backscatter sells a magnifier for the back screen; but I haven't tried that.)
– Battery life is good. Should last for a couple hours of heavy shooting – if not more.
– I set the camera to "P" mode and let it choose shutter speed, aperture, and ISO; I almost never do that above water, but find it best to simplify underwater. A hidden feature of this camera is that you can set a minimum shutter speed up to 1/250 by setting the shutter speed for flash – and this works whether you use flash or not. I set the minimum to 1/200, so the camera would not go below that speed in P mode unless the aperture and ISO were already set to the maximum settings to allow light. This was helpful for ensuring I didn't get shutter speeds so low that fish movement was blurred.
– Low light performance was good, but only really needed on a couple of occasions; most of the time there was ample light. I was aggressive with ISO and set the maximum to12,800; got decent photos at that ISO, but some detail was lost and 6400 might be a better choice.
– the housing with the camera is positively buoyant. If you add strobes or a metal bracket with handles this would of course reduce the buoyancy. Despite the buoyancy, I found the handling and ergonomics of the housing excellent.
– I found the autofocus good, but of course it struggled with the common problem of fish moving against a busy background. In this context, the camera nailed the focus about 50% of the time. Creature-specific AI autofocus, such as in the heavier OM-1, could be better – but I expect the problem there would be when, as is often the case, there are multiple fish in the frame the camera will have no way of knowing which one you are trying to focus on and may not lock on to the intended target.
– The camera doesn't have an underwater white balance mode; I adjusted WB in postprocessing.
Jim
![Olympus OM-D E-M10 IV Underwater Camera & Housing Review - [embed sexiest photo we can muster of this rig] Olympus OM-D E-M10 IV Underwater Camera & Housing Review - [embed sexiest photo we can muster of this rig]](https://www.backscatter.com/images/article/content/Olympus-E-M10-IV/Olympus-OM-D-E-M10-IV-Review-Video-Kit.jpg)
![Olympus OM-D E-M10 IV Underwater Camera & Housing Review - [embed product links to housing and camera, separately side-by-side, with BUY NOW buttons] Olympus OM-D E-M10 IV Underwater Camera & Housing Review - [embed product links to housing and camera, separately side-by-side, with BUY NOW buttons]](https://www.backscatter.com/images/article/content/Olympus-E-M10-IV/Olympus-OM-D-E-M10-IV-Review-Camera-Housing-together.jpg)
![Olympus OM-D E-M10 IV Underwater Camera & Housing Review - [embed photo: view of all included accessories with housing] Olympus OM-D E-M10 IV Underwater Camera & Housing Review - [embed photo: view of all included accessories with housing]](https://www.backscatter.com/images/article/content/Olympus-E-M10-IV/bs-uh-em10-iv-accessories.jpg)


![Olympus OM-D E-M10 IV Underwater Camera & Housing Review - [embed cool photo: someone looking like a badass with this rig underwater] Olympus OM-D E-M10 IV Underwater Camera & Housing Review - [embed cool photo: someone looking like a badass with this rig underwater]](https://www.backscatter.com/images/article/content/Olympus-E-M10-IV/Olympus-OM-D-E-M10-IV-Review-14-42mm-EZ-Lens.jpg)
