


With some help from Bob3 I decided to put valve ports in the dry suit. I got this suit for free from a buddy who had out grown it. I tried it on and it was a very tight fit in the arms and shoulders. I couldn't use it, so I fired up the pc and tried to find some one who could make it bigger for me. I found some one and sent it off. A few week later I get it back and presto it fits. They added a 3 inch gusset to the sides and the arms, so if the suit looks a bit weird that is why. But who cares, it fits. Now on to the next project valves port install.
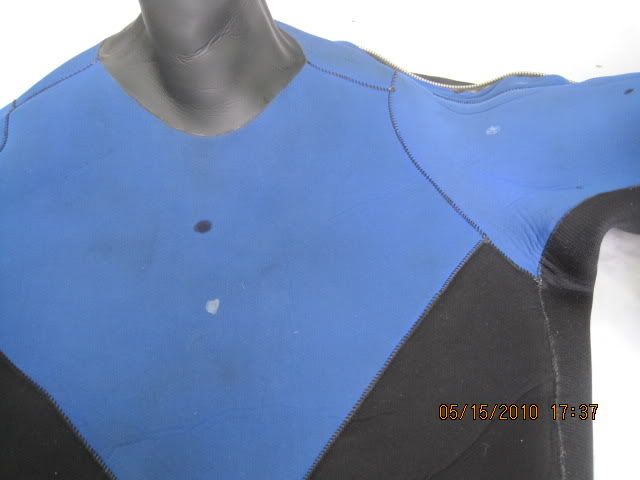
First, You need to mark your locations- I just used a paint pen. It helps to have someone else mark it for you, while you hold it where you want it.
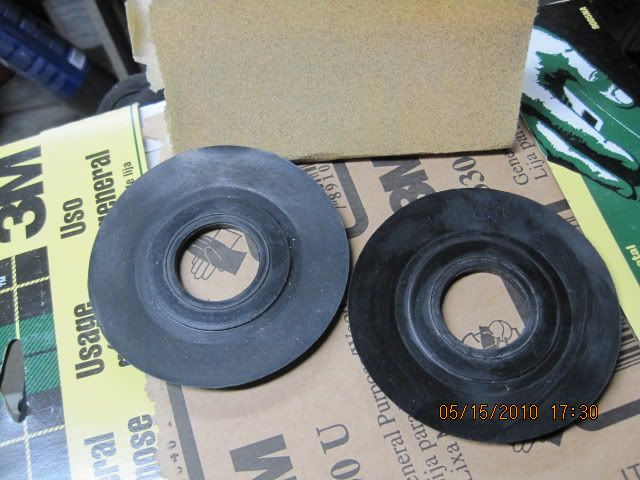
Then it is time to prep the valve ports. The valve ports have a mold release agent on them that must come off. I found some sand paper and "roughed up" the side that will be glued. At this point you are just trying to provide a surface for the glue to grip.
You can see the one on the left has been sanded, one on the right is has not been done. Pay particular attention to the edges, they are resistant to being roughed up.
After that is done I headed outside. The chemicals I am using are not conducive to humans and confined areas.

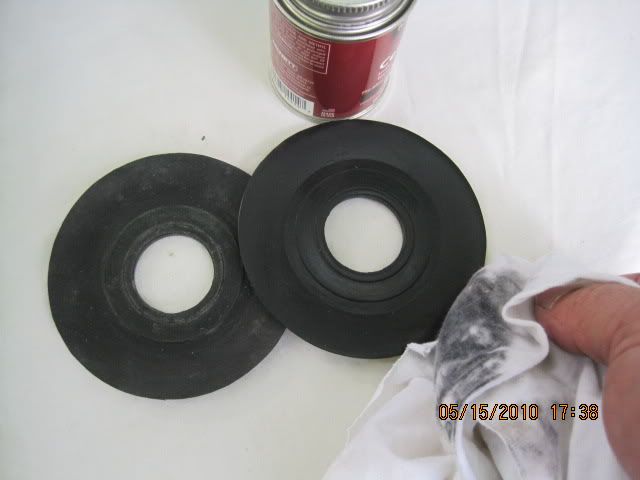
Once you are in a good area, wipe the ports down with Toluene. This will take the remaining mold release off the ports and when they dry they wont be shiny.
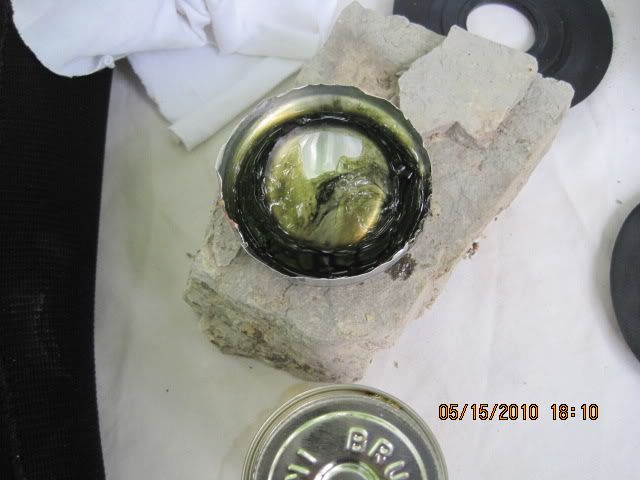
Next step will be prepping the glue. I used Mcnetts, it was recommended by Bob3. This glue seem to dry very fast, and is stringy. Cover anything you don't want glue on. I "cut" the glue with Toluene in order for it to penetrate the suit more. That way the glue gets deeper in to the suit. I used the bottom of a beer can, its what I had available and it is disposable.
Next was the actual gluing. I applied a couple of coats to the valve port, and then stuck it on the suit where I wanted it. I then pulled it off to see what the outline was. I then applied more glue to the suit and a couple of more layers to the port.
Once I was happy with the amount of glue, I set it on the suit and noticed that it was going to be a pain to keep the edges down. With the help of a properly sized cup and a brick, I got the edges nice and tight.
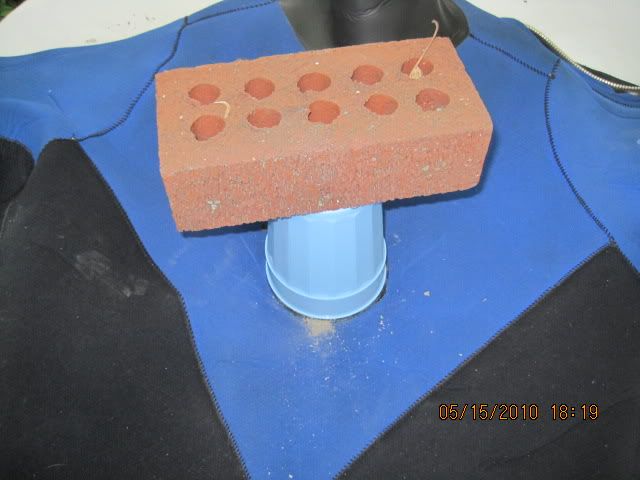
I know, the brick is ghetto. But again, I had them laying around.
Now I let this dry for a few hours, way more than needed but it was dinner time. Light was fading so I hung it up for the night.
Now it is on the the scary part, cutting holes. I got out what I needed and went at it.
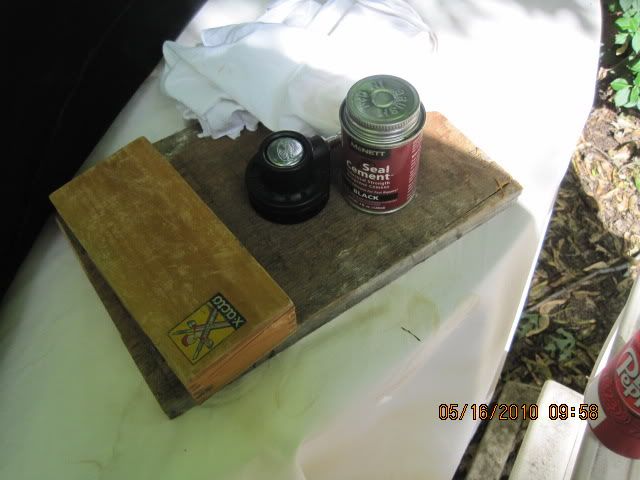
The board is so you don't accidentally cut all the way through the suit.Place it inside the suit directly under where you are cutting.
Deep breath.
I cut the center hole out first, so I can put the valve in. You will see later why.

The Exacto kit was not doing it for me. Neoprene is tougher than I thought.
First hole is halfway done.

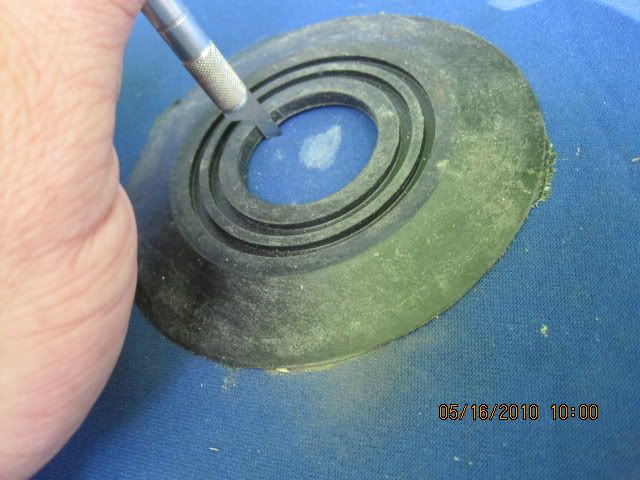
Now I take the valve and stick it in the hole from the inside, and using my paint pen trace around it.

Next the valve has to be pulled out and the remainder of the neoprene has to be cut out. The reason is that valve is not deep enough to go through the port and the neoprene. The inside portion of the valve screws down on the rubber, not the neoprene. Here is what it looks like after the hole has been cut.

Now that cutting instruments are done, I apply more glue to the edges of the hole. That way I avoid any seepage. I did a few coats, and wait. Let it dry before putting the valve in it. Otherwise valve replacement down the road will be a pain. I also waited for the glue to dry before going on to the next hole. This is still a work in progress, so I don't know if it leaks. I am waiting on the glue to dry, and will report back later and let you know if it leaks.
First, You need to mark your locations- I just used a paint pen. It helps to have someone else mark it for you, while you hold it where you want it.
Then it is time to prep the valve ports. The valve ports have a mold release agent on them that must come off. I found some sand paper and "roughed up" the side that will be glued. At this point you are just trying to provide a surface for the glue to grip.
You can see the one on the left has been sanded, one on the right is has not been done. Pay particular attention to the edges, they are resistant to being roughed up.
After that is done I headed outside. The chemicals I am using are not conducive to humans and confined areas.
Once you are in a good area, wipe the ports down with Toluene. This will take the remaining mold release off the ports and when they dry they wont be shiny.
Next step will be prepping the glue. I used Mcnetts, it was recommended by Bob3. This glue seem to dry very fast, and is stringy. Cover anything you don't want glue on. I "cut" the glue with Toluene in order for it to penetrate the suit more. That way the glue gets deeper in to the suit. I used the bottom of a beer can, its what I had available and it is disposable.
Next was the actual gluing. I applied a couple of coats to the valve port, and then stuck it on the suit where I wanted it. I then pulled it off to see what the outline was. I then applied more glue to the suit and a couple of more layers to the port.
Once I was happy with the amount of glue, I set it on the suit and noticed that it was going to be a pain to keep the edges down. With the help of a properly sized cup and a brick, I got the edges nice and tight.
I know, the brick is ghetto. But again, I had them laying around.
Now I let this dry for a few hours, way more than needed but it was dinner time. Light was fading so I hung it up for the night.
Now it is on the the scary part, cutting holes. I got out what I needed and went at it.
The board is so you don't accidentally cut all the way through the suit.Place it inside the suit directly under where you are cutting.
Deep breath.
I cut the center hole out first, so I can put the valve in. You will see later why.
The Exacto kit was not doing it for me. Neoprene is tougher than I thought.
First hole is halfway done.
Now I take the valve and stick it in the hole from the inside, and using my paint pen trace around it.
Next the valve has to be pulled out and the remainder of the neoprene has to be cut out. The reason is that valve is not deep enough to go through the port and the neoprene. The inside portion of the valve screws down on the rubber, not the neoprene. Here is what it looks like after the hole has been cut.
Now that cutting instruments are done, I apply more glue to the edges of the hole. That way I avoid any seepage. I did a few coats, and wait. Let it dry before putting the valve in it. Otherwise valve replacement down the road will be a pain. I also waited for the glue to dry before going on to the next hole. This is still a work in progress, so I don't know if it leaks. I am waiting on the glue to dry, and will report back later and let you know if it leaks.
