mtrhead03
Registered
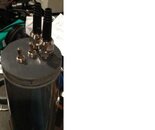
I'm building a canister light for 2 loads, I'm hoping for some helpful comments and that maybe I could drum up some interest in the left over materials I'll be left with and maybe help someone else. I totally understand why these cost so much now. Anyway I'm trying to figure out which tap to use for the sealing gland holes in the top cover, it looks to have a strait thread with O-ring seal, yet a 1/4 by 18 NPT tap lines up pretty good?
I found that when I dove with 2 canisters, one for the light and one for the vest, I couldn't tighten my harness all the way, this was in doubles I'll bet it would be the same in my rEvo, so I want one can.
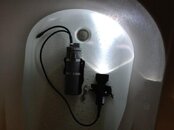
The goal is to build a canister with 2 wires, one for the HID light and the other, with EO end, for the 60W heated drysuit vest, and no unplugging and replugging underwater. I didn't want to hack up my LightMonkey 21W HID for parts, so I decided to source a totally separate light. I'm waiting for a used Sartek 21W HID head with integral ballast that I bought from a another board to arrive. I had enough to deal with making the canister, so I went for the store-bought head. I see on their site, Sartek has a really nice trade in deal on a 35w head, if the 21w ever craps the bed.
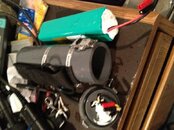
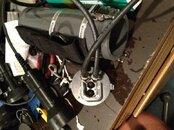
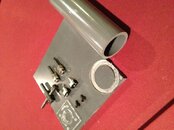
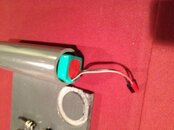
The can will be 3" schedule 80 PVC, I had to buy a 5' length, so there's plenty left over, wink. The bottom end cap will be 3/4" thick pvc with the step cut to half the thickness, 3/8". The picture shows the first attempt at the cut, the cut was started with a circle cutter and then I got impatient and tried to cut the step by eye, with a router and slipped and nicked the peice. The next attempt will be with a trim router, I've drilled the foot to accept a centering pin, shown in pic, which should allow a nice cut, I'll add a second and third hole for the next 2 cuts.
The top will be 1" PVC, I calculated that 1" could be dug out to provide a switch boot protector built in to the cover, similar to commericial units.
I went way over what I envisioned the budget would be on this, but I'm going cabin crazy anyway so at least I'm doing something diving related. This project will still come in at less then half what it would cost retail, including equipment I'll still have when it's done. I paid retail for the glands, switches, latches and such. The 21w head will come with an EO cable attached, I plan on running a regular cord permanently attached to the canister and head. A separate EO cord will power the vest.
The battery is 23AH, 11V, which should power the head for a very long time and the vest for 4 hours, I'm curious to see the performance and run time running both at the same time. It should work OK since the ballast is in the head. I'm concerned about losing the battery with a leak and was wondering if I could just wrap the battery in epoxy resin fiberglass? This way who cares if it leaks! I don't know if the battery needs to breathe though, comments? I think a thin wrap of fiberglass matt and resin will seal it.
It was too easy to square and flatten the ends of the canister with a DA sander!
The O-ring isn't shown but it is a .210" thick Buna o-ring that has to be streched .1" to fit over the step in the cover, the next size up would have flopped around.
The will be a lot of 3/4" and 1" flat pvc left over and 3" pvc pipe.
If there is interest I'll post followup status and pics.


