


When I first got home from our last dive trip I was disappointed in the photos from my fancy underwater camera setup, which was not all that fancy to be truthful. Having been into photography above the surface for many years I decided to tackle the problem and see what could be recovered from my mediocre underwater shots. These examples are not great photos, but show what can be recovered from photos that came out of the camera looking like rubbish.
In each case the camera used was a Panasonic TZ1 w/ Panasonic UW housing, no external strobe. Post processing time for each photo was limited to two minutes to ensure that this is not a "how good can you make this photo" tutorial. These are basic steps to recover something usable from the initial jpeg.
Case #1 & #2
1. Adjust levels in CS2. Use "Auto" first and see how it does. In cases where it didn't come close or introduced too much "red scatter" use the gray picker and start picking pixels until you find a white balance that works without blowing out the photo too much.
2. Color Balance. This couldn't be easier. Adjust the sliders individually to achieve a color balance that reflects what you saw. I push the midtones a little to the red and magenta and blue (to wash out some of the green). Shadows towards cyan and magenta. Highlights towards cyan, green, and blue. To each his/her own.
3. Shadows / highlight. A quick 5% for each works for me. Adjust as needed.
4. Auto Contrast - Seldom makes any noticeable change. Try it, if you like it keep it, if not CTRL-Z removes it.
5. Unsharp mask. 50% / 1.4 / 0 for these shots. Adjust as necessary.
6 & 7 - Resize for posting and USM again.
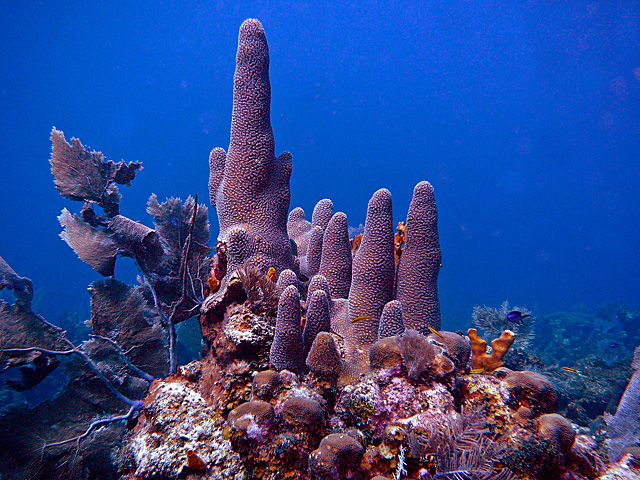
Photo 1 - BEFORE

Photo 1 - AFTER
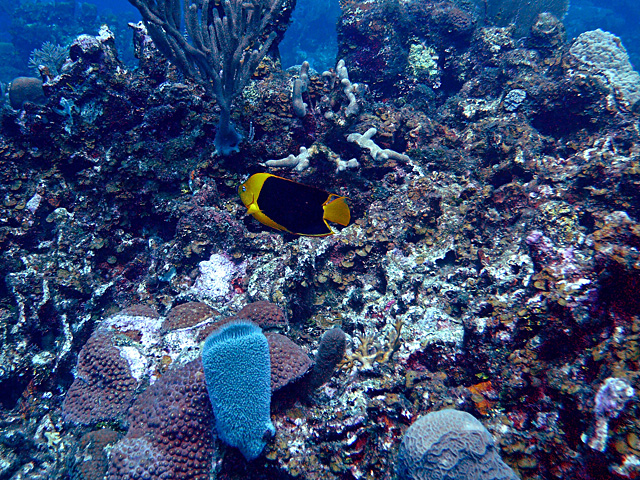
Photo 2 - BEFORE
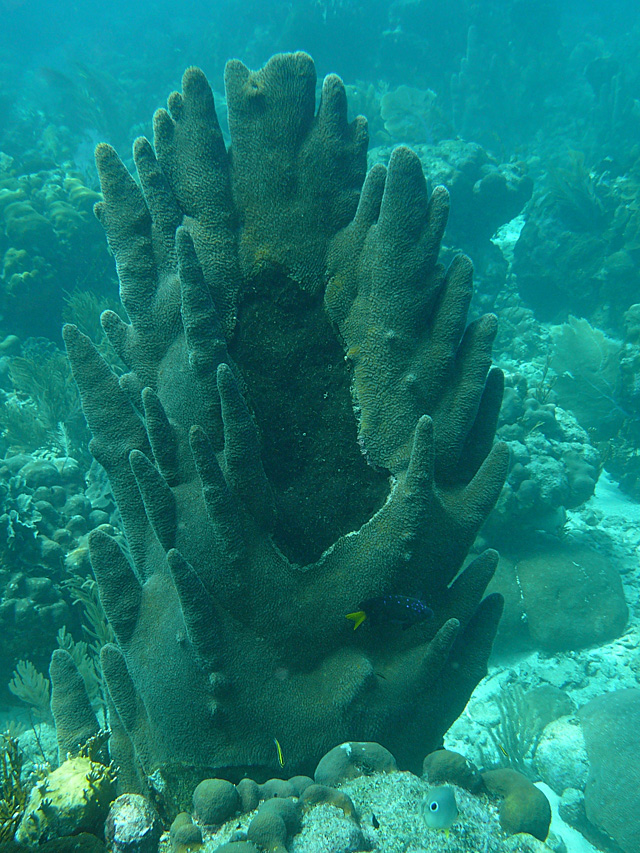
Photo 2 - AFTER
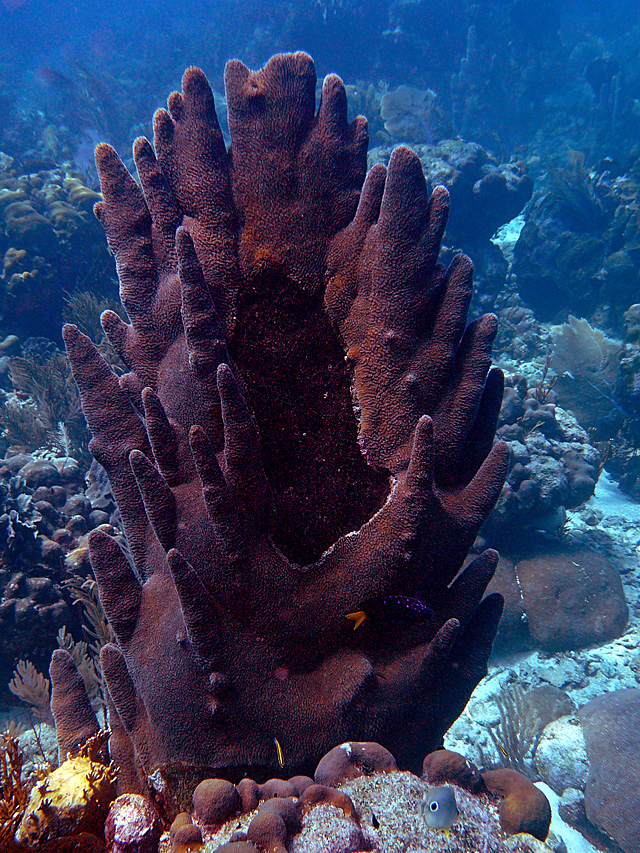
Photo 3-
A very quick use of the clone tool to try and hide some of the back scatter (seen in the open water area).
Photo 3 - BEFORE
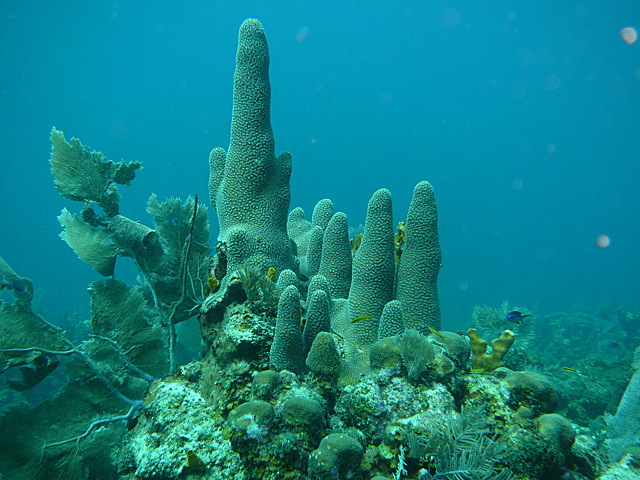
Photo 3 - AFTER
So before you delete your photos that may look green, blue, or without detail - give them a two minute swing in Photoshop or your favorite photo editing program. You may be surprised what you can find.
I know my photos aren't great
In each case the camera used was a Panasonic TZ1 w/ Panasonic UW housing, no external strobe. Post processing time for each photo was limited to two minutes to ensure that this is not a "how good can you make this photo" tutorial. These are basic steps to recover something usable from the initial jpeg.
Case #1 & #2
1. Adjust levels in CS2. Use "Auto" first and see how it does. In cases where it didn't come close or introduced too much "red scatter" use the gray picker and start picking pixels until you find a white balance that works without blowing out the photo too much.
2. Color Balance. This couldn't be easier. Adjust the sliders individually to achieve a color balance that reflects what you saw. I push the midtones a little to the red and magenta and blue (to wash out some of the green). Shadows towards cyan and magenta. Highlights towards cyan, green, and blue. To each his/her own.
3. Shadows / highlight. A quick 5% for each works for me. Adjust as needed.
4. Auto Contrast - Seldom makes any noticeable change. Try it, if you like it keep it, if not CTRL-Z removes it.
5. Unsharp mask. 50% / 1.4 / 0 for these shots. Adjust as necessary.
6 & 7 - Resize for posting and USM again.
Photo 1 - BEFORE
Photo 1 - AFTER
Photo 2 - BEFORE
Photo 2 - AFTER
Photo 3-
A very quick use of the clone tool to try and hide some of the back scatter (seen in the open water area).
Photo 3 - BEFORE
Photo 3 - AFTER
So before you delete your photos that may look green, blue, or without detail - give them a two minute swing in Photoshop or your favorite photo editing program. You may be surprised what you can find.
I know my photos aren't great
")
