Question DIY Thigh Pocket Addition on drysuit - Worth the Warranty Risk?

Please register or login

Welcome to ScubaBoard, the world's largest scuba diving community. Registration is not required to read the forums, but we encourage you to join. Joining has its benefits and enables you to participate in the discussions.

Benefits of registering include

  • Ability to post and comment on topics and discussions.
  • A Free photo gallery to share your dive photos with the world.
  • You can make this box go away

Joining is quick and easy. Log in or Register now!

OP
S

Submarine_MiG

Registered
Messages
22
Reaction score
10
Location
Thailand
# of dives
50 - 99
I've been using my DUI Coronado drysuit for almost a year now, with around 20 dives recorded. I'm considering adding thigh pockets to both thighs myself. The cost of having this done by DUI is significantly higher, at $320 plus shipping for two cargo pockets, compared to doing it myself, which would cost at most $200 for the glue and pockets. The DIY method seems feasible and non-invasive, as it involves just gluing the pockets directly onto the suit without puncturing it.

However, my main concern is about the warranty. Here’s what DUI's warranty policy states:

DUI warrants that your Standard drysuits: Coronado II, Yukon II, Cortez, and CD300-Sport (except for the neck seal, wrist seals, zipper and valves) will each be free from defects in materials and workmanship for a period of (3) years from the date of your original retail purchase of the drysuit, with proof of purchase.

DUI warrants that the zipper, the exhaust valves, the inlet valve and crotch strap for your purchased drysuit will be free from defects in materials and workmanship for a period of one (1) year from the date of your original retail purchase of the drysuit, with proof of purchase.

This warranty does not cover wear and tear from normal use.

This warranty does not cover fading or any other damage resulting from misuse, willful damage, abuse, negligence, neglect, alteration, failure to perform maintenance as instructed, damage caused by contaminants, or unauthorized repair or service of or relating to your purchased drysuit and/or dry suit accessories.


My hesitation is due to the potential difficulty in distinguishing whether any future issues are due to manufacturer defects or general wear and tear, even without any modifications. This makes me question whether the risk of potentially voiding the warranty by adding the pockets myself is worth the significant cost savings.

Has anyone here added pockets to their drysuit on their own? I'm eager to hear your thoughts on the trade-off between potentially voiding the warranty and saving costs through a DIY approach. Any personal experiences or insights would be incredibly helpful!

Thanks in advance!
 
One of the things I've learned from countless DIY projects is it's best to be able to "fail safely." I didn't really follow that advice when attempting to glue pockets onto my wetsuit, and have somewhat "ruined" it. It's functionally fine, just ugly, and the glue on the pocket/wetsuit keeps breaking despite trying various techniques, and glues.

I would first recommend making sure you can successfully glue a pocket to a wetsuit without "ruining" it. If you must, grab a cheap used wetsuit to practice on, perhaps from the classifies here, or from craigslist or Facebook market. Next, get some inexpensive glue on pockets. DiveGearExpress used to have some for $20 per pocket, but I'm not seeing them anymore.

I believe the proper way to glue the pockets, is to clean the wetsuit, stuff the wetsuit leg (as if a leg was in there), and then glue the pocket onto the leg. Though perhaps someone else can provide better instructions, given I personally have failed to get the pockets to securely stick over and over.

There are also pockets which can strap or clip onto or around your harness, wetsuit, or drysuit. They may not be as streamlined, but they would (usually) be far less expensive and permanent.
 
Gluing pockets onto a trilaminate is easier than neoprene because trilaminate does not stretch. Pockets sometimes come off when the suit stretches and the bond doesn't. But this is not such a big issue with trilam.

First step is to put the suit on and rest your hand comfortably on your outer thigh. Have someone mark your hand outline with chalk. This will give you a rough guide of where you want the pocket to go.

Lay the pocket on the suit over the hand outline and outline the pocket with chalk.

Put a board inside the suit under the pocket to support the work area. Using wetsuit cement (contact adhesive) paint three layers of glue inside the chalk outline on the suit and on back of the pocket. Allow about 10 mins between first two layers to let glue dry - allow about 3 minutes after third layer for glue to go tacky but not totally dry. When tacky, position pocket and press firmly onto the suit. Roll it down with a heavy roller if you have one or you can press it down firmly with your thumb.

Stack a bunch of weight on the pocket to keep it pressed down until the glue cures overnight.

Check the edges of the joint in the morning to make sure the pocket is fully connected. If there's any peeling you can reactive the glue with another coat, wait for it to go tacky and clamp it down again. Repeat if it starts to peel in the future.

This method should last for as long as the suit. If you need to reposition or remove the pocket in the future, you can soften the glue with a heat gun. You won't get the glue off if you remove the pocket but you can cover it up with a trilam patch (drysuit repair shop should be able to supply you with a scrap piece).

I would not think that a pocket applied in this way would affect the warranty on the suit itself (such as the seam warranty for example) but check with DUI to make sure.
 
I've glued pockets onto a bunch of wetsuits and a few drysuits.

Figure out where you want them to be, then have someone chalk mark where the pocket is on the one side. After that get a nice working surface, tape off the where you want the pocket to be and then with this glue, lay down a coat on both the suit and the pocket, allow to dry 30 minutes, then do another coat and allow to dry 30 minutes or so, then 3rd coat on both sides allow to dry 5 minutes or so and then stick the 2 pieces together and roll them out. The glue sticks to itself so once you touch the pieces together they're together.

Awesome, I think I'll give that a try on my "ruined" wetsuit. Worst case, it's $25 and an even slightly uglier wetsuit!
 
I've glued pockets onto a bunch of wetsuits and a few drysuits.

Figure out where you want them to be, then have someone chalk mark where the pocket is on the one side. After that get a nice working surface, tape off the where you want the pocket to be and then with this glue, lay down a coat on both the suit and the pocket, allow to dry 30 minutes, then do another coat and allow to dry 30 minutes or so, then 3rd coat on both sides allow to dry 5 minutes or so
All good advice.
The glue sticks to itself so once you touch the pieces together they're together.
Oh, yes!

It's very helpful to put a piece of wax paper between the suit and pocket, to get them positioned correctly, then gradually slide or roll the wax paper out, getting good contact without 'bubbles'.

I recommend using a roller, typically sold for gluing down laminate (Formica) countertops to get a good bond, particularly at the edges.
 
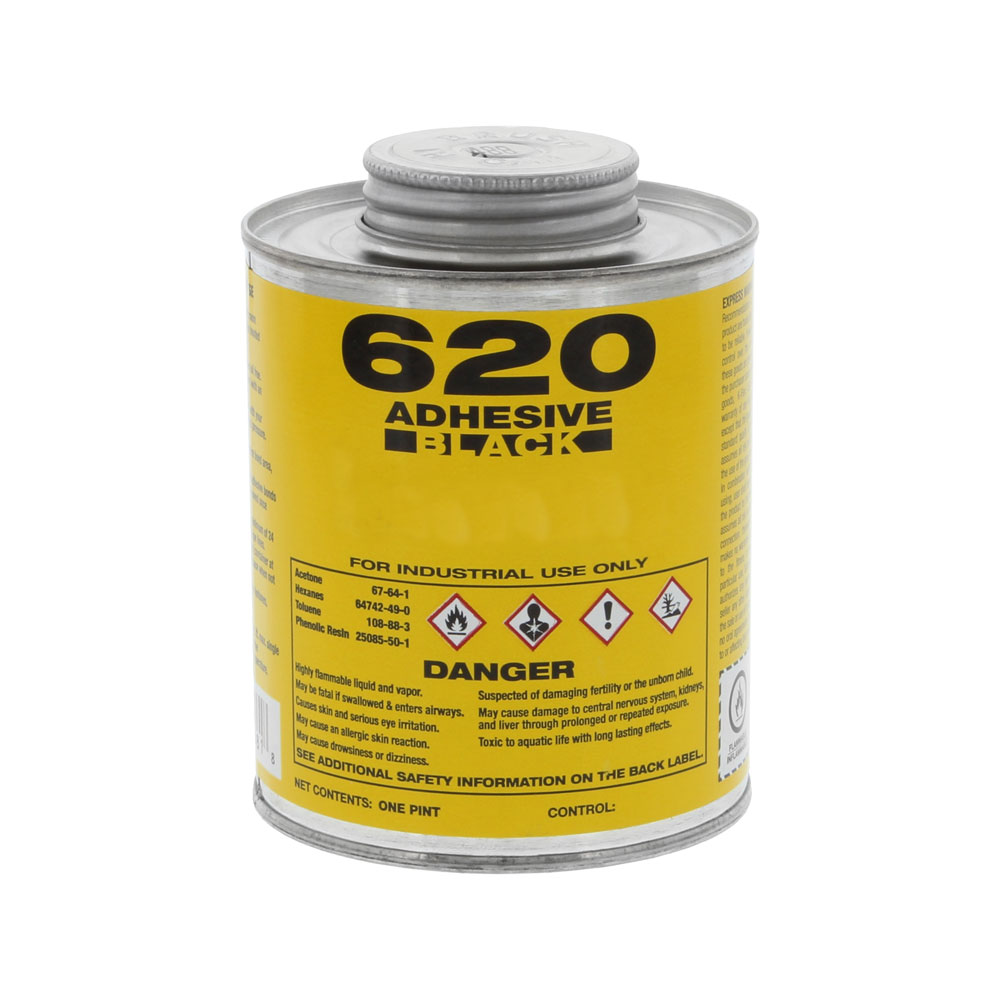
Wow, I'm truly grateful for all the advice and tips you all have shared. It's been incredibly helpful. After reviewing your suggestions and watching this video tutorial, I've decided to use a specific type of glue for my project. However, I'm still undecided between this glue by DGX from @crofrog's recommendation and this glue from the video. Here's my game plan:
  1. Put on my drysuit and have a friend outline the desired pocket area with white chalk.
  2. Place something flat inside the drysuit under the work area to create a flat surface.
  3. (I'm considering this step) Use blue tape to mark the outer area, which will help with any excess glue removal for a cleaner finish.
  4. Apply the first layer of glue to both the drysuit and the pocket, then wait 30 minutes.
  5. Apply a second layer of glue to both surfaces and wait another 30 minutes.
  6. Apply a third coat of glue, then wait for 5 minutes.
  7. Carefully attach the pocket to the drysuit.
    • Use wax paper to align the pocket with the chalk outline.
    • Use a roller to ensure there are no air bubbles.
  8. Place some weights on the pocket to ensure a good bond and wait for 1 hour.
  9. (If I use the blue tape in step 3) Remove the tape and leave everything to cure overnight.
I'd really appreciate any further input, especially regarding the choice of glue. What do you guys think of this approach? Any recommendations or tweaks you would suggest?

The sc4000 and e60 is what I actually use these days. Make sure you have a scale if you’re going to use it and chemical resistant brushes.

The adhesive black works just as well though.


Yes tape everything off. I remove the tape immediately normally but don’t think it’ll really matter. The weights won’t do anything but won’t hurt anything either.
 
Wow, I'm truly grateful for all the advice and tips you all have shared. It's been incredibly helpful. After reviewing your suggestions and watching this video tutorial, I've decided to use a specific type of glue for my project. However, I'm still undecided between this glue by DGX from @crofrog's recommendation and this glue from the video. Here's my game plan:
  1. Put on my drysuit and have a friend outline the desired pocket area with white chalk.
  2. Place something flat inside the drysuit under the work area to create a flat surface.
  3. (I'm considering this step) Use blue tape to mark the outer area, which will help with any excess glue removal for a cleaner finish.
  4. Apply the first layer of glue to both the drysuit and the pocket, then wait 30 minutes.
  5. Apply a second layer of glue to both surfaces and wait another 30 minutes.
  6. Apply a third coat of glue, then wait for 5 minutes.
  7. Carefully attach the pocket to the drysuit.
    • Use wax paper to align the pocket with the chalk outline.
    • Use a roller to ensure there are no air bubbles.
  8. Place some weights on the pocket to ensure a good bond and wait for 1 hour.
  9. (If I use the blue tape in step 3) Remove the tape and leave everything to cure overnight.
I'd really appreciate any further input, especially regarding the choice of glue. What do you guys think of this approach? Any recommendations or tweaks you would suggest?
I'd suggest letting it set to dry with weights overnight before trying anything with it. An hour just seems too little.
I've put pockets on a dozen or so wet suits and half a dozen drysuits using Aquaseal and letting it dry weighted overnight. The suit will rot and fall apart before the pocket will come off or come loose. My oldest one is going on 15 years and still on tight even though the exposed glue is a little yellowed.
Aquaseal requires weights. Contact adhesives do not work the same way.

From the SC4000 product sheet:
SC 4000 Cement is a room temperature curing liquid rubber adhesive that, when catalyzed with the appropriate amount of E-40 Hardener, yields high strength adhesions without the aid of heat, pressure or special equipment.

Aquaseal really isn't a great adhesive. It's a sealant.
 

Back
Top Bottom