DIY Strobe Arm

Please register or login

Welcome to ScubaBoard, the world's largest scuba diving community. Registration is not required to read the forums, but we encourage you to join. Joining has its benefits and enables you to participate in the discussions.

Benefits of registering include

  • Ability to post and comment on topics and discussions.
  • A Free photo gallery to share your dive photos with the world.
  • You can make this box go away

Joining is quick and easy. Log in or Register now!

Tommy2tone_1999

Registered
Messages
38
Reaction score
1
Location
Louisiana
# of dives
100 - 199
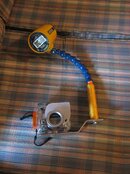
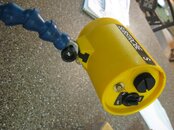
I have an old Hanimex 35mm, and an Ikelite Substrobe S from the 80s. Well after fighting with that dinosaur in the Keys last year, I decided to go digital. I bought a second-hand Canon A570 IS and a matching housing from Canon - They marked down several of their housings really cheap around Memorial Day. I added CHDK to increase the capabilities, but I also wanted to incorporate the old Substrobe S. To do this I would need a flash arm. I like to tinker a bit so I thought I would make one myself based on some of the designs I've found online. Here is what I ended up with.
 

Attachments

  • Step 6 - Assembled wo knobs.jpg
    Step 6 - Assembled wo knobs.jpg
    411.5 KB · Views: 473
Last edited:
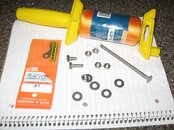
Here are the build pics.

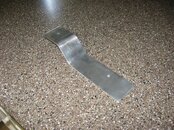
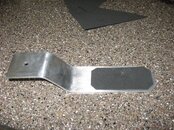
I cut the tray out of a piece of aluminum flat bar. To bend the aluminum more easily, you need to anneal (soften) it buy holding it over a flame (propane torch, gas stove top), and let it cool on its own (no quenching).
The cushion was made from a sheet of Fun Foam purchased at a local crafts store.
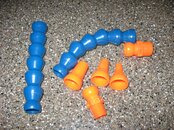
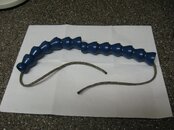
I went to Grainger Industrial supplies and purchased a Loc-Line Hose set fro less than $13
All screws, washers, and nuts are stainless steel.
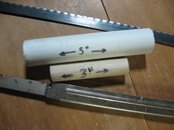
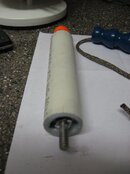
The handle is made from PVC pipe and a wooden dowel.
 

Attachments

  • IMG_0165.jpg
    IMG_0165.jpg
    470 KB · Views: 114
  • IMG_0173.jpg
    IMG_0173.jpg
    460.4 KB · Views: 98
  • IMG_0194.jpg
    IMG_0194.jpg
    468.9 KB · Views: 130
  • IMG_0195.jpg
    IMG_0195.jpg
    405.7 KB · Views: 116
  • IMG_0201.jpg
    IMG_0201.jpg
    396.6 KB · Views: 131
Last edited:
Continued...

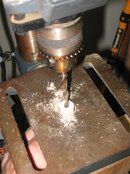
I drilled the center out on my drill press
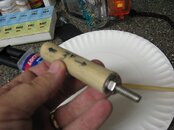
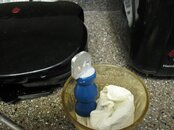
Then I ran the lag screw through the hole and tightened it down with the nut and washers.
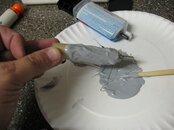
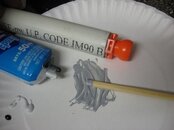
Next I coated the dowel in marine epoxy.
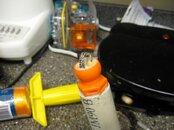
The PVC pipe was a tad too small to screw the Loc-Line ball joint in place, so I reamed it out a tiny bit with my Dremel, coated the thread with epoxy and screwed it down tight.
After this I filled the void space top and bottom with marine epoxy.
 

Attachments

  • IMG_0198.jpg
    IMG_0198.jpg
    416 KB · Views: 100
  • IMG_0215.jpg
    IMG_0215.jpg
    397 KB · Views: 112
  • IMG_0216.jpg
    IMG_0216.jpg
    394.9 KB · Views: 114
  • IMG_0212.jpg
    IMG_0212.jpg
    392.9 KB · Views: 107
  • IMG_0218.jpg
    IMG_0218.jpg
    393.7 KB · Views: 112
Last edited:
Even more...

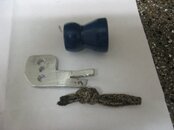
I cut the top piece to attach the strobe from the same flat bar that I cut the tray from and shaped it on my grinder. I also tied a cord loop to secure a cord to in case the hose separated underwater.
I then tied another loop and epoxied it into the ball joint hole.
The top pieces were also epoxied in place.
I then ran a cord through the loc-line hose.
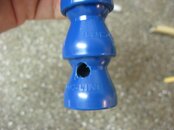
Holes were drilled at the bottom and top of the hose to allow the interal space of the hose to equalize.
I then snapped the hose together, and attached the strobe.
I bought some surveyors colored cord and wrapped the pvc handle with it using continuous half-hitch knots to give it a nautical look. I secured the cord with a little superglue here and there.
The weight of the strobe is a bit heavy, and causes the arm to collapse a little, so I may insert a small length of plastic tubing inside the hose to lend some rigidity.
 

Attachments

  • IMG_0219.jpg
    IMG_0219.jpg
    368.3 KB · Views: 108
  • IMG_0227.jpg
    IMG_0227.jpg
    395 KB · Views: 106
  • IMG_0228.jpg
    IMG_0228.jpg
    399.7 KB · Views: 111
  • IMG_0210.jpg
    IMG_0210.jpg
    403.5 KB · Views: 110
  • IMG_0233.jpg
    IMG_0233.jpg
    392.7 KB · Views: 105
  • IMG_0236.jpg
    IMG_0236.jpg
    400.8 KB · Views: 119
I saw your build pics too. Great work. Nice use of plumbing. Thanks for the advice on the Loc-Line.
 

Back
Top Bottom