As an interesting aside to the poppet modification discussed above, I discovered another wrinkle in D420 tuning.
When I tuned my D420 with the new seat, I was moving quickly and left the pressure on the regulator. I adjusted the lever for the tiniest bit of "tap-tap" space between the diaphragm disc and the lever and then screwed the faceplate on. I had a tiny bit of freeflow and started screwing down the hex fitting on top of the poppet spring. But it took way more than I expected to seal. And I couldn't get 0.5" cracking.
I took the purge lever back off, and to my surprise, I didn't have any "tap-tap" space! WTH? I'd just adjusted it!
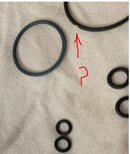
What happens is that when you screw down the faceplate, the white anti-friction ring (#41) that prevents the edge of the diaphragm from rolling has a smaller inner diameter than the faceplate. What that does is puts pressure on the slope of the diaphragm as it rises from the edge, and pulls down on the center disc. That removed the play between diaphragm and lever, and recreated all the instability we struggled with when this reg first came out.
Solution?
First, do your initial adjustment of lever height with pressure off, because the lever drops slightly more when the pressure comes on.
Second, after you put on the faceplate, and before you add the purge lever, make sure there's still a little "tap-tap" space between the diaphragm disc and the lever. Now you can tune with the top hex alone.
As a quick lever adjustment check, the lever should be barely visible sighting across the case rim, with the reg pressurized. That should give you the space you want between lever and diaphragm. That also means your reg will rattle ever so slightly with pressure on. It should rattle less, or not at all, with pressure off.


