Apollo AV1 red light issue

Please register or login

Welcome to ScubaBoard, the world's largest scuba diving community. Registration is not required to read the forums, but we encourage you to join. Joining has its benefits and enables you to participate in the discussions.

Benefits of registering include

  • Ability to post and comment on topics and discussions.
  • A Free photo gallery to share your dive photos with the world.
  • You can make this box go away

Joining is quick and easy. Log in or Register now!

the two screws to the right (90 degrees around) serve as the water sensor, not the posts you are pointing to. If there is any salt between them, it shorts out and turns on the light. Those two screws penetrate the bulkhead and extend down into the sealed cavity. They detect water intrusion on the inside (as well) by way of a piece of nylon belt that connects them. When that belt gets damp, especaily with salt water, then it shorts out, turns the light on and precludes the motor from running.

Once that belt gets damp with salt water, it needs to be removed, carefully washed to remove all dissolved salts, dried and then replaced and you can verify the light is no longer going to turn on. You also obviously need to remove the salt water on the inside.

Pulling the bulkhead involves removal of the wires to the battery, remalal of the 4 screws on each corner of the bulkhead, goggling out all the silicone sealant over the screws and the perimeter of the bulkhead. A steak knife works well. This is tedious and will take a while.

Then the hard part, yanking the bulkhead upward. If the thing has not been disaasembled previously it is a bitch because the caulking/sealant is used down below where you can scrap it. I generally use two vice grips on the vertical walls that hold the battery in place, stand on the bottom of the prop shroud and pull and swear and pray I don't break anything. Work it slowly back and forth. You also want to slowly remove it, you can't yank it up a long distance or it will destroy all the attached electrical stuff below.

You got to be super careful you don't screw up the sealing edge of the bottom half of the scooter when working on it.

But you need to remove the prop assembly as a 2 minute inspection procedure as well. Depending on how flooded the prop assembly is and how much water got inside behind the bulkhead, you can try to fix the actual cause of the problem. All the stuff above is just getting it to turn on, it does not fix your actual leakage problem.
Thanks so much really well explained. I’ll let you know how I get on hopefully it works.
 
are you Interested in the factory breakdown service manual chief
 
Before butchering plastic sealing components consider plastic tools
and limit steak knife use to juicy steaks, and also for dir people only

View attachment 824150

and possibly replace this seal and the two prop orings before even thinking about bulkhead work


What I find quite intriguing about these beauties is the shaft seal unlike a standard seal with a metal cup within
these rely on a rubber seal of similar shape, but is compressed within a brass housing and metal plate for shape

Here's an AV-1 parts schematic

View attachment 824152

It's a POP!


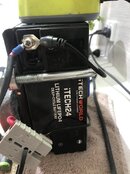
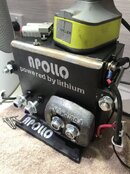
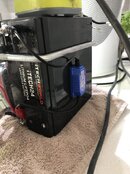
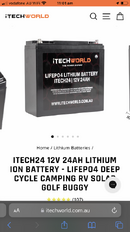
So show us some photos of your battery setup

ImScubaPaul

the two screws to the right (90 degrees around) serve as the water sensor, not the posts you are pointing to. If there is any salt between them, it shorts out and turns on the light. Those two screws penetrate the bulkhead and extend down into the sealed cavity. They detect water intrusion on the inside (as well) by way of a piece of nylon belt that connects them. When that belt gets damp, especaily with salt water, then it shorts out, turns the light on and precludes the motor from running.

Once that belt gets damp with salt water, it needs to be removed, carefully washed to remove all dissolved salts, dried and then replaced and you can verify the light is no longer going to turn on. You also obviously need to remove the salt water on the inside.

Pulling the bulkhead involves removal of the wires to the battery, remalal of the 4 screws on each corner of the bulkhead, goggling out all the silicone sealant over the screws and the perimeter of the bulkhead. A steak knife works well. This is tedious and will take a while.

Then the hard part, yanking the bulkhead upward. If the thing has not been disaasembled previously it is a bitch because the caulking/sealant is used down below where you can scrap it. I generally use two vice grips on the vertical walls that hold the battery in place, stand on the bottom of the prop shroud and pull and swear and pray I don't break anything. Work it slowly back and forth. You also want to slowly remove it, you can't yank it up a long distance or it will destroy all the attached electrical stuff below.

You got to be super careful you don't screw up the sealing edge of the bottom half of the scooter when working on it.

But you need to remove the prop assembly as a 2 minute inspection procedure as well. Depending on how flooded the prop assembly is and how much water got inside behind the bulkhead, you can try to fix the actual cause of the problem. All the stuff above is just getting it to turn on, it does not fix your actual leakage problem.
 

Attachments

  • image.jpg
    image.jpg
    81.7 KB · Views: 68
  • image.jpg
    image.jpg
    109.8 KB · Views: 64
  • image.jpg
    image.jpg
    104.5 KB · Views: 66
  • image.jpg
    image.jpg
    91.8 KB · Views: 66
  • 9D40E0E6-D8D3-46B6-924B-763CE682F537.png
    9D40E0E6-D8D3-46B6-924B-763CE682F537.png
    208.5 KB · Views: 72
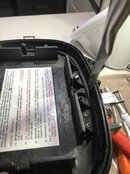
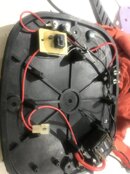
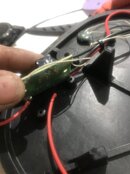
Think I’ve found the problem hopefully it’s a easy fix. It looks like one of the wires was just hanging on to the moisture sensor relay it’s completely come off now I’ve removed the fixing screws.
 
Think I’ve found the problem on the Apollo Av1 it looks like a wire was just hanging on to the moisture sensor relay. I’ve removed the two fixing screws and now it’s completely come off hopefully it’s just a easy fix.
 

Attachments

  • image.jpg
    image.jpg
    78.1 KB · Views: 71
  • image.jpg
    image.jpg
    60.7 KB · Views: 63
Good luck I’m not sure I understand enough of the electronics to provide any confirmation. Good to hear no water got in there. BTW, if you are messing with things, everyone I know has switched from the standard plugs to these. Apparently they are considerably better and not expensive. I didn't shop around to find the best price, just a link to the improved plugs,

 
similar to the Dacor SV900. The problem with running a lithium pack in them is there is almost no voltage drop. then you are overheating the hell out of it and will destroy it in a pretty fast fashion. That SV900 with a 4S Liion was out clocking some Cuda's when I did that but It had maybe 10 minutes at full pitch before it time out from the heat. so make sure you pitch it down a bit on regular dives.

Also as for changing out the wiring. I offer conversion kits to AndersonPP75 connectors, They are included with out usual apollo packs but We offer it on its own aswell. it can be found here. Tusa / Apollo Wiring Harness
 
Hi all quick update everyone reattaching the wire to the moisture board has now turned the red light off but now a new problem has started. The alarm has started going off constantly when the battery terminals are connected and now no longer runs the motor.
 

Back
Top Bottom