fish149
Contributor
Just finished my first DIY light and I'm pretty happy with it. When I started out and was reading about everyone else's project it seemed that almost all of them required some type of machining. Although mills/lathes/presses are ideal and I did use all the above when making my light I realize that there are a lot of people who don't have that luxury and as I went through this I was thinking of ways to accomplish the same thing with a minimum of equipment (like just a drill press and hand tools).
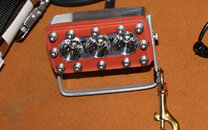
For the light head I copied Deepairmike's design from Cave diver forum 3W (9W) LED I bought a 2 1/2 in. long piece of 2x4 in. aluminum bar locally. Fortunately, I had access to a mill/lathe machine which made machining the head much easier but I think you could accomplish roughly the same thing with a drill press, a 7/8 and a 1 in. drill bit if that's all you had. (plus some filing and sanding)
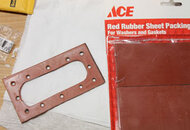
In Mike's design it looked like he machined a groove around the light for an o-ring to set in. I lack the skill needed to make such a cut so I decided to order a 1/8 in thick red rubber sheet off ebay and cut a gasket out of it which seems to have worked out ok.
I also purchased the same three LED lights from Deal Extreme ( 3V~18V Input 3W Cree Drop-in Module (supports Surefire 6P) - Free Shipping - DealExtreme ) that he used.
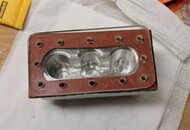
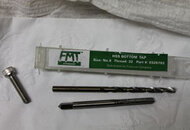
I bought machine screws, bits and hand tap for the light head from Fastenal (fastenal.com)
I bought the cable gland, cable, toggle and toggle boot from Hector at tlslights.com
For the battery canister I was able to make one from PVC. I just glued an end cap to one end but for the end which is removed and replaced to access the battery I took the same type of end cap and then sanded it from the inside so that it would go on and off the pvc pipe (2 in. by the way) easily.
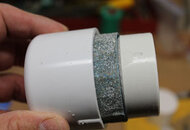
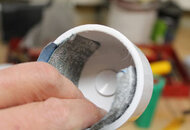
Next I took an end cap with a knockout and punched the center out.
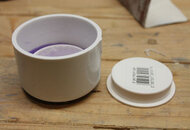
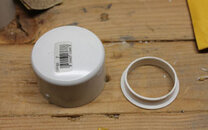
Using PVC glue I glued the knockout into the end cap (oriented how you see in the photo on the left above)
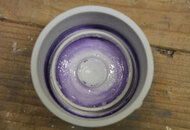
After that was dry I applied some JB weld to the inside (where you see the blue) to ensure that it was completely sealed.
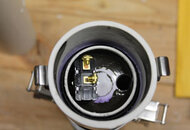
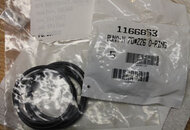
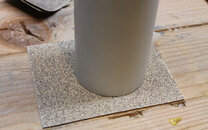
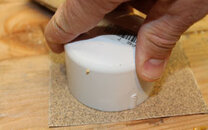
I then drilled holes for the toggle switch and the cable gland to run through and placed an o-ring (size 226) around the knockout and the inside of the end cap. When the end cap is placed on the PVC pipe and latched down the o-ring will be pressed against the end of the pipe and form a seal. To help form good seals I also sanded the end of the PVC pipe and the end cap by placing sandpaper on a flat surface and twisting the pipe or end cap on top (to keep the edge true; so there won't be uneveness or gaps)
I purchased latches from mcmaster-carr and attached them to the main can and lid/end cap with stainless steel #6 screws which I filed down to prevent them from poking though the PVC pipe wall. I also applied JB weld to the threads to help strengthen and seal.
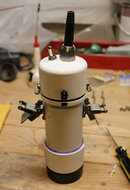
part description/item number:As you can see in the above photo I glued a small pvc ring (cut from another end cap) to the outside of the pipe, just under the bottom of the endcap/lid. I placed another o-ring (#227) in between those two pieces and so now when the end cap is latched on I have two o-rings sealing the container shut.
I purchased the battery (12 volt 4500 MA) and charger from battery space.com
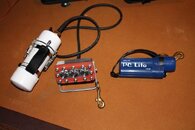
I took the light out in my backyard last night and tried it out. Man, it's super bright. There's a farm up against my back yard and I lit up a barn about 350 feet away with a strong beam. I haven't dove with the light completed yet but am looking forwards to it. I have dove with the individual components though, a couple weeks ago, to test them and their seals. Fortunately, they didn't let any water leak through.

For the light head I copied Deepairmike's design from Cave diver forum 3W (9W) LED I bought a 2 1/2 in. long piece of 2x4 in. aluminum bar locally. Fortunately, I had access to a mill/lathe machine which made machining the head much easier but I think you could accomplish roughly the same thing with a drill press, a 7/8 and a 1 in. drill bit if that's all you had. (plus some filing and sanding)
In Mike's design it looked like he machined a groove around the light for an o-ring to set in. I lack the skill needed to make such a cut so I decided to order a 1/8 in thick red rubber sheet off ebay and cut a gasket out of it which seems to have worked out ok.
I also purchased the same three LED lights from Deal Extreme ( 3V~18V Input 3W Cree Drop-in Module (supports Surefire 6P) - Free Shipping - DealExtreme ) that he used.


I bought machine screws, bits and hand tap for the light head from Fastenal (fastenal.com)

I bought the cable gland, cable, toggle and toggle boot from Hector at tlslights.com
For the battery canister I was able to make one from PVC. I just glued an end cap to one end but for the end which is removed and replaced to access the battery I took the same type of end cap and then sanded it from the inside so that it would go on and off the pvc pipe (2 in. by the way) easily.


Next I took an end cap with a knockout and punched the center out.


Using PVC glue I glued the knockout into the end cap (oriented how you see in the photo on the left above)

After that was dry I applied some JB weld to the inside (where you see the blue) to ensure that it was completely sealed.


I then drilled holes for the toggle switch and the cable gland to run through and placed an o-ring (size 226) around the knockout and the inside of the end cap. When the end cap is placed on the PVC pipe and latched down the o-ring will be pressed against the end of the pipe and form a seal. To help form good seals I also sanded the end of the PVC pipe and the end cap by placing sandpaper on a flat surface and twisting the pipe or end cap on top (to keep the edge true; so there won't be uneveness or gaps)
I purchased latches from mcmaster-carr and attached them to the main can and lid/end cap with stainless steel #6 screws which I filed down to prevent them from poking though the PVC pipe wall. I also applied JB weld to the threads to help strengthen and seal.
part description/item number:As you can see in the above photo I glued a small pvc ring (cut from another end cap) to the outside of the pipe, just under the bottom of the endcap/lid. I placed another o-ring (#227) in between those two pieces and so now when the end cap is latched on I have two o-rings sealing the container shut.
I purchased the battery (12 volt 4500 MA) and charger from battery space.com
I took the light out in my backyard last night and tried it out. Man, it's super bright. There's a farm up against my back yard and I lit up a barn about 350 feet away with a strong beam. I haven't dove with the light completed yet but am looking forwards to it. I have dove with the individual components though, a couple weeks ago, to test them and their seals. Fortunately, they didn't let any water leak through.


